Electric Roller Shutter Stopped Working? Quick Fixes
Your electric roller shutter stopped working, and now you’re standing there with a window or doorway that won’t budge. It’s frustrating, especially when you’re not sure whether the fix is something simple or a sign of a bigger problem. The good news is that many common faults have straightforward causes you can check yourself before calling in a professional.
From dead remote batteries and tripped circuit breakers to jammed guides and motor faults, electric roller shutters can fail for a range of reasons. Some of these you can sort out in minutes. Others need hands-on experience and the right parts to resolve safely. Knowing the difference saves you both time and money, and helps you avoid making the problem worse.
In this guide, we walk you through the most common reasons electric roller shutters stop responding and what to do about each one. Where a fix goes beyond basic troubleshooting, our team at Roller Shutter Repairs Adelaide, with over 20 years of experience servicing shutters across the Adelaide region, is ready to help. We’ll cover practical steps you can take right now, plus clear guidance on when it’s time to call a technician.
Before you start: safety and what you will need
Before you begin working through this guide, take a moment to understand the risks involved. Electric roller shutters run on mains electricity and contain moving mechanical parts, which means a careless approach can lead to injury or cause further damage to the system. This section covers the safety precautions you need to follow and the basic items to have on hand so you can work through each troubleshooting step without interruption.
Safety precautions to follow
Working on an electric roller shutter that has stopped working might seem straightforward, but the risk of electric shock or physical injury is real. Never touch any wiring or electrical components while the shutter is connected to a live power supply. Always switch off the power at the isolation switch or circuit breaker before you get close to any part of the electrical system.
If you are unsure which circuit controls your shutter, switch off the main supply at the switchboard until you can confirm the correct circuit.
Keep your hands clear of the shutter guides, curtain, and any spring mechanism while the system is powered. Even a partially functional motor can activate unexpectedly if the limit settings are off or if someone else in the building triggers the controls. Let anyone nearby know you are working on the shutter before you start.
If your shutter is installed at height, such as above a commercial roller door opening or on an upper storey, only access elevated sections using a stable, rated ladder with someone present to assist. Do not attempt to open motor housings or work on internal wiring unless you hold a valid electrical licence in South Australia. Unlicensed electrical work is illegal under Australian standards and can void your property insurance.
Tools and materials you will need
Having the right items ready before you start saves time and reduces the chance of stopping mid-task to search for something. You do not need specialist equipment for most of the checks in this guide, but a few basics are important to gather first.
Here is what to have on hand before you begin:
- Replacement remote batteries (check your remote’s battery compartment for the correct size, commonly CR2032 or AA)
- A flathead and Phillips head screwdriver for opening battery compartments and access panels
- A non-contact voltage tester to safely confirm whether power is present at a circuit without touching live wires
- A torch or headlamp if your motor unit is located in a dim area such as a ceiling cavity or inside a roller door housing
- Your shutter’s user manual or model number so you can follow reset and re-pairing procedures specific to your system
- A stable step ladder if the motor, manual override, or wall switch is mounted out of comfortable reach
Write down your shutter’s brand and model number before you begin. You will need it for system reset steps later in this guide, and it is essential information if you end up speaking with a technician. This detail is usually printed on a sticker attached to the motor housing or the inside of the control panel cover.
Step 1. Check power supply and isolation switch
When your electric roller shutter stopped working, the power supply is the first place to look. A tripped circuit breaker or a switched-off isolation switch is one of the most common causes of a completely unresponsive shutter, and checking both takes less than two minutes before you move on to anything more involved.
Find and check the isolation switch
Most electric roller shutters have a dedicated isolation switch mounted on the wall near the motor or inside the roller door housing. This switch cuts power to the shutter independently of your other electrical circuits. Check whether it is in the on position. If it has been knocked, bumped, or accidentally switched off, turning it back on may restore full operation immediately. If your shutter has multiple control points, check each one before moving on.
If your isolation switch shows scorch marks, signs of heat damage, or a burning smell, do not turn it back on. Contact a licensed electrician before touching anything further.
Check your switchboard for tripped breakers
Head to your main switchboard and look for any circuit breakers sitting between the fully on and fully off positions, which is the typical sign of a trip. Flip the affected breaker fully to the off position before resetting it to on. Skipping this step and pushing a half-tripped breaker directly to on will not give you a clean reset and may leave the circuit unreliable.
If the breaker trips again straight after you reset it, stop immediately. Do not attempt a third reset. A repeatedly tripping breaker points to a fault in the motor or wiring that needs a licensed electrician or experienced roller shutter technician to assess safely.
Confirm power is reaching the motor unit
Once the isolation switch and circuit breaker are both confirmed on, use your non-contact voltage tester near the motor’s incoming cable or connection point without touching bare wires. A positive reading tells you that power is present at the motor and you can move on to checking the controls. No reading at this point means the fault is still on the supply side of the circuit, and you will need a licensed electrician to trace and repair it.
Step 2. Test remotes, wall switches, and batteries
Once you have confirmed that power is reaching the motor, the next most likely culprit when your electric roller shutter stopped working is a fault with the controls rather than the motor itself. Remote handsets and wall switches are used daily and wear out over time, so ruling them out early is a quick win before you dig deeper into the system.
Check and replace remote batteries
A weak or flat battery is the most common reason a remote stops responding, and it is easy to miss because the remote might still show a faint LED flash even with insufficient charge to send a reliable signal. Open the battery compartment on your remote and look at the battery type printed inside the cover. Replace the existing batteries with fresh ones of the same type and voltage rather than testing with batteries from another device that may already be partially drained.
After fitting new batteries, stand within two metres of the motor unit and test the remote before assuming it is working correctly at longer distances.
Once you fit fresh batteries, press the button firmly and watch for a solid LED indicator. If the light is bright and the shutter still does not respond, the issue is not the battery.
Test the wall switch
Your wall-mounted switch operates on a direct wired connection, so it bypasses any wireless signal issues entirely. Press and hold the open or close button on the wall switch for two to three seconds and observe whether the motor makes any sound or movement. A motor that responds to the wall switch but not the remote tells you the remote itself or its signal is at fault, not the motor or wiring.
If neither the remote nor the wall switch produces any response from the motor, make a note of this before moving to the next step. That combination of symptoms points toward a system-level fault such as a tripped internal fuse or a motor control board issue.
Check for signal interference or range issues
Nearby devices operating on the 433 MHz frequency, such as wireless alarms, garage door openers, or some home automation equipment, can block or interfere with your shutter remote’s signal. Try operating the shutter from directly in front of the motor unit to eliminate distance and interference as a factor. If the shutter responds only when you are very close, the remote receiver inside the motor may need replacing rather than the remote itself.
Step 3. Reset the shutter system and re-pair controls
If power is confirmed and your controls are functioning but your electric roller shutter stopped working, a system reset is worth attempting before assuming the motor itself has failed. Most modern roller shutter motors store operational settings such as travel limits and paired remote codes in onboard memory, and those settings can become corrupted after a power surge, a brownout, or an extended mains interruption.
Always record your shutter’s brand and model number before starting a reset, as the procedure varies between brands and you may need to refer to the manual mid-process.
Perform a factory reset on the motor unit
The reset procedure differs between brands, but the general process follows a similar pattern across most Australian-market roller shutter motors. Locate the programming button on your motor housing, which is usually a small recessed button labelled “P,” “SET,” or “PROG.” With the shutter powered on, press and hold this button until the shutter jogs up and down once, which confirms the unit has cleared its stored settings and returned to factory defaults.
Some motors require you to hold the button for a specific number of seconds, typically between five and ten, while others use a sequence of short and long presses. Check the table below as a starting reference for common brands, then confirm the exact steps against your unit’s manual:
| Brand | Reset action | Confirmation signal |
|---|---|---|
| Somfy | Hold PROG button 5 seconds | Shutter jogs once |
| Aprimatic | Hold SET button 8 seconds | Motor beeps twice |
| Automatic Technology | Hold P button 10 seconds | Shutter jogs up and down |
| Generic / unbranded | Hold PROG 5-10 seconds | LED flashes three times |
Re-pair your remote controls
Once the reset is complete, you need to re-pair each remote handset to the motor. Stand within two metres of the motor unit and press the programming button once to put it into pairing mode. Then press and hold the open or close button on your remote until the shutter jogs, which confirms the new pairing is saved.
Repeat this process for each remote you use, including any wall-mounted wireless keypads, and test each one individually before moving on to the next step.
Step 4. Clear jams and fix common mechanical issues
Even if power is confirmed and your controls work correctly, a physical blockage or mechanical fault can stop your electric roller shutter stopped working situation from resolving itself. Mechanical jams are one of the more common causes of a shutter that hums or clicks when activated but fails to move, and most can be identified with a careful visual inspection before any tools are needed.
Identify and remove obstructions in the guide tracks
Dirt, debris, and small objects lodged in the guide tracks are a frequent cause of a shutter that refuses to travel its full path or stops part way through operation. Run your fingers along both vertical guide channels from top to bottom and look for built-up grit, leaves, insect nests, or foreign objects that have worked their way into the track. Use a dry cloth or a stiff-bristled brush to clear loose debris, then wipe the inside of each guide with a clean rag.
Never use water or solvent-based cleaners inside the guide tracks, as these can cause corrosion on metal components and degrade rubber seals.
Once the tracks are clear, apply a silicone-based lubricant to both guide channels. Avoid using WD-40 or oil-based sprays on roller shutter tracks, as these attract more dirt over time and can cause the curtain to stick. Silicone spray leaves a dry, low-residue coating that keeps the curtain moving smoothly without drawing in grime.
Check for damaged slats or a de-railed curtain
A bent, cracked, or warped slat can prevent the curtain from rolling evenly and will cause the shutter to jam at the same point every time it operates. Stand back and look across the face of the curtain for any slats sitting out of alignment with the rest. A single damaged slat is often enough to cause the whole curtain to bind inside the guides.
If the curtain has jumped out of one of the guide tracks, you may be able to reseat it by hand if the shutter is in the down position and the motor is isolated. Work from the bottom of the curtain upward, guiding each slat back into the channel. Do not force the curtain if it resists, as this risks bending additional slats or damaging the guide itself.
| Symptom | Likely mechanical cause | First action |
|---|---|---|
| Shutter hums but does not move | Obstruction or jammed slat | Inspect guide tracks and curtain |
| Shutter stops at the same point | Damaged slat or debris at that point | Check curtain face at stop point |
| Curtain moves unevenly or wobbles | De-railed slat in one guide | Re-seat curtain from bottom up |
| Loud scraping noise during travel | Dry or corroded guide tracks | Clean and apply silicone lubricant |
Step 5. Check the motor, limits, and manual override
If your electric roller shutter stopped working and none of the previous steps have resolved the fault, the problem may lie with the motor itself or its travel limit settings. Before assuming the motor has failed completely, there are a few checks you can carry out to distinguish between a motor that has stopped working and one that is simply set incorrectly or engaged in manual override mode if it has one.
Listen and look for signs of motor fault
Stand close to the motor unit and activate the shutter from your wall switch. A motor that hums or buzzes but produces no movement usually indicates a mechanical jam preventing travel rather than a dead motor. A motor that makes no sound at all, produces a single click, or triggers your switchboard breaker to trip suggests an electrical fault inside the motor itself, such as a failed capacitor or burned winding.
If the motor is hot to the touch after a brief activation attempt, switch off power immediately and do not run it again until it has cooled and been inspected by a technician.
Use the table below to match what you observe to the likely cause:
| Observation | Likely cause |
|---|---|
| Hums but does not move | Mechanical jam or seized drive |
| No sound, no movement | Failed capacitor or blown internal fuse |
| Trips breaker immediately | Short circuit in motor wiring |
| Runs briefly then stops | Thermal overload protection activated |
Check and reset the travel limits
Travel limits tell the motor where to stop at the fully open and fully closed positions. If these settings have drifted or been cleared during a power event, the motor may refuse to travel in one or both directions. To check limits, activate the shutter and watch whether it moves at all or stops almost immediately after starting.
Most motors allow you to adjust limits using the programming button on the motor housing combined with short presses of your remote. Hold the shutter at the desired stop point and confirm the limit using the procedure in your manual. Incorrectly set limits cause the motor to stall repeatedly, which leads to premature wear on the motor’s internal components over time.
Use the manual override
Some motor units include a manual override cord or hex key slot that lets you move the shutter by hand when the motor cannot operate. Locate the override point on the motor housing, usually marked with a pull cord or a small socket near the end cap, then disengage the motor drive carefully and move the shutter by hand to check whether the curtain travels freely through its full range.
If the curtain moves smoothly under manual operation, the mechanical path is clear and the fault sits inside the motor or its controls rather than in the guides or curtain. If the curtain resists or binds during manual travel, revisit Step 4 before moving on, as a physical obstruction is still present.
Step 6. Know when to stop DIY and call a technician
Troubleshooting is useful, but there is a clear point at which continuing on your own creates more risk than it solves. If your electric roller shutter stopped working and none of the previous steps have identified or resolved the fault, the problem is likely beyond basic maintenance. Recognising the boundary between DIY troubleshooting and professional repair protects both you and your equipment, and in some cases it is a legal requirement under Australian electrical safety standards.
Faults that need a licensed electrician
Any fault that involves internal wiring, motor terminals, or the mains supply circuit must be handled by a licensed electrician in South Australia. Attempting to open motor housings and probe wiring without a licence is illegal under the Electricity (General) Regulations 2012 and can void your home or business insurance if a claim arises from unlicensed work.
If you have already experienced repeated breaker trips, a burning smell from the motor housing, or visible scorch marks anywhere on the unit, switch off power at the switchboard and do not attempt to reset or operate the shutter again until a qualified professional has inspected it.
Stop DIY troubleshooting and contact a licensed electrician or experienced roller shutter technician if you observe any of the following:
- The circuit breaker trips every time you attempt to run the shutter
- The motor housing is warm or hot after a brief activation attempt
- You can see or smell burned plastic, insulation, or wiring near the motor
- The wall switch or wiring shows signs of arcing, discolouration, or heat damage
- The motor produces a loud bang or pop when activated
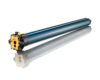
When the motor needs professional assessment
A motor that fails to respond after a confirmed power supply, a full system reset, and clear mechanical guides has likely developed an internal fault. Common causes include a failed run capacitor, burned motor windings, or a damaged control board, and none of these are serviceable without specialist tools and replacement parts.
Continuing to run a faulty motor risks burning out additional components, turning a straightforward motor replacement into a more expensive repair. At Roller Shutter Repairs Adelaide, our technicians carry the parts needed to assess and repair most motor faults on the same visit, across all Adelaide suburbs and surrounding regions.
Final checks
If your electric roller shutter stopped working, working through this guide in order gives you the best chance of identifying the fault quickly. Start with power supply and controls before moving to mechanical checks, and keep notes on what you tested and what you observed at each step. Those notes are valuable if a technician needs to pick up where you left off.
Once your shutter is running again, test it through five complete open and close cycles to confirm it travels smoothly without hesitation, unusual noise, or unexpected stops. Check that both your remote and wall switch operate reliably, and apply silicone lubricant to the guide tracks if you have not done so recently.
If the fault remains unresolved after completing all steps, do not keep running the shutter and risk further damage. Contact the team at Roller Shutter Repairs Adelaide for a fast, experienced assessment across all Adelaide suburbs.