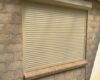
Convert Manual Roller Shutter to Electric: Costs & DIY Tips
Winding manual roller shutters up and down wears you out. Your shoulder aches after the third window. Some nights you skip closing them because cranking handles feels like too much work. The convenience that drew you to shutters becomes a daily chore when you’re managing multiple windows.
Converting your existing shutters to electric solves this permanently. You upgrade what you already have rather than replacing everything from scratch. Most manual shutters built in the last 20 years accept a motor with the right adapter and mounting bracket. The conversion takes a few hours if you’re handy with basic tools.
This guide walks through the complete process. You’ll learn what to check before starting, how to choose between mains and battery power, what parts and kits you need, and the installation steps. We cover typical costs, testing procedures, maintenance, and fixes for common issues.
What to know before you convert
Your first task is checking whether your shutters can physically accept a motor. Most domestic shutters built since 2000 work with tubular motors, but you need to verify three measurements before buying parts. Measure the axle diameter (typically 40mm or 60mm), the headbox depth (minimum 150mm for standard motors), and the curtain width. Shutters wider than 2.4 metres or with damaged slats may need professional assessment.
Check your shutter compatibility
Pull off the end cap and inspect the axle shape. Octagonal and round axles both accept motors, though each needs a specific adapter wheel. Spin the axle by hand to confirm it rotates freely without binding or wobbling. The curtain weight matters too: shutters over 4 square metres require higher-torque motors (20Nm or greater) to lift smoothly. Check that your headbox isn’t crammed with excess curtain material, as the motor needs clearance to slide into position.
Most manual shutters accept a conversion, but checking axle type and box clearance first prevents wasted time and returns.
When to call a professional
You can install the motor yourself if you’re comfortable drilling pilot holes and following wiring diagrams. Electrical work requires a licensed sparkie under Australian Standards AS/NZS 3000, so plan to hire one for mains connections even if you fit the mechanical parts. High windows, damaged components, or shutters lacking standard fittings usually justify calling a full-service installer who handles everything from motor choice to final certification.
Step 1. Choose power and controls
Your power source decision shapes everything else about the conversion. Mains-powered motors deliver unlimited cycles and suit windows you use daily, while battery systems eliminate electrician costs and work during blackouts. The right choice depends on how often you’ll operate the shutter, whether you have accessible power points nearby, and your budget for installation labour.
240V mains-powered motors
These motors plug into your home’s electrical circuit and provide consistent torque without recharging. You’ll need a licensed electrician to run cable through the wall cavity and connect it to a protected spur or dedicated switch. Installation typically costs $150 to $250 per window for the electrical work alone, but you never worry about flat batteries or reduced performance over time.
Most 240V motors fit 40mm or 60mm octagonal axles and produce between 10Nm and 40Nm of lifting force. Choose 10Nm for shutters under 900mm wide, 20Nm for standard windows up to 1800mm, and 40Nm for large patio doors or commercial-grade curtains. The motor slides inside the existing axle tube once you remove the manual winder mechanism.
Battery and solar options
Battery motors let you convert manual roller shutter to electric without hiring an electrician. Rechargeable lithium packs power 30 to 40 full open/close cycles per charge, which covers most households for three to six months between top-ups. You charge the controller with a standard USB-C or barrel plug adapter, exactly like charging a mobile phone.
Solar panel kits extend battery life indefinitely in sunny locations. Mount a small 5W panel on the headbox or nearby fascia, angle it north at 30 degrees, and the battery maintains itself. Battery motors cost $190 to $350 depending on torque rating, and you avoid all electrical compliance work.
Battery systems suit high windows, rental properties, or anywhere running mains cable would cost more than the motor itself.
Control options and automation
Standard conversions include a wall-mounted switch that opens, stops, and closes the shutter with three buttons. Upgrade to radio-frequency remotes (from $50) to control multiple windows from one handset, or choose Wi-Fi and Zigbee bridges ($80 to $120) that integrate with Google Home, Amazon Alexa, or Apple HomeKit. Smart controllers also add scheduling, sun sensors, and wind detection for fully automated operation throughout the day.
Step 2. Budget, kits and tools
You need to gather everything before you start pulling shutters apart. Complete conversion kits start at $377 for battery systems and $450 for mains-powered setups, while individual components let you mix brands or handle unusual axle sizes. Most suppliers ship nationwide within three business days, so order parts a week ahead to avoid project delays. Budget an extra $150 to $250 per window if you’re hiring an electrician for mains installations.
Conversion kit pricing
All-in-one kits include the motor, axle adapter, mounting bracket, controller, and fixings in one package. Battery kits for shutters up to 4 square metres cost $377 to $428 delivered, which covers the L10 motor ($145), E-Port controller ($159), wall plate ($9.50), charger ($14), axle insert and bearing ($10.50 to $16.50), and drive wheel ($14). Mains-powered equivalents range from $450 to $650 depending on torque rating and whether you add remote controls or smart-home bridges.
Buying components separately makes sense when you already own remotes or need specialty adapters for oversized axles. Motors alone cost $145 to $350, controllers run $50 to $160, and drive wheels for non-standard profiles add $20 to $35. Factor in electrician labour ($150 to $250), installation help if you’re not comfortable on ladders ($100 to $200), and any headbox modifications needed for tight clearances.
Most homeowners spend $550 to $900 per window for a complete professional conversion, or $400 to $650 doing it themselves with electrician help for mains wiring.
Tools and safety gear
You’ll need basic hand tools and safety equipment to convert manual roller shutter to electric. Cordless drill with 3mm and 5mm bits handles pilot holes and bracket mounting, while a socket set or nut driver removes side plates and tightens axle screws. Keep insulated screwdrivers, a multimeter, and a non-contact voltage tester on hand if you’re doing any electrical checks before the sparkie arrives.
Safety glasses and cut-resistant gloves protect against sharp slat edges when you’re working inside the headbox. Use a stable stepladder or platform rather than balancing on window sills, and clamp the bottom bar before releasing the manual winder to prevent the curtain dropping unexpectedly. Battery-powered systems require no additional electrical PPE, but mains installations need your electrician to bring RCD testers and lock-out tags for existing circuits.
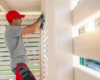
Step 3. Overview of the DIY install
The mechanical work takes two to four hours once you have all the parts laid out. You remove the old manual winder, slide the motor into the hollow axle, secure it with brackets, then wire the controller (or plug in the battery pack). The curtain stays in place throughout the process, though you’ll need to clamp or wedge the bottom bar to prevent it dropping when you release the tension spring.
Remove the manual winder
Wind your shutter fully down and secure the bottom bar with spring clamps or timber wedges in each guide channel. Cut the winder strap or tape near the winch box using side cutters, then remove the faceplate screws and backing screws that hold the winch to the wall. Pull the entire winder assembly clear and extract the plastic gear wheel or tape drum from the axle end. Clean any debris from inside the axle tube so the motor drive wheel seats properly without binding.
Install motor and brackets
Fix the motor bracket to the inside of the side frame using 10g stainless self-tapping screws, positioning it 20mm below the axle centreline. Slide the drive wheel onto the motor shaft, matching the wheel profile (40mm round or 60mm octagonal) to your axle shape. Feed the motor into the hollow axle until the drive wheel engages, then rotate gently until the motor head sits level and the cable exits naturally without twisting.
Most installation problems stem from misaligned drive wheels, so take time to confirm the motor head arrow points straight down before securing brackets.
Connect and align
Replace the end caps and spring clips, then run a test cycle using the manual override button on the motor. The curtain should roll smoothly without catching or tilting. Battery systems need only the controller plugged into the motor socket, while mains installations require your electrician to wire the three-core flex into a protected circuit. Set the upper and lower limit stops so the curtain halts 10mm before hitting the headbox or sill.
Step 4. Testing, maintenance and fixes
Your motor is installed, but you’re not finished until you’ve confirmed everything works safely and smoothly. Testing catches limit-setting errors and mechanical binding before they damage the motor or curtain. Once you verify proper operation, a simple maintenance routine keeps your converted shutter running quietly for years. Most issues after conversion stem from incorrect limits or dirt in the guide channels, both of which you can fix in minutes.
Run functional tests
Press the up button and watch the curtain roll completely into the headbox without jamming or tilting. The motor should stop automatically 10mm before the slats crush against the pelmet. Test the down cycle next, confirming the bottom bar halts cleanly before hitting the sill. Place a rolled towel or similar obstruction in one guide channel, then run the shutter down. The motor must detect resistance and reverse immediately to prevent crushing. If it doesn’t stop, increase the sensitivity setting via the motor’s adjustment screw or the controller app.
Maintenance schedule
Clean the slats and guide channels every six months using soapy water and a soft cloth. Spray silicone lubricant into each guide track to prevent friction that overworks the motor. Check all mounting screws remain tight, especially after the first month of use. Battery systems need a full recharge annually even if you rarely use the shutter, as lithium cells degrade when left flat.
Common faults and fixes
Motor hums without moving: the drive wheel has slipped off the axle. Loosen the retaining screw, reseat the wheel, and retighten. Shutter stops mid-travel: debris blocks the guides or your limits need reprogramming. Remote range drops: replace the coin cell in the handset or relocate the receiver away from metal foil insulation.
Most faults after you convert manual roller shutter to electric trace back to limits set too tight or guide channels needing a clean.
Ready to upgrade your shutters
Converting manual roller shutters to electric removes the daily shoulder strain and gives you push-button control from anywhere in the room. You’ve learned what to check before starting, how to choose between battery and mains power, what parts and kits you need, and the installation steps that turn cranking into tapping. Most homeowners complete the mechanical work in an afternoon, with electricians handling the mains wiring in under two hours.
Your next decision is whether to tackle the job yourself or hand it to professionals who convert manual roller shutter to electric every week. Battery systems suit confident DIYers because they avoid compliance work, while mains installations typically need both mechanical skill and a licensed sparkie. Either way, you keep your existing shutters and gain modern convenience without the cost of complete replacement.
Need help with your conversion or want professional installation? Contact Roller Shutter Repairs Adelaide for expert advice, quality motors, and fast service across all Adelaide suburbs.