Is your roller door playing up? Learn how to fix roller door issues with our DIY guide. Troubleshoot common problems, from cleaning to sensor faults & knowing when to call a pro.
Remote not responding after a battery swap? Moved in and only some shutters work? Or maybe the curtain runs the wrong way and stops in the wrong spot. Programming roller shutter remotes can be fiddly because every brand handles “learning” and limits a bit differently, and one sloppy step can accidentally wipe other shutters or jam a motor.
The good news: there’s a safe, repeatable way to get it right first time. This guide walks you through a clear workflow—identify your gear, prepare tools, isolate power to a single shutter, enter programming mode, pair the remote, check direction, set accurate limits and test. We’ll also show you how to clone extra remotes, create group channels, and reset cleanly when things go off-script—all with safety front and centre.
Below you’ll find step‑by‑step instructions, quick troubleshooting, and brand‑specific sequences for Somfy, Ozroll/E‑Port RF, Alpha and Neco so you don’t have to guess timings. We finish with safety and compliance tips and when it’s smarter to call a local technician in Adelaide. Let’s get your shutters running smoothly—and keep them that way.
Step 1. Identify your remote, motor and control system
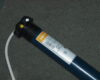
Before you program a roller shutter remote, match the handset, receiver and motor. Most failures come from incompatible gear. Flip the remote or slide off the battery cover to find the silver sticker; check the decal near the motor lead. Record brand, model and frequency so you follow the right sequence later.
- Common brands: Somfy RTS, Neco, Alpha RF, Ozroll E‑Port RF.
- Ensure radio and coding match: 433/868 MHz and fixed‑code vs rolling‑code.
- Note handset type and receiver location: single or multi‑channel, motor‑head PROG or wall‑box LEARN.
Step 2. Prepare your tools, batteries and isolate power to a single shutter
Get your kit together and make the area safe. Keep things brisk—many motors exit programming if left inactive for about two minutes—and ensure power is connected to one shutter only.
- Fresh batteries (CR2430/CR2032) and a paper clip or small screwdriver for PROG.
- Torch/ladder; phone with the manual.
- Isolate power: unplug/turn off all other shutters; confirm only the target is live.
Step 3. Enter programming mode on the motor or receiver
With only the target shutter powered, put its receiver or motor into learn mode. Locate a small PROG/SET/LEARN button on the motor head (near the power lead, often behind a rubber bung) or a recessed pinhole on the wall controller. A brief jog, beep or LED change confirms programming mode.
- Somfy RTS: press PROG once — shutter jogs.
- Neco controller: tap LEARN briefly — LED goes solid red.
- Alpha tubular RF: hold SET for 2 seconds — single beep.
You now have about 60 seconds for Step 4.
Step 4. Pair the first remote to the shutter
With the receiver in learn mode, send the teach signal from your handset within about 10 seconds. Keep the remote roughly 30 cm from the receiver (too close can swamp the RF front end). Then follow the exact button sequence for your brand:
- Somfy RTS: press the remote’s recessed PROG until the curtain jogs.
- Alpha RF: hold UP + DOWN for 2 s, then tap STOP once.
- Ozroll E‑Port RF: press UP > STOP > DOWN in quick succession.
A jog/beep or steady LED confirms pairing. No reaction? Exit and re‑enter learn mode and retry with fresh batteries.
Step 5. Check direction and reverse if needed
Before you set limits, test direction while you program a roller shutter remote: hold Up or Down and ensure the curtain moves the same way. If it runs backwards, reverse now to prevent limit errors. Most systems: hold Stop until the shutter jogs (up to 5 s). Brand cues: Somfy—hold MY 5 s; Neco—tap Up five times; Alpha—use the DIR toggle.
Step 6. Set accurate upper and lower travel limits
Accurate limits protect the motor, stop rattles and ensure a tight seal. Enter limit-adjustment mode first; on many systems you hold Up + Down for about 5 seconds until the shutter gives a short jog. Work slowly and keep the shutter moving—if it sits idle for roughly two minutes, most motors exit programming. Only the shutter you’re setting should be powered.
- Set the upper limit: Run up and stop just before the head box; don’t let the bottom bar hit the V‑stoppers. Save: many units accept a long press on Stop until a jog; others require Stop + Down held until movement.
- Set the lower limit: Bring the curtain down to the correct sill position (per your box/slat locking setup). Save with Stop until a jog, or Stop + Up held until movement.
- If it misbehaves: Power the motor off for 2 seconds, back on, then re‑enter programming and repeat.
Step 7. Save, exit programming mode and test full cycles
Save the limits, exit programming mode and test. Hold Stop until the shutter jogs to confirm limits. Then press and hold the programming button on the back of the remote/transmitter until it jogs again—this puts it into user mode. Now a brief Up/Down press should run automatically. Run two full open/close cycles and verify smooth travel and exact stop points.
Step 8. Add extra remotes (cloning) and assign channels
Once the first handset works, you can clone extra remotes without touching the motor head. On multi‑channel handsets, select a free channel before pairing so you don’t overwrite another shutter and you keep rooms organised.
- Clone from a working remote: Press its recessed PROGRAM/PROG with a paperclip until the shutter jogs (Somfy ≈3 s; Neco press LEARN twice; many remotes: hold PROGRAM until a jog).
- Teach the new remote: Within 10 seconds, press/hold the new remote’s PROGRAM until the curtain jogs. That handset is now added.
- Assign channels: On multi‑channel remotes, pick the desired channel (CH+/wheel) before teaching, then note the location and channel for later.
Step 9. Create an ‘all shutters’ group channel
For whole‑home control, create an “All” group on your multi‑channel handset. Select an unused channel (or the dedicated ALL/5 channel on some remotes) and teach each shutter to it one at a time with only that shutter powered. Example: on some four‑channel remotes, select channel 1, hold the rear PROGRAM about 5 s (jog), cycle the channel button until all lights are lit, then tap PROGRAM for 0.5 s; repeat for remaining channels so the ALL/5 channel moves every shutter together.
Step 10. Adjust limits later in user mode
Need to tweak later? Adjust limits in user mode—no reprogramming required. Move steadily; most motors time out after about two minutes of inactivity, so keep the curtain moving and your button presses deliberate.
- Lower: Press Down to the lower stop; hold Up + Down until a jog; fine‑tune with Up/Down; hold Stop until a jog to save.
- Upper: Press Up to the upper stop; hold Up + Down until a jog; adjust; hold Stop until a jog to confirm.
Step 11. Reset or clear codes (soft reset and factory reset)
If pairing keeps failing or you’ve inherited mystery remotes, a reset gives you a clean slate. Use a soft reset to clear a single channel/handset, or a factory reset to erase every stored remote—then re‑pair from Step 3. Watch for a jog/beep/LED to confirm success.
- Somfy RTS: hold the recessed PROG for ~7 s until two jogs.
- Neco: hold LEARN ~15 s; LED flashes rapidly, then turns off.
- Ozroll E‑Port RF: remove battery, reinsert, hold UP + STOP ~5 s until a single jog.
- Power‑cycle clear (many RF systems): power off 2 s, on 10 s, off 2 s, on; then hold the remote’s PROGRAM ~10 s until the shutter moves and stops.
After any reset, re‑add remotes and set limits again.
Step 12. Label channels and document settings for future changes
After you program a roller shutter remote, future you will thank present you. Label channels on the handset (CH1 Bedroom, CH2 Living, CH5 ALL) and tape a note inside the controller or pelmet. Keep a phone note with channel assignments, reset steps and final upper/lower limit notes. Photograph the motor/receiver stickers and store them with the log.
Step 13. Troubleshooting common programming issues
If pairing fails or limits won’t save, it’s usually power, timing or radio—not a dead motor. Keep only one shutter powered, watch the two‑minute timeout, and confirm every jog/beep/LED. Try these quick fixes before you wipe memory or assume the motor has failed.
- Remote LED lit, no move: re‑pair; check isolator/breaker/cables.
- Short bursts: step mode/thermal trip; hold STOP/MY 5 s; cool.
- Won’t enter learn: power off 30 s; verify 230 V; factory reset.
- Pairing flaky: fresh battery; 30 cm distance; reduce Wi‑Fi/metal; act fast.
- Direction reversed: hold Stop to jog (Somfy MY 5 s; Neco five Ups).
- Limits won’t store/jams: set upper before V‑stoppers; power‑cycle 2 s, retry.
Grinding, overload faults or a shutter skewed in guides—call a technician.
Step 14. Brand-specific quick-start sequences (Somfy, Ozroll/E-Port RF, Alpha, Neco)
Use these quick-starts to program a roller shutter remote without guesswork. Keep only the target shutter powered, act within the learn window, and look for a jog/beep or LED change to confirm each step.
- Somfy RTS: Head PROG once (jog); remote recessed PROG to pair (jog); reverse: hold MY 5 s; limits: hold UP + DOWN 5 s, save with STOP/MY; reset: hold PROG 7 s (two jogs).
- Ozroll E‑Port RF: With receiver in learn, press UP > STOP > DOWN quickly; adjust limits as above; reset: remove battery, reinsert, then hold UP + STOP 5 s (jog).
- Alpha RF (tubular): Hold SET 2 s (beep); pair: hold UP + DOWN 2 s then tap STOP; reverse via DIR toggle; limits: UP + DOWN 5 s, save with STOP.
- Neco: Tap LEARN (LED solid); within about 10 s send the handset’s teach signal; reverse: press UP five times quickly; reset: hold LEARN ~15 s (rapid flash → off).
Step 15. Safety, compliance and when to call an Adelaide technician
Work safely and keep compliance in mind. Isolate power so only the shutter you’re programming is live, keep hands clear, and don’t leave the motor inactive in programming mode for more than about two minutes. Set the upper limit so the bottom bar never hits the V‑stoppers, and ensure the Box/Slat Locking System is set correctly. Any 230 V wiring must be performed by a licensed electrician. After you program a roller shutter remote, test from user mode with brief presses.
- Call a pro for persistent overload faults, grinding noises, or a curtain jammed off‑square.
- If power is present but there’s no movement (tired motor capacitor/loose neutral suspected).
- When the receiver won’t enter learn mode even after power‑cycling and resets.
- If limits won’t store and the shutter jams near the head box.
- For motor, slat or guide replacements, or inaccessible pelmets requiring removal.
FAQs
Got stuck part-way through how to program roller shutter remote steps? These quick answers cover the snags we see most—timing, power isolation and limits. Follow the brand cues above, keep only one shutter powered, and watch for the “jog” to confirm each action before moving on.
- How long does learn mode last? Typically 30–60 seconds; if inactive for about 2 minutes most motors exit programming.
- Do I need to power only one shutter? Yes—connect power ONLY to the shutter being programmed.
- How do I reverse direction? Hold Stop until a jog (Somfy: hold MY ~5 s).
- After a reset, what next? Re-pair every remote and re-set upper and lower limits.
- Remote won’t pair—quick fixes? Fit fresh CR2430/CR2032, stand ~30 cm from receiver, reduce nearby interference, retry within the learn window.
Final checks and next steps
Do a last sweep: power isolated to one shutter, pairing confirmed by a jog/beep, direction correct, upper/lower limits saved, two full cycles run smoothly, and channels clearly labelled. If a step times out, re-enter programming and repeat slowly. If you’d rather not wrestle with it—or a motor jams, trips or won’t learn—book a local specialist. Fast, no call‑out fee support across Adelaide: Roller Shutter Repairs Adelaide.