Gliderol Roller Door Motor Manual: Setup, Limits & Remotes
You need to set up your Gliderol roller door motor but the manual is nowhere to be found. Or maybe you have the manual but the instructions feel unclear and you just want straightforward guidance. Whether you’re programming remotes, adjusting travel limits, or troubleshooting a stubborn motor, you need clear answers fast.
This guide links you directly to official Gliderol manuals for every motor model and walks you through the most common setup tasks. You’ll get step by step instructions that actually make sense, not technical jargon that leaves you more confused than when you started.
We’ll help you identify your exact motor model first, then show you how to set travel limits properly, program your remotes without frustration, and handle the most common setup issues. By the end, you’ll have your Gliderol motor running exactly how it should.
What is in your Gliderol motor manual
Your Gliderol motor manual contains installation instructions, wiring diagrams, and step-by-step programming guides for your specific model. You’ll find detailed sections on setting travel limits, connecting safety sensors, and programming remotes. The manual also includes troubleshooting charts that help you identify common issues and maintenance schedules to keep your motor running smoothly.
Every Gliderol roller door motor manual includes model-specific limit setting procedures that differ between roller door and sectional door operators.
Most manuals provide clear diagrams showing where to locate adjustment buttons and how to interpret LED indicators on your control board.
Step 1. Identify your Gliderol motor model
You need to know your exact motor model before you can download the right gliderol roller door motor manual or follow any setup instructions. Different Gliderol models have completely different programming procedures, so using the wrong manual will waste your time and potentially cause setup errors.
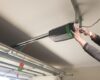
Check the motor housing label
Look at the motor housing unit attached to your door for a white or silver label. This label shows your model name (like Glidermatic GRD, Rollamatic GEN II, or Genesis) plus the serial number. You’ll find this label on the side or bottom of the motor casing where it’s mounted.
The model name on your motor housing label determines which manual and programming procedure you need to follow.
Identify by door type and age
If the label has faded or you can’t access the motor easily, your door type gives you strong clues. Roller doors typically use Glidermatic GRD or Rollamatic models, while sectional doors use Genesis or Glidermatic GTS models. Motors installed before 2015 are usually older GRD or GTS versions, whereas newer installations feature GEN II or Optima variants with updated control boards.
Step 2. Set up travel limits and safety features
Your travel limits control how far your door opens and closes, while safety features prevent accidents and damage. Setting these correctly ensures your Gliderol motor stops the door at exactly the right position and reverses if it meets resistance. The gliderol roller door motor manual for your specific model contains precise button sequences, but the general process follows similar steps across most models.
Access the programming mode
You need to enter programming mode before you can adjust any limits. Press and hold the learn button (sometimes labelled “PROG” or “SET”) on your motor’s control board until the LED light starts flashing. This flashing light confirms you’re in programming mode and ready to set limits.
Most Gliderol motors require you to hold the learn button for 3 to 5 seconds until you see a flashing LED indicator.
Different models use different button locations. Roller door motors (GRD models) typically have the learn button on the side of the motor housing, while sectional door motors (GTS/Genesis models) place it on the control board inside the motor unit. Check your manual if you can’t locate the button within 30 seconds of searching.
Set the upper and lower travel limits
Close your door completely using the wall button or remote. Press the learn button once to register this as your lower limit. The LED will flash or change colour to confirm the setting has been saved. Now press the up button to open the door to your desired upper position (usually fully open). Press the learn button again to save this as your upper limit.
Test the limits immediately by running a full open-close cycle. Your door should stop precisely at both positions without straining or leaving gaps. If the door stops too early or runs too far, you need to clear the limits and repeat this process. Press and hold the learn button for 10 seconds to erase all limit settings, then start again from the closed position.
Connect and test safety sensors
Safety sensors (photo eyes) prevent your door from closing on objects or people. Mount the sensors on opposite sides of your door opening, 150mm from the ground, ensuring they face each other directly. Connect the sensor wires to the terminals marked “SENSOR” or “PHOTO” on your control board following the colour-coded diagram in your manual.
Test the sensors by placing an object in the door’s path while closing. The door should reverse immediately when the sensor beam is blocked. If the door doesn’t reverse, check your sensor alignment and wiring connections before using the motor.
Step 3. Program and test your remotes
Your Gliderol remote needs to communicate with your motor’s control board before it will operate your door. Programming remotes involves putting your motor into learn mode and then sending a signal from each remote you want to register. The exact button sequence varies by model, but your gliderol roller door motor manual provides the specific steps for your motor type.
Put your motor into learn mode
Press the learn button on your motor’s control board once (don’t hold it). The LED indicator will flash or stay solid for 30 seconds, showing you’re in learn mode and ready to program remotes. This window gives you time to program multiple remotes before the motor exits learn mode automatically.
Most Gliderol motors allow you to program up to 15 remotes during a single learn mode session.
Send the signal from your remote
Stand within 3 metres of your motor and press the button on your remote that you want to program. Hold the button for 2 seconds until you hear a click from the motor or see the LED flash twice. This confirms the motor has saved that remote’s code. Repeat this process for each additional remote you need to program before the 30-second window closes.
Test each remote thoroughly
Walk to different locations around your property and test each programmed remote from various distances. Your remote should operate the door reliably from at least 10 metres away in clear line of sight. Test both the open and close functions multiple times to confirm consistent operation. If a remote fails to work, clear all remote codes by holding the learn button for 10 seconds, then reprogram all remotes from scratch.
Extra setup and troubleshooting tips
Your gliderol roller door motor manual covers standard setup, but real-world issues often need quick practical solutions. These additional tips prevent common mistakes and help you resolve problems without calling a technician. Understanding these troubleshooting techniques saves you time and helps you maintain your motor properly between professional services.
Common setup errors to avoid
Never set travel limits while your door is partially open. Always start from the fully closed position to ensure accurate limit points. Check that your door moves smoothly by hand before programming limits, as mechanical binding creates false limit readings that cause motor strain. Test manual operation by disconnecting the motor and lifting the door through its full range before you begin any programming.
Setting limits on a mechanically faulty door will cause your motor to struggle and potentially fail prematurely.
Quick motor resets
If your motor stops responding after a power outage, disconnect it from power for 60 seconds, then reconnect. This full reset clears temporary errors and restores normal function in most cases.
Next steps – call the experts 0414611662
You now have the knowledge to download your gliderol roller door motor manual, identify your specific model, set travel limits correctly, and program your remotes. These setup procedures work for most Gliderol motors when you follow the instructions carefully and test each step thoroughly. Your motor should now operate smoothly with properly configured limits and responsive remotes at all positions around your property.
However, some motor issues require professional assessment beyond basic setup. If your motor shows mechanical problems, makes unusual noises, or won’t respond even after correct programming, you need expert diagnosis. Contact roller shutter repairs Adelaide for experienced technicians who can repair or replace faulty motors, fix mechanical issues, and ensure your door operates safely. Professional service prevents small problems from becoming expensive failures.