B&D Roller Door Installation Guide: Steps, Specs & Safety
Installing a B&D roller door yourself can save you hundreds of dollars in labour costs. But you need the right measurements, proper bracket placement, and correct tensioning techniques to do it safely. Miss any of these steps and you risk a door that binds, rattles, or worse, becomes a safety hazard.
This guide walks you through the complete B&D Roll-A-Door installation process. You’ll get exact measurements for your opening, learn how to mount brackets and guides correctly, and discover how to tension the door for smooth operation. We’ve broken down each stage into clear steps based on B&D’s official Series 2 installation specifications.
By the end, you’ll know how to prepare your opening, mount all components securely, balance the door correctly, and run essential safety checks. Whether you’re installing a new door or replacing an old one, these instructions cover residential and light commercial applications across standard and custom openings.
What you need before you start
You need to gather all your tools, materials, and safety gear before you touch the door. Missing even one critical item halfway through installation means stopping work, leaving your opening exposed, and losing momentum. This b&d roller door installation guide assumes you have everything ready before you begin.
Required tools and equipment
Your basic toolkit needs power tools and hand tools that can handle both mounting and adjustment work. You’ll use these throughout the installation process, so check you have them all before starting.
- Power drill with masonry and timber drill bits (10mm, 12mm, and 16mm)
- Socket set with ratchet (10mm to 17mm)
- Spirit level (at least 1200mm long)
- Tape measure (minimum 5 metres)
- Adjustable wrench and shifting spanner
- Phillips head and flat head screwdrivers
- Steel square for checking right angles
- Ladder or work platform rated for your weight plus tools
- Marker or pencil for measurements
- Safety glasses and work gloves
You’ll need a helper for several stages, particularly when handling the rolled door and tensioning the springs.
Essential components and materials
Check your B&D Roll-A-Door kit contains all brackets, guides, and hardware listed in the contents section of your manual. Manufacturers typically include everything needed, but you should verify before starting.
Your kit should include side guides (left and right), mounting brackets, spring tensioning components, locking mechanisms, and all bolts, screws, and fixings. Count each item against the parts list.
Safety requirements
Set up a 2-metre exclusion zone around the installation area. This keeps pets, children, and other people away from falling components or spring tension release. You also need adequate overhead clearance to work safely above the opening without obstruction.
Wear appropriate protective equipment throughout the installation. Safety glasses protect your eyes from metal fragments and dust, while heavy-duty gloves prevent cuts from sharp edges on the door and guides.
Step 1. Measure and check your opening
You need accurate measurements of your garage opening before you unpack the door. B&D Roll-A-Doors overlap the opening on each side, so your measurements determine which size door you order and how you position the mounting components. Getting these wrong means ordering the wrong door or installing brackets in positions that cause binding and uneven operation.
Check structural requirements first
Your opening needs solid mounting surfaces on both sides and adequate overhead clearance for the rolled door barrel. Inspect the lintel above the opening to confirm it can support the door weight, typically between 50kg and 100kg depending on door size. Check that side walls extend at least 100mm beyond the opening on each side to accommodate the side guides.
Take accurate width measurements
Measure the clear opening width at three points: top, middle, and bottom of the opening. Record all three measurements because older openings often vary due to settling or construction tolerances. Use the narrowest measurement as your reference width, as this determines where the door will sit without binding.
B&D doors require 50mm overlap on each side of the opening, so your door width will be 100mm wider than your opening measurement.
Measure the height correctly
Measure from the finished floor to the underside of the lintel at both sides of the opening. Take measurements at the left side, centre, and right side. Your shortest measurement becomes the critical height dimension for the b&d roller door installation guide specifications.
Verify squareness and level
Check that your opening forms true right angles at all four corners using a steel square. Measure the diagonals from corner to corner – they should match within 10mm. Place your spirit level against both side jambs to confirm they’re plumb (perfectly vertical). Check the lintel with the level to verify it’s horizontal across the full width.
Record any variations exceeding 10mm because you’ll need to compensate during bracket installation. Openings out of square by more than 15mm may require shimming or structural correction before proceeding.
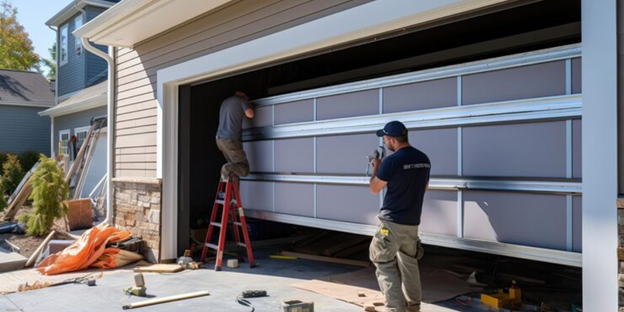
Step 2. Install brackets and guides
You need to mount the brackets and guides with exact positioning and secure fixings to prevent the door from binding or jumping off track during operation. This stage requires precision because any misalignment compounds as the door rolls up and down, causing premature wear on the curtain and components. Work methodically through each component in the correct sequence to avoid having to remove and reposition parts later.
Mark bracket positions accurately
Start by marking the bracket mounting holes on both side walls using the measurements from your b&d roller door installation guide specifications. Position the top bracket 50mm below the lintel and 50mm inward from the opening edge. Use your spirit level to mark a perfectly vertical line down each side wall, ensuring the guide track will run straight.
Transfer the hole positions from the brackets to the wall by holding each bracket against your marked line. Mark through the mounting holes with a pencil, then set the bracket aside. Double-check that left and right brackets sit at matching heights using a tape measure from the floor, not just the lintel, because floors can vary.
Mount the side guides
Drill pilot holes at your marked positions using a 10mm masonry bit for brick or concrete walls, or appropriate timber bits for stud frames. Insert wall plugs if drilling into masonry, ensuring they sit flush with the wall surface. Bolt the bottom bracket first on each side using the supplied bolts and washers, but leave them finger-tight initially.
Position the guide track into the bottom bracket and check it runs perfectly vertical with your spirit level before securing. Bolt the top bracket next, then tighten all fixings progressively. Start at the bottom, work to the top, then return to check and fully tighten each bolt. This prevents the guide from twisting as you apply torque.
The side guides must be perfectly parallel to each other and vertical to prevent the door curtain from binding.
Secure mounting brackets
Install the barrel mounting brackets to the lintel according to the spacing specified in your door size documentation. These brackets support the rolled door weight, so they need solid fixings into structural timber or concrete. Space them evenly across the opening width with maximum spacing of 1200mm between brackets for standard residential doors.
Check each bracket sits level across its mounting surface before drilling and bolting. Tighten all lintel brackets firmly, as loose mountings allow the barrel to sag and cause uneven rolling. Verify the bracket faces remain parallel to the opening using your steel square.
Step 3. Hang, tension and balance the door
You need to hang the rolled door barrel, tension the springs correctly, and balance the door so it stays in position at any height. This stage presents the highest risk during the b&d roller door installation guide process because spring tension can release suddenly if you skip steps or rush through adjustments. Work slowly, follow each step exactly, and never release your grip on components until they’re fully secured.
Insert the door curtain into guides
Remove the packaging bands from the rolled door barrel while it sits on the ground, keeping the curtain tightly rolled. Position the barrel between the mounted brackets with a helper supporting the opposite end. Lift the barrel into the bracket slots, ensuring it seats fully in each bracket before releasing any weight. Secure the barrel with the supplied pins or clips that prevent it from lifting out during operation.
Feed the bottom slat of the curtain into both side guide tracks simultaneously. Start at one side, insert the slat edge into the guide channel, then immediately insert the opposite end into the other guide. Pull the curtain down slowly, checking it feeds smoothly without binding or twisting. Stop if you feel resistance and check that both edges remain seated in their guides.
Apply spring tension correctly
Locate the spring tensioning mechanism on one end of the barrel (usually the left side when facing the door). Your B&D door uses either a strap and ratchet system or a direct spring winding method depending on your model. Count the number of tension increments specified in your manual for your door height, typically one full turn per 300mm of door height.
Wind the spring tension using the provided winding tool, holding it firmly with both hands. Apply each increment of tension, then secure the ratchet or locking pin before releasing the tool. Never let the tool spin free, as the spring can release with enough force to cause serious injury.
Test the door balance after each tension adjustment by lifting it manually to chest height and releasing it gently to see if it holds position.
Check and fine-tune the balance
Pull the door down to the fully closed position and release it. The door should stay closed without creeping upward. Lift it to waist height and release, observing whether it drifts up or down. Adjust the spring tension one increment at a time until the door remains stationary at any height between fully open and closed.
A correctly balanced door requires minimal effort to lift and stays put when you stop pulling. Over-tensioned doors want to fly open, while under-tensioned doors feel heavy and drop closed. Make small adjustments rather than large corrections, testing after each change. Record your final tension setting (number of turns applied) for future maintenance reference.
Step 4. Fit the opener and run safety checks
You need to mount the opener mechanism securely and verify all safety systems work before you use the door daily. This final stage of the b&d roller door installation guide prevents accidents by confirming the door stops correctly, reverses on obstruction, and operates smoothly under power. Skip these checks and you risk injury to people or damage to vehicles when the door fails to respond correctly to commands or obstacles.
Mount the door opener mechanism
Position the opener motor unit on the barrel end opposite to the spring tensioning side. B&D Roll-A-Pro and Controll-A-Door openers mount directly to the barrel using the supplied bracket system. Align the drive sprocket with the chain or belt track before bolting the motor housing firmly to the mounting bracket. Check that all bolts pass through the bracket holes correctly and tighten them progressively to prevent the housing from sitting crooked.
Feed the chain or belt through the guides along the barrel, maintaining proper tension according to your opener manual specifications. Too loose and the chain skips under load, too tight and it wears prematurely. Adjust the tensioner until you achieve approximately 10mm of vertical movement when you press the chain midway between sprockets.
Connect power and test operation
Run the power cable from the opener to your power source following Australian electrical safety standards. Use a dedicated 240V circuit with appropriate circuit breaker protection. Mount the wall control button at a convenient height, typically 1500mm from the floor, where you can see the door clearly while operating it.
Never bypass safety switches or disable obstruction sensors to make installation easier, as these features prevent serious injuries.
Test the door operation by pressing the open command and observing the complete cycle from closed to fully open. The door should roll smoothly without jerking, binding, or making excessive noise. Press close and watch it descend evenly on both sides, stopping flush with the floor at the bottom position.
Perform essential safety checks
Place a solid obstruction like a timber block under the door when closing and verify the auto-reverse function triggers within 50mm of contact. The door should reverse immediately and return to the open position. Test this at multiple points across the opening width to confirm sensors detect obstructions everywhere.
Check the manual release mechanism operates correctly by pulling the emergency cord. The door should disconnect from the opener and allow you to lift it manually. Reconnect the opener and verify it engages properly when you operate the door by remote control. Test the remote from various positions around your property to confirm reliable signal range.
Verify all locking mechanisms engage correctly when the door reaches the fully closed position. Check that side bolts extend into their receivers and that the bottom slat sits firmly against the floor seal. Document your installation date and opener settings for future maintenance reference.
Ready to install your B&D roller door or call the experts on 0414611662
You now have the complete b&d roller door installation guide covering measurements, bracket mounting, tensioning, and safety checks. Follow each step in sequence and you’ll achieve a professional installation that operates smoothly for years. Remember to work with a helper during the hanging and tensioning stages, and never rush through the spring adjustment process.
However, if you encounter structural issues with your opening, damaged components, or prefer professional installation with warranty coverage, contact Roller Shutter Repairs Adelaide for expert service across all Adelaide suburbs. Our technicians handle installations, repairs, and motor upgrades with over 40 years of combined experience.