Ozroll E-Port Controller Manual: Setup, Charging & Reset
The Ozroll E-Port controller is one of the most popular battery backup systems for motorised roller shutters across Adelaide homes and businesses. If you’ve recently had a shutter motor installed or inherited a property with this setup, having access to the Ozroll E-Port controller manual information is essential for getting the most out of your system. Understanding how to properly charge, program, and reset your E-Port can save you unnecessary service calls and keep your shutters running smoothly.
At Roller Shutter Repairs Adelaide, we work with Ozroll systems daily and regularly receive questions about E-Port setup and troubleshooting. Whether you’re dealing with flashing LED lights you don’t understand or need to perform a factory reset after a fault, this guide covers everything you need to know. We’ve compiled the key instructions, diagnostic codes, and step-by-step procedures to help you operate and maintain your E-Port controller with confidence.
Below, you’ll find clear guidance on initial setup, charging requirements, LED indicator meanings, and reset procedures, all based on official Ozroll documentation and our hands-on experience servicing these units throughout Adelaide.
Identify your E-Port controller and do safety checks
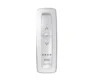
Before you start working with your controller, you need to confirm you’re dealing with an Ozroll E-Port unit and perform basic safety checks. The E-Port is a rechargeable battery backup controller designed to keep your roller shutters operational during power outages. Mistaking it for a different Ozroll model or attempting installation without proper checks can lead to damage or safety issues.
Physical identification features
Your E-Port controller measures approximately 80mm x 80mm and features a white plastic housing with the Ozroll branding clearly visible on the front. You’ll find a single LED indicator window at the top of the unit and charging contacts on the rear that align with the wall plate. The controller differs from standard Ozroll wired controllers because it has no cable connections and operates entirely through battery power with magnetic coupling to the wall plate.
Check the back of your unit for the model number (E-Port) and serial number. This information appears on a label and confirms you’re working with the correct controller type referenced in the ozroll e-port controller manual documentation.
Essential safety precautions
Turn off power to your roller shutter motor at the circuit breaker before you begin any installation or maintenance work. Even though the E-Port operates on battery power, the wall plate connects to mains voltage and requires proper electrical safety protocols.
Never attempt to disassemble the E-Port controller unit itself, as this voids your warranty and exposes you to potential battery hazards.
Ensure your hands are dry and you’re working in appropriate conditions. Avoid installing the controller in areas exposed to direct moisture or extreme temperatures, as this affects battery performance and longevity. If you notice any physical damage to the controller housing or cracked plastic, contact a qualified technician before proceeding with installation.
Step 1. Install the wall plate and seat the controller
Your first task involves securing the wall plate to a suitable location and properly mounting the controller unit. The ozroll e-port controller manual specifies that installation requires a standard electrical mounting box or direct wall mounting, depending on your existing setup. This step determines how reliably your controller operates and whether it maintains proper charging contact.
Mounting the wall plate
Identify a location within 1.5 metres of your roller shutter motor that allows easy access for daily operation. Mark the mounting holes using the wall plate as a template, ensuring the plate sits level to maintain proper controller contact. Drill appropriate holes for your wall type and insert wall plugs if needed.
Connect the mains wiring to the terminals on the back of the wall plate according to the colour-coded connections: active (brown), neutral (blue), and earth (green/yellow). Tighten all terminal screws securely and verify no exposed copper shows. Secure the wall plate to the wall using the provided screws.
Seating the controller unit
Align the charging contacts on the rear of your E-Port controller with the corresponding contacts on the wall plate. Press the controller firmly against the plate until you hear a magnetic click indicating proper seating. The unit should sit flush against the plate without any gaps.
If the controller doesn’t seat properly or feels loose, remove it and check that no debris obstructs the magnetic mounting surface.
Test the security by gently pulling the controller. It should resist removal but detach with deliberate upward force.
Step 2. Charge it properly and wake it from sleep mode
Your E-Port controller arrives in sleep mode to preserve battery life during storage and shipping. Before you can operate your roller shutters, you need to complete an initial charging cycle and activate the unit. The ozroll e-port controller manual specifies that proper charging is critical for battery longevity and reliable operation.
Initial charging procedure
Place your controller on the wall plate and leave it to charge for a minimum of 24 hours before first use. The LED indicator flashes green during charging and displays a solid green light when fully charged. This extended initial charge conditions the battery and ensures maximum capacity.
Check the LED status after 24 hours. If you see a solid green light, your controller is ready for operation. If the LED continues flashing, allow additional charging time until the solid green appears.
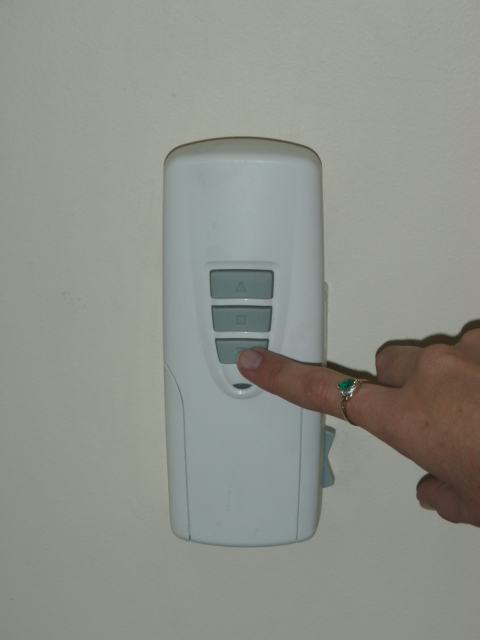
Activating from sleep mode
Press and hold the centre button on the controller for three seconds to wake the unit from sleep mode. The LED flashes briefly to confirm activation. Your E-Port now responds to button presses and operates your roller shutters normally.
If the unit doesn’t respond after waking, remove it from the wall plate and reseat it to ensure proper charging contact.
Repeat this wake procedure any time your controller enters sleep mode after extended periods without use.
Step 3. Use LED signals to diagnose what’s wrong
Your E-Port controller communicates its status and any faults through LED indicator signals that appear in the window at the top of the unit. Learning to read these signals helps you diagnose problems quickly and determine whether you need professional assistance. The ozroll e-port controller manual includes a comprehensive LED diagnostic chart that covers all possible status conditions.
Understanding the LED colour codes
Your controller uses three LED colours (green, amber, and red) to indicate different operational states and fault conditions. Green signals normal operation or charging status, amber indicates low battery or specific operational modes, and red warns you of fault conditions requiring attention.
| LED Colour | Pattern | Meaning |
|---|---|---|
| Solid Green | Constant | Fully charged and ready |
| Flashing Green | Regular pulse | Currently charging |
| Solid Amber | Constant | Low battery (requires charging) |
| Flashing Red | Rapid pulse | Motor overload or obstruction detected |
| Alternating Red/Green | Sequential | Error mode (requires reset) |
Reading flash patterns
Watch the flash frequency to distinguish between different fault types. Rapid flashing indicates immediate issues like motor obstruction, while slow alternating patterns signal system errors that need a full reset. Count the number of flashes between pauses to identify specific fault codes.
If you see red LED signals persisting after removing obstructions, proceed to the reset procedure in the next step.
Step 4. Reset error mode and fix common faults
When your controller displays alternating red and green lights, it has entered error mode and requires a reset to restore normal operation. The ozroll e-port controller manual includes specific reset procedures that clear most fault conditions and return your unit to working order. Performing this reset takes only a few minutes and resolves the majority of controller issues without requiring professional service.
Performing a factory reset
Remove your controller from the wall plate by pulling it straight off the magnetic mount. Locate the small reset button recessed into the side of the unit near the charging contacts. Press and hold this button using a paperclip or similar thin object for ten seconds until the LED flashes three times, then release.
Reseat the controller on the wall plate and allow it to charge for two hours before testing operation. Your unit returns to factory settings and clears any stored fault codes.
Fixing common fault conditions
Address motor overload issues (indicated by rapid red flashing) by checking for obstructions in your shutter tracks or damaged slats blocking movement. Clear any debris and test operation again before attempting a reset.
Battery performance problems often resolve through a full discharge and recharge cycle. Remove the controller from the plate, operate it until the battery depletes completely, then charge uninterrupted for 24 hours.
Next steps
You now have everything you need to set up, charge, and troubleshoot your Ozroll E-Port controller using the information from the ozroll e-port controller manual. Following these steps ensures your battery backup system operates reliably and your roller shutters continue working during power outages. Regular charging and proper maintenance extend your controller’s lifespan and prevent most common faults.
If your E-Port controller continues displaying error codes after performing a reset, or if you notice physical damage to the unit, the problem may require professional diagnosis. Issues like internal battery failure, faulty wall plate connections, or motor compatibility problems need expert assessment to resolve safely.
Roller Shutter Repairs Adelaide services Ozroll systems throughout the Adelaide region and can quickly diagnose and repair controller faults that exceed basic troubleshooting. Our technicians carry replacement parts and can restore your system to full operation the same day. Contact us for experienced help with any roller shutter controller issue.