Roller Shutter Fix: DIY Guide, Costs & Adelaide Service
A roller shutter that won’t open or close properly can throw your entire day off track. Whether it’s a jammed curtain, a frayed strap or a motor that’s given up, you need a solution fast. Security concerns, lost convenience and potential damage to the shutter itself all pile on the pressure to get things sorted.
The good news is that many roller shutter problems have straightforward fixes you can handle yourself with basic tools and a bit of patience. For more complex issues or if you’re not confident tackling the repair, professional help is available right here in Adelaide to get your shutters back to smooth operation.
This guide walks you through everything you need to know about roller shutter repairs. You’ll learn how to identify your shutter type, perform simple maintenance checks, tackle common DIY fixes for both manual and motorised systems, and understand typical repair costs in Adelaide. We’ll also cover when it’s time to call in the experts rather than risk making things worse.
What is a roller shutter fix
A roller shutter fix covers any repair or maintenance work needed to restore your shutter’s proper function. This ranges from simple adjustments like cleaning tracks and tightening loose screws to more involved repairs such as replacing motors, rewinding straps or swapping out damaged slats. You might need a fix when your shutter refuses to move, makes grinding noises, sits crooked in its tracks or struggles to stay open.
Common problems that need fixing – call us on 0414611662 let the professionals do it
Your roller shutter can develop several issues that demand attention. Manual shutters typically suffer from worn straps, broken springs or jammed tracks, while motorised units face different challenges related to their electrical components. Understanding what’s gone wrong helps you decide whether to grab your toolbox or call a professional.
The most frequent roller shutter problems include:
- Shutter stuck in open or closed position
- Frayed or snapped lifting straps
- Bent or cracked slats causing jams
- Worn springs that won’t hold tension
- Motor failure or electrical faults
- Misaligned tracks preventing smooth travel
- Corroded or damaged bottom rails
Regular maintenance catches many of these issues before they turn into expensive repairs.
Minor repairs versus major work – 0414611662 call us
Minor fixes usually involve cleaning, lubricating and adjusting existing components. You can handle most of these tasks yourself with basic tools and a ladder. Clearing debris from tracks, applying lubricant to moving parts, tightening loose fixings and realigning slightly bent slats all fall into this category. These repairs take anywhere from fifteen minutes to an hour and cost next to nothing if you tackle them yourself.
Major repairs require replacement parts, specialised tools or electrical knowledge. Replacing a motor, fitting new slats, rewinding a spring mechanism or fixing structural damage to the headbox demands more skill and experience. These jobs carry higher risks if you get them wrong, potentially causing further damage or creating safety hazards. Professional repair services become the sensible choice when you’re dealing with complex mechanical or electrical faults.
Step 1. Stay safe and identify your shutter
Before you attempt any roller shutter fix, you need to protect yourself and work out exactly what type of system you’re dealing with. Safety comes first because you’ll be working at height with mechanical components that can pinch, trap or fall. Knowing your shutter type determines which repair methods and replacement parts you’ll need, saving you time and preventing damage from using the wrong approach.
Safety equipment and precautions
You should gather the right protective gear before touching your shutter. Safety glasses shield your eyes from dust, lubricant spray and small metal fragments that can flick off during repairs. Work gloves protect your hands from sharp slat edges and prevent cuts when handling metal components. Wear closed-toe shoes with good grip because you’ll be climbing a ladder and need stable footing.
Your ladder setup requires careful attention. Position a stable stepladder or extension ladder at the correct angle (one metre out for every four metres up) and ensure both feet sit on firm, level ground. Never overreach from your ladder position. If you can’t comfortably reach the headbox or pelmet, climb down and reposition rather than stretching. Have someone hold the ladder base steady while you work if possible.
Switch off power at the circuit breaker before touching any motorised shutter components to prevent electric shock.
Manual versus motorised systems
Manual shutters use a strap, cord or spring mechanism that you operate by hand. You’ll see a plastic winder box mounted on the wall near the window, with a fabric or cord strap that winds around a drum inside. Pull down on the strap to raise the shutter, and it lowers when you release it. These systems rely on mechanical parts like springs and gears rather than electrical components.
Motorised shutters run on electricity and respond to wall switches, remote controls or smartphone apps. Look for a control box or motor housing inside the headbox (the casing at the top of your shutter). You won’t see any manual winding mechanism on the wall. If your shutter moves at the push of a button and you can hear a motor humming, you’re working with an electric system that needs different troubleshooting steps.
Check the manufacturer label inside the headbox or on the side bracket to identify your specific model. Note down the brand name, model number and any date stamps you find. This information becomes essential when ordering replacement parts or calling for professional repairs.
Step 2. Do quick DIY checks and maintenance
Most roller shutter problems start small and get worse over time. Regular inspection and basic maintenance catch these issues early, saving you from expensive repairs down the track. You can complete these checks in under an hour with household tools you probably already own. This preventative approach keeps your shutters running smoothly and extends their working life by years.
Clear debris from tracks and guides
Dirt, leaves and spider webs build up in the side channels and bottom tracks where your shutter curtain travels. This debris creates friction that forces your motor or spring mechanism to work harder, leading to premature wear. Over time, accumulated grime can jam the shutter completely or cause it to sit crooked in its frame.
Start by opening your shutter halfway to access the full length of both side guides. Use a vacuum cleaner with a narrow nozzle attachment to remove loose debris, then wipe the inside surfaces with a damp cloth and mild detergent. Pay special attention to the bottom rail channel where dirt collects most heavily. Rinse with clean water and dry thoroughly before moving on to the next step.
Clean tracks eliminate 60% of common shutter movement problems without any parts replacement.
Apply lubricant to moving components
Dry PTFE spray or silicone lubricant works best for roller shutters because it doesn’t attract dust like oil-based products. You need to lubricate all friction points including the side guide channels, the roller barrel bearings inside the headbox, and any moving parts on your winder mechanism. Proper lubrication reduces noise, improves movement and prevents premature component wear.
Follow these specific steps for the best results:
- Spray a light coating into each side guide channel, focusing on the full vertical run
- Apply lubricant to the roller barrel bearings (you’ll need to access the headbox for this)
- Treat the winder drum and spring mechanism on manual shutters
- Wipe away any excess product that drips onto surrounding surfaces
- Cycle your shutter up and down three times to distribute the lubricant evenly
Check alignment and tighten loose fixings
Misaligned slats or sagging tracks cause your shutter to bind, making the motor strain or the manual strap difficult to pull. Walk around to the exterior and inspect the shutter face while it’s fully closed. Look for gaps between slats, sections that bow outward or any visible twisting of the curtain. These signs indicate alignment problems that need correction before they worsen.
Test all fixing screws and brackets that hold your side guides and headbox in place. Vibration from daily use gradually loosens these connections over time. Use a screwdriver or hex key to snug up any loose fixings, but don’t overtighten as this can strip threads or crack plastic components. Check the bottom rail end caps haven’t come loose, as these keep the curtain properly positioned in the side channels.
Manual shutters need spring tension checks at this stage. Pull down gently on the strap or handle and release it. The shutter should hold its position at any height without creeping downward. If it drops slowly or won’t stay put, your spring mechanism needs adjustment or replacement, which we’ll cover in the next section on manual shutter fixes.
Step 3. Fix common manual shutter problems
Manual shutters rely on mechanical components that wear out through regular use. Straps fray and snap, springs lose tension, and slats shift out of alignment. You can fix most of these issues yourself with basic tools and replacement parts from hardware stores. Each repair follows a logical sequence that prevents further damage and gets your shutter working properly again.
Replace a frayed or broken strap
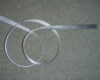
Your lifting strap takes the full weight of the shutter curtain every time you raise or lower it. Constant friction against the winder drum causes the fabric to thin, fray and eventually snap. You’ll notice this problem developing when you see loose threads on the strap edges or feel it slipping through the winder mechanism without moving the shutter.
Purchase a replacement strap that matches your existing width and thickness (typically 23mm wide webbing). You’ll need a screwdriver, pliers and possibly a ladder to access the headbox. Follow these steps to complete the roller shutter fix:
- Remove the pelmet cover by unscrewing or drilling out the pop rivets along the front edge
- Pull the old strap free from both the winder drum and the shutter curtain attachment point
- Thread the new strap through the winder box and wind it three times around the drum
- Secure the strap end to the drum using the metal clip or clamp provided
- Attach the other end to the shutter curtain’s connection bracket
- Test the tension by raising and lowering the shutter several times
- Replace the pelmet cover with new rivets or screws
Replace straps at the first sign of fraying rather than waiting for a complete failure that drops your shutter suddenly.
Adjust spring tension settings
Spring mechanisms counterbalance the shutter’s weight to make manual operation feel smooth and effortless. When springs wear out or lose tension, you’ll struggle to lift the shutter or it won’t stay in the open position. Excessive spring tension has the opposite effect, making the shutter shoot up too quickly or resist closing.
Locate the spring adjustment mechanism inside the headbox on the roller barrel’s end cap. You’ll see either a tension screw or a ratchet system with notched positions. Use a screwdriver or hex key to make small adjustments:
- Turn clockwise to increase tension if the shutter feels heavy or drops when released
- Turn anticlockwise to reduce tension if the shutter rises too fast or won’t close properly
- Make quarter-turn adjustments and test after each change
- Never force the adjustment mechanism as this can break internal spring coils
Test the balance by opening your shutter halfway and letting go. It should hold position without creeping up or dropping down.
Clear jammed slats and realign the curtain
Bent slats or debris caught between interlocking sections stop your shutter dead in its tracks. You’ll hear grinding noises or see the curtain buckle as you try to force it. Physical impacts from storm debris or accidental knocks cause most alignment problems, while accumulated dirt creates friction points that eventually jam the system.
Start by identifying exactly where the jam occurs. Open the shutter to the point where it stops moving and examine the slat alignment on both sides. Look for protruding sections, visible gaps or slats that sit at an angle rather than horizontally. Use these techniques to fix the problem:
- Gently press bent slats back into alignment using steady hand pressure
- Remove the damaged slat completely if it’s cracked or severely deformed (slide it out through the side guide)
- Order a replacement slat from your shutter manufacturer, matching the profile and colour
- Check that both side guides remain parallel and haven’t shifted position
- Tighten all guide bracket fixings if you notice any movement
Minor bends respond well to careful reshaping, but cracked aluminium slats need complete replacement to prevent repeated jams.
Step 4. Fix simple motorised shutter issues
Electric shutters add convenience but bring their own set of problems when things go wrong. Motor failures, limit switch errors and power supply issues cause most motorised shutter breakdowns. You can solve many of these problems yourself without calling an electrician, as long as you follow basic electrical safety rules and know when to stop. This roller shutter fix section focuses on straightforward electrical troubleshooting that doesn’t require specialist tools or qualifications.
Check power supply and connections
Your motor needs consistent electricity to function properly. Power interruptions, tripped circuit breakers and loose connections prevent your shutter from responding to commands. Start by checking the obvious sources before you pull apart control boxes or investigate complex wiring problems.
Walk to your switchboard and locate the circuit breaker that controls your roller shutter. Toggle it off and back on to reset any temporary faults. Look for signs of a tripped breaker (the switch sits in a middle position or points the opposite direction to other switches). Check if other electrical items on the same circuit still work, as this confirms whether you have a broader power issue.
Inspect the wall switch or control panel that operates your shutter. Remove the cover plate by unscrewing the fixing screws and examine the wiring behind it. Look for loose terminal connections, frayed wires or signs of overheating (brown discolouration or melted plastic). Tighten any loose connections using a screwdriver, but switch off power at the breaker first to prevent electric shock.
Always isolate power at the switchboard before touching any electrical connections or opening control boxes.
Reset the motor and control unit
Motors and control units have built-in protection systems that shut them down when they overheat or detect faults. Your shutter might stop working simply because the motor needs to cool down and reset. Many control units also lose their programming after power cuts, requiring you to restore their settings manually.
Press and hold the reset button on your motor control unit for five to ten seconds. You’ll find this button either inside the headbox near the motor or on the wall-mounted control panel. Release the button and wait thirty seconds before testing your shutter operation. Some systems show a flashing LED light during the reset process, which stops blinking once the reset completes.
Consult your manufacturer’s instruction manual for the specific reset procedure if the basic method doesn’t work. Different brands use different reset sequences. Some require you to hold multiple buttons simultaneously, while others need you to cycle the power switch in a particular pattern.
Adjust travel limit settings
Limit switches tell your motor when to stop at the fully open and fully closed positions. When these settings drift out of calibration, your shutter stops too early, too late or reverses direction unexpectedly. You’ll notice the curtain creeping higher each time you open it, or stopping several centimetres short of closing completely.
Access the limit adjustment controls inside your motor housing or on the external control unit. You’ll see two small screws or buttons labelled “up limit” and “down limit”. Follow these steps to recalibrate:
- Open your shutter to the position where you want it to stop at the top
- Press and hold the up limit button until you hear a click or beep
- Close the shutter to your desired bottom position
- Press and hold the down limit button until it confirms with a sound
- Test the full travel range three times to verify the new settings stick
Troubleshoot remote control problems
Dead batteries and interference from other devices cause most remote control failures. Your shutter motor works fine but won’t respond when you press the remote buttons. Rule out simple battery problems before you suspect faults with the receiver unit or motor electronics.
Replace the remote batteries with fresh ones, even if they seem to work in other devices. Weak batteries provide enough power to light the LED indicator but lack sufficient voltage to transmit a strong signal. Test your remote from different distances and angles to see if the range has decreased.
Re-pair your remote with the receiver if battery replacement doesn’t fix the problem. Hold down the programming button on your receiver unit (usually inside the headbox) until its LED flashes rapidly. Within ten seconds, press any button on your remote. The LED should stop flashing or change to a solid light, confirming successful pairing. Repeat this process for each remote you want to program.
Call a licensed electrician if you suspect wiring faults, motor burnout or damage to the control board. These repairs require electrical qualifications and specialised testing equipment that go beyond simple DIY fixes.
Roller shutter fix costs in Adelaide
Understanding repair costs before you commit helps you budget properly and spot overpriced quotes. Adelaide roller shutter repairs typically range from $120 to $850 depending on the problem’s complexity and the parts you need. Simple fixes like clearing jammed tracks or tightening loose brackets cost far less than replacing motors or fitting new slat sections. Most repair companies charge a standard callout fee between $80 and $120 which covers travel time and initial diagnosis.
Your final bill depends on several factors including the repair type, replacement parts quality, your shutter’s accessibility and the time required to complete the work. Getting multiple quotes helps you compare prices, but the cheapest option isn’t always the best value. Rushed repairs using substandard parts often fail within months, costing you more in repeat callouts.
Minor repair pricing
Basic maintenance and simple fixes fall into the affordable category where you’ll spend between $120 and $280 for most jobs. These repairs involve minimal parts replacement and take under two hours to complete. You can handle many of these tasks yourself if you’re comfortable working at heights and following safety procedures.
Common minor roller shutter fix jobs and their typical costs include:
- Track cleaning and lubrication: $120 to $180
- Strap replacement (manual shutters): $150 to $220
- Spring tension adjustment: $140 to $200
- Single slat replacement: $180 to $250
- Bottom rail realignment: $160 to $240
- Remote control reprogramming: $120 to $180
Expect to pay towards the higher end of these ranges for larger or heavier shutters that require more time and effort. Commercial-grade roller shutters with thicker slats and reinforced components also cost more to repair than standard residential models.
Major repair and replacement costs
Complex repairs requiring specialist knowledge or expensive parts push your costs into the $350 to $850 bracket. These jobs often involve electrical work that requires licensed tradespeople, or mechanical repairs demanding precise calibration. Your technician needs several hours on site and may return for follow-up adjustments.
Budget for these amounts when facing substantial repairs:
- Motor replacement (tubular motor): $450 to $680
- Complete spring mechanism overhaul: $380 to $550
- Multiple slat replacement (five or more): $420 to $650
- Headbox structural repairs: $400 to $600
- Manual to electric conversion: $650 to $850
- Full curtain replacement: $500 to $850
Most Adelaide repair specialists offer free quotes and won’t charge you if they can’t fix the problem on the day.
What influences your final bill
Accessibility challenges add to your costs when technicians need special equipment to reach high or awkward locations. Two-storey installations requiring scaffolding or elevated work platforms incur additional fees of $150 to $300. Emergency callouts on weekends or public holidays attract premium rates, typically 50% above standard weekday pricing.
Parts quality makes a significant difference to long-term value. Genuine manufacturer components cost 20% to 40% more than generic alternatives but carry proper warranties and fit precisely. Cheap imported motors might save you $100 upfront but often fail within twelve months, while quality units from established brands run reliably for ten years or longer.
Your shutter’s age affects repair economics. Spending $600 fixing a fifteen-year-old shutter with other worn components rarely makes financial sense when a new installation costs $800 to $1,200. Your repair technician should advise whether fixing or replacing provides better value based on your specific situation.
When to call Roller Shutter Repairs Adelaide 0414611662
You’ve tried the DIY approaches and your shutter still won’t cooperate, or perhaps the problem looks too complex to tackle safely yourself. Knowing when to stop and call professionals prevents you from causing expensive damage or risking injury. Some roller shutter fix jobs require specialised tools, electrical qualifications or years of experience that you simply can’t replicate with a YouTube tutorial and basic hand tools.
Warning signs that need professional attention
Electrical problems beyond simple resets demand qualified technicians who understand Australian wiring standards. You should call immediately if you notice burnt smells coming from the motor housing, scorch marks on wiring, or the motor making grinding noises that don’t stop after lubrication. Structural damage to the headbox, cracked side guides or severely bent slat sections also need professional assessment before you attempt repairs.
Watch for these specific situations that require expert help:
- Motor runs but the shutter doesn’t move (gearbox failure)
- Shutter drops suddenly when you release the strap (broken spring assembly)
- Multiple slats need replacement across the curtain
- Water damage or corrosion throughout the headbox
- Shutter won’t stay in tracks despite realignment attempts
- Control unit shows error codes you can’t resolve
Professional repairs come with warranties that protect you if the problem returns, something you can’t guarantee with DIY fixes.
What to expect from our service
Roller Shutter Repairs Adelaide brings over 40 years of combined experience to every job across Adelaide metro, the Hills and Barossa Valley regions. Our technicians arrive with fully stocked vans containing genuine replacement parts for all major shutter brands, meaning we complete most repairs on the first visit. You won’t pay hidden callout fees or inflated parts charges.
Contact us when you need fast, reliable roller shutter fix services that solve the problem properly the first time. We diagnose the fault accurately, explain your repair options clearly, and provide upfront pricing before we start work. Our team handles everything from simple motor replacements to complete shutter overhauls, with same-day service available for emergency repairs.
Final thoughts
Your roller shutter fix doesn’t have to be complicated or expensive when you follow the right approach. Simple maintenance tasks like cleaning tracks and applying lubricant prevent most problems before they start, while basic troubleshooting steps help you identify whether you can handle the repair yourself or need professional assistance. Understanding your shutter type and following proper safety procedures protects both you and your equipment throughout the repair process.
Remember that DIY repairs work well for straightforward mechanical issues, but electrical faults and structural damage require qualified technicians who carry the right tools and expertise. You’ll save money on minor fixes while avoiding the risk of making problems worse through incorrect repairs. Most Adelaide homeowners find that regular maintenance combined with professional repairs when needed keeps their shutters running smoothly for decades.
Need expert help with your roller shutter problems? Contact Roller Shutter Repairs Adelaide today for fast, reliable service backed by over 40 years of industry experience across all Adelaide suburbs.