How to Fix a Roller Door: DIY Guide for Common Problems
Roller door playing up? Maybe it grinds and shudders on the way down, stops halfway, rolls up unevenly, or refuses to respond to the remote. When a door won’t cooperate, it’s more than an annoyance — it’s a security risk and a daily headache. The good news: many “how to fix a roller door” issues come down to simple things like dirty tracks, loose brackets, dry rollers, or misaligned sensors, and you can often sort them safely with basic tools.
This guide gives you clear, practical steps to get your door running smoothly again. You’ll learn quick checks that isolate the fault, how to disengage the opener and test the door by hand, clean and lubricate correctly, realign guides and the bottom rail, fix coning/ballooning, adjust safe settings on motorised units, reprogram remotes, and replace a worn weather seal — plus where the line is for pro-only repairs.
We’ve structured the walkthrough for both manual and motorised roller doors, with safety notes up front and a simple toolkit list. Tips are tailored to Australian conditions (including Adelaide’s coastal air and dust). By the end, you’ll know whether it’s a 10‑minute tune‑up or time to call an expert — and exactly what to do next.
Step 1. Read this first: safety, limits, and when not to DIY
Roller doors store serious energy in their springs and can injure if handled incorrectly. Many fixes are simple housekeeping, but some jobs cross into “pro only”. Always put safety first, work methodically, and stop if anything binds, bows, or feels beyond a light adjustment.
- Disengage power: Unplug the opener and pull the release cord before any maintenance.
- Hands clear: Keep fingers away from guides, drum wheels and moving parts.
- Light fixes only: Clean tracks, tighten hardware, lubricate; do not grease locks.
- Springs are pro‑only: Broken/weak torsion springs or cables require a qualified technician.
- If in doubt: Serious faults or structural damage—call a specialist, not DIY.
Step 2. Identify your setup: manual or motorised roller door
Before you troubleshoot, confirm your setup — the steps differ for powered versus purely mechanical doors. You’ll still isolate the door and test it by hand, but the checks you make next depend on whether electronics are involved.
- Motorised: Opener on the axle/ceiling, photo-eye sensors near the guides, wall button/remote. Typical fixes: clean/align sensors, check limit/force settings; pull the release cord to test manually.
- Manual: Pull‑strap or keyed central lock, no motor present. Typical fixes: tracks, hardware, lubrication, light balance checks; broken springs/cables are strictly pro‑only.
Step 3. Gather tools and supplies for a safe DIY fix
A small toolkit makes DIY roller door fixes safer and quicker. You’ll clean, tighten and realign—never force anything—so gather the basics before you start. Unplug the opener and set up stable footing first.
- PPE: gloves, safety glasses, step ladder.
- Tools: screwdrivers, adjustable spanner, socket set.
- Cleaning: soft brush, rags, mild detergent, mineral turps/metho for guides.
- Lubrication: RP7/WD‑40 and an oily rag; don’t grease the lock.
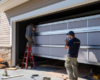
Step 4. Isolate the fault: disengage the opener and test the door by hand
Before you chase electronics, prove the door itself runs freely. Unplug the opener and pull the manual release cord to decouple the motor. Lift and lower the curtain by hand. A good door should travel smoothly and feel balanced. If it’s heavy, slams shut, or binds, you’re looking at a mechanical issue; if it glides fine by hand but misbehaves on power, the fault is with sensors, limits or the opener.
- Disconnect safely: Unplug opener, pull the release cord.
- Lift halfway: Door should hold roughly in place; dropping or rising = imbalance (pro-only to fix).
- Run full travel: Feel for rough spots, listen for scraping.
- Note behaviour: Smooth by hand = check sensors/limits later; rough = fix tracks/hardware next.
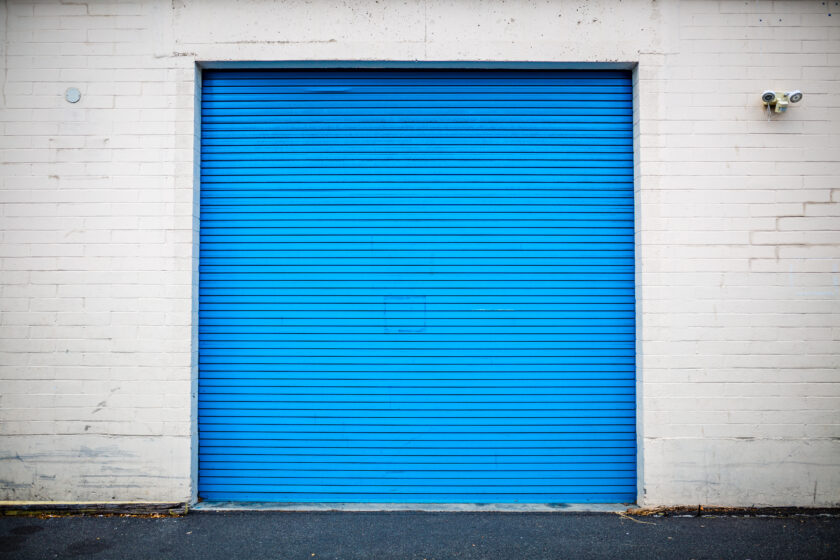
Step 5. Clear jams and clean the guide tracks
If the curtain binds, scrapes, or stalls, grit in the guides is a prime suspect. With the opener disengaged, focus on the inside faces of both tracks where the edges of the curtain travel. A clean, smooth guide lets the door run straight; any stones, screws, bent lips or built‑up grime will snag the slats and amplify strain.
- Open and secure: Roll the door fully up and ensure it can’t drop.
- Remove debris: Use a soft brush/vacuum to clear sand, stones, leaves and screws from the guides.
- Wipe the guides: Clean the internal sections with a rag dampened with mineral turps or methylated spirits; polish to remove residue.
- No heavy grease: Do not grease tracks; it attracts dust and causes sticking.
- Re-test travel: Lower/raise by hand; note any scrape points or dents to address in Step 7.
Step 6. Tighten loose hardware and lubricate to stop noisy operation
Rattles, squeaks and grinding usually come from loose fixings or dry parts. With the opener unplugged and disengaged, work from top to bottom, snugging hardware and applying light lubricant where it helps. This quick tune‑up is often the fastest way how to fix a roller door that’s noisy.
- Tighten hardware: Check guide brackets, head brackets, drum wheel U‑bolts, and bottom rail screws.
- Lubricate lightly: Use RP7/WD‑40 on moving parts and wipe springs with an oily rag.
- Don’t lube tracks/lock: Clean tracks only; do not grease the lock or pack guides with grease.
- Re‑test by hand: If noise remains or parts look worn, replace the suspect item or call a pro.
Step 7. Realign guides, brackets, and bottom rail if the curtain is scraping
Scraping usually means guides aren’t plumb or head brackets slightly off level. After cleaning and tightening, make only small adjustments with the opener disengaged and follow existing fixing holes. These alignment tweaks are a common part of how to fix a roller door that scrapes.
- Plumb guides and level head brackets: Loosen, nudge/pack, retighten.
- Dress track lips: Straighten bent edges lightly; don’t crease.
- Square the bottom rail: Half‑lower; keep it parallel; re‑test by hand.
Step 8. Fix coning or ballooning (uneven roll) so the curtain winds straight
If the curtain forms a cone at one end and the bottom rail sits out of parallel, you’ve got coning/ballooning. It’s usually caused by slightly out‑of‑level head brackets or an axle that’s drifted off‑centre, and by operators driving from one end. Work with the opener disengaged and make only light, controlled adjustments.
- Level the brackets: Check the head brackets are level; pack/adjust, then retighten.
- Centralise the axle: Ensure the axle sits centred within the roll.
- Move the axle through the roll: Shift it in the opposite direction to the cone by about the cone’s length.
- Square the bottom rail: Half‑lower and confirm it’s parallel to the roll and guides.
- Prevent repeat (motorised): Pin/secure the curtain to both drum wheels before setting up the operator.
- Re‑test by hand: If it still cones or needs tension work, call a pro.
Step 9. Check balance and spring tension: light re‑tension vs pro‑only fixes
A correctly balanced door is the backbone of smooth, safe operation. With the opener unplugged and disengaged, lift the curtain to waist height and let go carefully. It should stay roughly put. If it drops hard (under‑tension) or shoots up (over‑tension), address balance before you chase electronics.
- Light re‑tension (only if your manual allows): With the door fully open and secured, add a small increment (about a quarter‑turn) on the approved tensioner, then re‑test. Stop after 1–2 small adjustments.
- Never: Loosen U‑bolts or touch drum wheels under load; don’t increase opener force to mask imbalance.
- Pro‑only: Broken/weak springs, frayed cables, twisting brackets, a door that’s still heavy after minor adjustment, or loud spring/drum noises. These require a qualified technician and are not DIY.
Step 10. Recover an off‑track roller door safely
If the curtain rides out of the guide, stop immediately. Forcing the opener can tear slats or twist brackets. Recovering an off‑track roller door is a gentle, low‑force job: you’re guiding the curtain edge back into the track, fixing the snag, and then re‑testing by hand.
- Kill power and disengage: Unplug the opener and pull the release cord.
- Support the curtain: Use a helper and secure the door to prevent sudden movement.
- Clear the cause: Remove debris; check for a bent guide lip or loose bracket.
- Create a lead‑in: Slightly open the guide mouth at the snag with pliers; don’t remove the track.
- Re‑seat by hand: Feed the curtain edge back into the guide; raise/lower in small increments.
- Close and secure: Dress the guide lip back, tighten fixings, and test smooth travel by hand.
- Stop and call a pro: If slats are creased, the curtain has unwrapped from the drum, guides are twisted, or any spring/cable issues appear. Never loosen U‑bolts or touch springs under load.
Step 11. Motorised doors: sensors, limits, and force settings to stop random reversing
If the roller door runs smoothly by hand but reverses on power, the safety system is likely doing its job. Work methodically, correct the cause, and never “dial up” force to hide a mechanical fault.
- Clear the path: Remove objects/debris from the door’s travel.
- Clean/align sensors: Wipe both photo-eyes near the guides and aim them directly at each other.
- Set travel limits: Adjust close/open limits so the door seals without overdriving.
- Check force settings: Keep within the manual’s range; do not increase to overcome friction.
- Re-test: Run full cycles; the door should close smoothly without reversing.
Step 12. Remotes and keypads: batteries, reprogramming, and interference checks
Once the door runs smoothly by hand and on power, remote/keypad trouble is usually straightforward. As part of how to fix a roller door, start with simple checks, then reprogram. If several transmitters still fail after reprogramming, the opener’s receiver is the likely culprit.
- Replace batteries: Fit fresh cells in remotes/keypads and check polarity.
- Test another remote: Identify whether the fault is the remote or opener.
- Rule weak signal: Stand closer to the opener and try again.
- Reprogram correctly: Re-learn (or erase and re-add) remotes per the opener manual; if multiple remotes still fail, book a technician.
Step 13. Replace a worn weather seal to keep water, dust, and pests out
A cracked or flattened bottom seal lets in wind‑driven rain, grit and insects, and can make the door rattle. Replacement is quick and pays off immediately. Work with the opener unplugged and disengaged, and support the door so it can’t drop while you’re at the bottom rail.
- Confirm size/type: Measure the door width and buy a seal compatible with your bottom rail (follow the manufacturer’s spec).
- Remove and clean: Pull out the old seal and thoroughly clean the bottom‑rail channel.
- Fit the new seal: Feed it evenly into the channel; ensure continuous contact along the floor.
- Trim and secure: Cut ends square; refit end caps/stoppers if present.
- Re‑set close limit (motorised): Adjust so the door just compresses the seal without overdriving.
Step 14. Maintenance checklist and how often to service in Adelaide conditions
Adelaide’s sea air, dust and heat speed up grime and corrosion. A simple routine keeps your roller door smooth and reliable. Always unplug the opener and pull the release first. Do little-and-often, add a quick monthly check, and book servicing as usage and location demand.
- Fortnightly wash: Wash the door every 14 days; more often if coastal.
- Guides and lube: Clean guides with a rag dampened with turps/metho; never grease tracks or the lock; lightly oil moving parts; wipe springs with an oily rag.
Step 15. When to call a professional in Adelaide (springs, cables, structural damage)
There’s a clear line between smart maintenance and high‑risk repairs. Anything involving stored spring energy, cables, or a bent structure is not a DIY fix. A licensed Adelaide technician has the tools, jigs and know‑how to re‑tension safely, replace parts correctly, and reset limits without masking faults.
- Springs: Broken/weak torsion springs, loud “bang”, door heavy or won’t hold mid‑travel after light checks.
- Cables/drums: Frayed cables, bird‑nest wraps on drum wheels, shifting axle/U‑bolts, grinding at the drum.
- Off‑track damage: Creased slats, twisted guides, bent bottom rail after a derailment.
- Structural issues: Head brackets pulling out, cracked masonry or rotted timber where brackets fix.
- Opener faults: Burning smell, tripping power, chain/belt slipping, repeated reversing despite clean, free travel and aligned sensors.
- Persistent problems: Door still noisy, binding, or unbalanced after cleaning, tightening and light lubrication.
If you spot any of the above, stop work and book a qualified roller door/shutter specialist in Adelaide. They’ll balance and re‑tension correctly, replace worn components, and restore safe operation.
Final checks and next steps
You’ve worked through the smart fixes: clean guides, tighten hardware, light lube, alignment, and safe tests by hand. Before you call it done, run two or three full manual cycles, then re‑engage the opener and test powered travel. If it still feels heavy, binds, or reverses despite clean tracks and aligned sensors, stop and book a pro.
- Reconnect power; re‑engage the release cord.
- Set close/open limits and safe force.
- Door holds mid‑travel; heavy/light = pro job.
- Sensors clean/aligned; path absolutely clear.
- Guides clean (no grease); hardware snug.
- Bottom seal contacts the floor evenly.
- No coning; axle centred; bottom rail parallel.
- Add monthly clean; book periodic servicing.
Prefer a once‑and‑done fix or need help beyond DIY? Contact Roller Shutter Repairs Adelaide for friendly, local support and reliable repairs.