
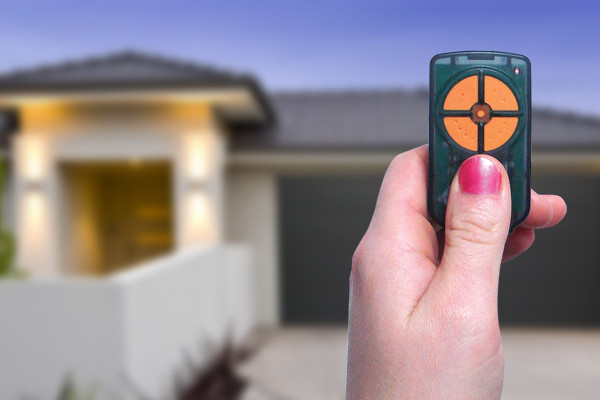
How To Reset A Garage Door Remote: Step-By-Step (Australia)
A garage door remote that stops responding is one of those small problems that disrupts your entire routine. You press the button, nothing happens, and suddenly you’re stuck in the driveway. In most cases, the fix is straightforward, you need to know how to reset a garage door remote, clear its memory, and reprogram it. It’s also a smart move when you’ve just moved into a new home and want to make sure no old remotes still have access to your garage.
At Roller Shutter Repairs Adelaide, we work on roller doors and roller shutters across Adelaide every day. That includes diagnosing remote and motor issues that homeowners assume need a full replacement when a simple reset would do the job. With over 20 years of hands-on experience, we’ve seen just about every brand and opener type installed in Australian homes and businesses.
This guide walks you through the full process step by step, from locating the learn button on your opener unit to re-syncing your remotes after a reset. Whether you’re troubleshooting a remote that’s stopped working or locking out old remotes for security, you’ll have everything you need to get it sorted yourself. And if the reset doesn’t fix the problem, we’ll point you in the right direction from there.
Before you start: what “reset” really means
Most people use “reset” to describe several different things, and knowing which one you actually need saves you a lot of time and frustration. Before you start learning how to reset a garage door remote, it helps to get clear on what the process involves, because choosing the wrong step first can mean you have to start over entirely or create new problems along the way.
The difference between erasing and reprogramming
Erasing the opener’s memory means wiping every remote, keypad, and vehicle HomeLink button that’s currently paired to your opener unit. After you do this, nothing works until you program devices back in from scratch. Reprogramming, on the other hand, simply adds a remote to the opener without clearing existing ones. If your remote stopped responding after a battery change or a power outage, reprogramming is usually all you need, and you won’t have to re-pair every other device you own.
If you erase the opener’s memory first and the remote still doesn’t respond after reprogramming, the fault lies with the remote hardware or the opener unit itself, not the pairing process.
When a full memory wipe makes sense
A full erase is the right move in specific situations. If you’re moving into a new home, clearing the memory ensures previous owners or occupants can no longer access your garage. It’s also the correct starting point if your opener has hit its storage limit, which varies by brand but commonly sits between 10 and 40 devices, causing unreliable behaviour across all your remotes.
Here are the three main scenarios where a full reset is the right call:
- Moving into a property with an existing opener already installed
- Lost or stolen remote that you can’t delete individually from the unit
- Opener behaving erratically because too many devices are programmed
Step 1. Do quick checks before you wipe codes
Before you go through how to reset a garage door remote, run through a few basic checks. A full memory wipe takes only minutes, but reprogramming every device afterwards takes longer, and it’s unnecessary if a simple fix resolves the problem.
Check the battery first
The most common reason a remote stops working is a flat or weak battery. Replace it with a fresh one before anything else. Common Australian garage door remotes use one of these battery types:
- CR2032 (thin coin cell, common in slim remotes)
- A23 (12V cylindrical, common in older models)
- 9V (used in some wall-mounted keypads)
A weak battery can cause intermittent signal loss that looks exactly like a pairing fault, so always rule this out first.
Check for signal and lockout issues
Stand within five metres of your opener unit and press the remote button. Interference from LED lighting, neighbouring systems, or metal structures can block or weaken the signal at longer distances. If the remote works up close but not from the driveway, the problem is signal interference, not the pairing.
Some openers also have a vacation lock or lockout mode that disables all remote signals. Check your wall control panel for a lock button and confirm it isn’t activated before deciding you need a full reset.
Step 2. Erase the opener’s memory of all remotes
Once you’ve confirmed the batteries are fresh and there’s no lockout mode active, you’re ready to wipe the opener’s memory. This is the core part of learning how to reset a garage door remote correctly. The process is quick and consistent across most Australian opener brands, though the exact button location and indicator light behaviour will vary.
Find the learn button on your opener
Your opener unit, mounted on the ceiling near the door, has a learn button (sometimes labelled “program” or “smart”) on its back or side panel. The button colour depends on the brand and model:
| Button colour | Common brand |
|---|---|
| Yellow | Chamberlain, Merlin |
| Purple | LiftMaster |
| Orange or red | Gliderol, B&D |
| Green | Linear |
Press and hold to clear the memory
With the button located, press and hold it for six to ten seconds until the indicator light beside it blinks twice or turns off completely. That light change confirms the opener has erased all paired devices.
Once the memory is cleared, no existing remote, keypad, or car button will operate the door until you re-pair them in Step 3.
Release the button and test an old remote to confirm the wipe worked before moving on.
Step 3. Reprogram remotes, keypads, and car buttons
With the memory cleared, you can now re-pair every device you want to use. This is the step that ties the whole process together when learning how to reset a garage door remote, so work through each device one at a time to avoid confusion about which ones have successfully paired.
Pair a handheld remote
Press and release the learn button on the opener unit once (do not hold it this time). Within 30 seconds, press and hold the button on your remote until the opener light blinks or you hear two clicks. That confirms the pairing is complete. Test the remote from the driveway to confirm it operates the door at full range.
If the light doesn’t blink, repeat the process within the 30-second window and make sure you’re pressing the correct button on the remote.
Add a keypad or HomeLink car button
Keypads follow the same pairing sequence: press learn on the opener, then enter your chosen PIN on the keypad and press enter to confirm. For HomeLink buttons built into your car’s sun visor, hold the car button and the learn button simultaneously until the opener light blinks. Repeat this step for every additional device you need to register before moving on.
Step 4. Troubleshoot the most common reset failures
If you’ve worked through the steps above and something still isn’t responding, a handful of specific, fixable faults cover the majority of reset failures. Running through them one by one helps you pinpoint the exact problem without guesswork, rather than repeating the full process of how to reset a garage door remote from scratch.
The remote won’t pair after the memory wipe
The most likely cause is timing. You have a strict 30-second window between pressing the learn button on the opener and pressing the button on your remote. If that window closes first, the opener exits programming mode silently and the pairing attempt fails.
Check you’re pressing the correct button on your remote, as some multi-button models only pair on button one.
Run the sequence again and move quickly between steps. If you keep missing the window, stand closer to the opener unit while pressing the remote button to reduce any signal delay.
The opener light doesn’t respond during the erase step
This typically means you didn’t hold the learn button long enough during the wipe. Most Australian openers need a full eight to ten seconds before the indicator light blinks or turns off, so hold it steady and count.
If the light still doesn’t change, confirm the unit has mains power by pressing the wall button. Check whether the opener’s ceiling light activates normally when you trigger the door from inside.
If it still won’t work
Running through how to reset a garage door remote fixes the problem in most cases, but some faults sit beyond the pairing process entirely. If you’ve replaced the battery, cleared the memory, and reprogrammed your devices with no result, the issue is most likely a worn-out remote, a failing receiver board, or a faulty motor unit that needs a technician’s hands on it.
Remotes that are physically damaged, waterlogged, or simply old may fail to transmit a signal even after a successful pair. In that case, replacing the remote is the most direct fix. Your opener’s brand and model number will tell you the correct replacement to source from an Australian supplier.
When the opener unit itself isn’t responding to anything, including the wall button, the motor or control board may have failed. At that point, a professional inspection is the right move. Contact the team at Roller Shutter Repairs Adelaide and we’ll diagnose the fault and get your door working again.