Residential Security Shutters: Prices, Reviews, Installation
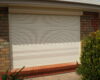
Residential security shutters are external roller blinds made from interlocking slats (typically aluminium) that roll down over windows and doors. Operated by a strap, crank or electric motor, they create a strong barrier that deters break-ins, blocks prying eyes, and helps control light, heat and noise. Because they sit outside the glass, they also shield against storm debris and harsh sun – a practical, long-lasting way to lift comfort, privacy and security at home.
In this guide you’ll find the essentials to choose, budget and install with confidence: shutter types and materials; manual, electric and solar drives; smart controls; Australian safety and compliance; bushfire and severe-weather performance; a clear price guide with typical costs; DIY vs professional installation; what to expect on the day; how to read reviews and compare suppliers; Adelaide-specific tips; maintenance and upgrades; alternatives; and FAQs.
Who should consider residential security shutters
Residential security shutters suit homeowners who want stronger street-level security, better sleep and comfort, or protection from weather. If your windows face the street, back onto laneways, or bear harsh afternoon sun and wind, shutters add control and peace of mind. They’re popular with shift-workers needing blackout, families on busy roads needing noise reduction, coastal and hills properties seeking storm resilience, those upgrading older homes for insulation, and anyone who prefers low-effort electric operation for accessibility.
Key benefits: security, privacy, climate control and noise
Residential security shutters deliver four big wins in daily living: stronger security, true privacy, better climate control and real noise relief. The aluminium curtain forms a rigid barrier outside the glass, so you decide what gets in—people, light, heat and sound. In hot Adelaide summers and during wild winter fronts, that control means calmer rooms, safer windows and more comfortable sleep.
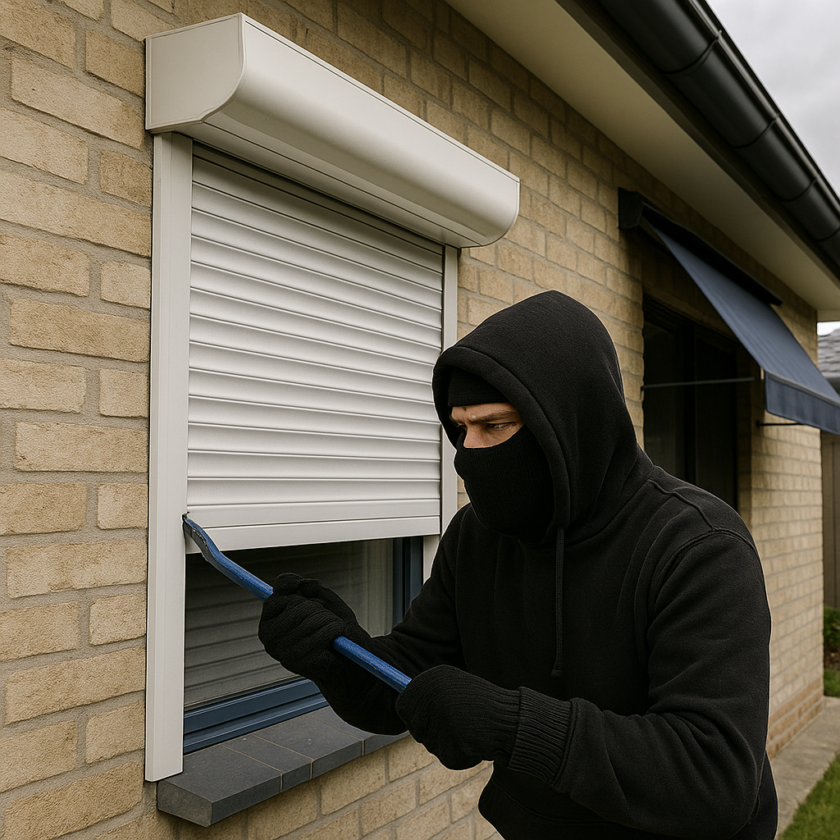
- Security: External aluminium barrier resists prying and opportunistic forced entry; locks when fully closed.
- Privacy and light: From blackout to filtered; vented slats allow daylight and airflow when partially open.
- Climate control: Foam-filled slats and exterior shading reduce heat gain/loss, easing air con reliance.
- Noise reduction: Shutter mass and air gap soften traffic, wind and neighbour noise for better rest.
Shutter types and materials explained
Most residential security shutters use interlocking aluminium slats that roll into a compact headbox. Slats come in two broad builds: lighter, foam‑filled aluminium for insulation and everyday security, and thicker‑gauge aluminium for higher strength. Domestic profiles are commonly around 40–42 mm, with optional vent holes for daylight and airflow when partly open. Frames, side guides and the drum sit outside the window; materials and hardware specifications vary by supplier. When comparing quotes, ask for slat profile and wall thickness details, so you’re weighing like‑for‑like strength and finish.
- Foam‑filled aluminium: Cost‑effective, insulating, quiet, suits most window spans.
- Thicker‑gauge aluminium: Stronger curtain, better for wide openings and higher‑risk spots.
- Vented slats: Add light/ventilation control; reduce glare without losing privacy.
Manual, electric and solar: which drive suits your home
Your choice of drive changes how your residential security shutters feel day to day. Consider window size and weight, how often you’ll operate them, accessibility needs, wiring access, and whether you want grouped control. Retrofits on double‑brick or heritage walls often favour no‑wiring solutions, while large spans benefit from powered lift for smooth, reliable operation.
- Manual: Strap or winder, no wiring, budget‑friendly for small to medium windows. Simple and robust, but less convenient on multiple openings and can be harder to lift on wider shutters.
- Electric (mains): Quiet, powerful motors ideal for larger shutters and frequent use; supports switches, remotes and group control. Requires licensed electrical work and consider outage contingencies.
- Solar: Panel on the headbox avoids cabling—great for retrofits or where power isn’t nearby. Check panel aspect/shading and battery capacity to ensure dependable daily operation.
- Upgrading later: Many manual systems can be converted to electric with a motor kit if you want to start simple and add convenience later.
Smart controls and automation features
Smart controls make residential security shutters easy to live with. With electric or solar motors, add wall switches, remotes or a small gateway for app control. Set shutters to open with the morning, close at dusk, and coordinate rooms for comfort, privacy and security—no daily fiddling.
- Schedules and scenes: Wake, movie, bedtime presets at a tap.
- Group control: Open/close whole floors or façades together.
- App and voice control (via hub): Phone control and popular assistants.
- Geofencing/away mode: Auto-close when you leave; randomise while away.
Security, safety and compliance in Australia
In Australia, residential security shutters should balance strength with safe, compliant operation. A sound setup pairs an aluminium curtain with deep side guides, a solid bottom bar and the right fixings into masonry or timber framing. Just as critical are safe controls—properly matched motors, correctly set travel limits, and a plan for access if power fails. Use this checklist to frame a clear, accountable installation brief.
- Licensed electrical work: Wired motors and switches must be installed by a licensed electrician; confirm isolation switch location.
- Emergency access: Ensure motorised shutters include a manual override and keep the winder key accessible.
- Egress planning: Don’t shutter the only escape window in a bedroom; nominate a door or alternate exit.
- Obstacle protection: Ask for obstacle detection and precise limit-setting to prevent overrun or crushing.
- Anchoring and fixings: Specify fixings suited to your wall type and local wind exposure; request like-for-like details in quotes.
- Documentation and approvals: Collect product specs, warranty and maintenance schedule; obtain strata/council approval for façade changes where required.
Bushfire and severe weather performance
For Adelaide’s hot, windy summers and sudden winter fronts, residential security shutters add a practical outer shield. In bushfire‑prone areas like the Hills, the main risk is ember attack; in storms, it’s windborne debris and driven rain. Performance comes down to metal construction, tight sealing, sturdy guides and correct fixings—plus how you use and maintain the system.
- Ember resistance: Choose aluminium slats with an enclosed headbox, tight side guides, brush seals and closeable vent holes; operate fully closed on high‑risk days.
- Heat exposure: Aluminium tolerates radiant heat better than plastics; avoid components that can soften. Shutters complement—not replace—bushfire‑compliant glazing and screens.
- Wind and impact: Deep side guides, quality end‑clips and a solid bottom bar improve retention against gusts and debris; ask suppliers for stated wind performance.
- Power and egress: Ensure a manual override for outages and keep exits usable.
- Upkeep: Clear leaves from guides, check seals, and clean solar panels so batteries charge ahead of extreme weather.
Price guide in Australia: what affects cost
Across Australia, prices for residential security shutters hinge on window size, slat profile, drive system and how tricky the install is—not just postcode. A small, manual, foam‑filled shutter is at the entry point; wider spans, thicker‑gauge slats, motorisation and smart control step the budget up. Site access, wall type and finish choices also matter. Understanding these levers helps you compare quotes like‑for‑like and avoid surprises.
- Size and quantity: Bigger/wider openings and more shutters mean more material and labour.
- Slat profile/thickness: Foam‑filled aluminium is economical; heavier‑gauge boosts strength and cost.
- Drive type: Manual is cheapest; electric and solar add motors, controls and set‑up.
- Controls and smart: Switches, remotes, hubs and integration increase hardware and commissioning.
- Install complexity: High installs, double‑brick/stone, scaffolding or awkward access add labour.
- Guides/headbox hardware: Deep side guides, enclosed headboxes and quality end‑clips cost more but improve performance.
- Finish and colour: Standard colours are sharper priced; custom powder coat attracts a premium.
- Weather/bushfire options: Seals, wind retention and ember‑resistant detailing add to the spec.
- Electrical works: New circuits, isolators or solar placement affect the final bill.
Typical costs for manual, electric and upgrades
Actual prices for residential security shutters vary by size, slat profile, drive type and installation complexity. As a broad indicator from online sources, roller shutters can range anywhere between $300–$1,000, with material, manual versus electric motorised operation and quality all affecting the total. Custom colours, deeper side guides and tricky access also add to the bill, while DIY kits can price lower than fully measured-and-installed solutions.
- Manual (entry-level): Most budget-friendly for small to medium windows; simple parts and no wiring keep costs down.
- Electric (mains): Adds motor, controls and licensed electrical work; better for larger spans and frequent use.
- Solar: Typically a premium over mains electric due to panel and battery, but can avoid cabling.
- Motor replacements: Often cheaper than full new shutters; useful when the curtain and guides are sound.
- Manual-to-electric conversions: Pay for the motor kit and fitting; optional remotes/hubs add to the upgrade.
DIY kits vs professional installation
DIY roller shutter kits can work well on straight, ground‑floor windows where access is easy and you’re comfortable drilling into masonry. They suit manual drives best; solar and electric add complexity, and any mains wiring must be done by a licensed electrician. For larger spans, upper floors, or when you want guaranteed fit and finish, professional installation of residential security shutters is the safer bet.
- DIY pros: Lower cost, flexible timing, satisfying if you’re handy.
- DIY cons: Risk of mis‑measurement, alignment issues, masonry drilling, limited recourse if errors, electrician needed for wiring.
- Pro install pros: Precise measuring, structural fixings, neat finish, limit‑setting and commissioning, warranty accountability, safer at height.
- Pro install cons: Higher upfront cost, schedule lead times.
What to expect during installation
On install day you want a tidy, methodical process that ends with a neat fit and smooth, safe operation. Good installers plan access, protect floors and glazing, and communicate before drilling. Here’s the usual flow for residential security shutters, whether it’s one window or a whole façade.
- Pre‑start check: Final measure, confirm side (reveal or face) mounting, controls and opening direction.
- Site prep: Drop sheets, mark fix points, verify services in walls before drilling.
- Mount hardware: Fit headbox level, align deep side guides, and square everything to the opening.
- Hang curtain: Feed slats, set end‑clips, bottom bar and stoppers; check travel is smooth.
- Power and limits: Licensed electrician connects motors or solar gear; installer sets upper/lower limits and tests obstacle response.
- Sealing and finishing: Weather seal where needed, cap fixings, tidy cabling and clean down.
- Handover: Demonstrate operation, provide warranty, care and emergency override instructions.
Style choices: slat size, box profile and colours
Beyond strength, the look of residential security shutters can lift your street appeal. Slat size influences lines and light: slimmer domestic profiles around 40–42 mm read finer on smaller windows, while heavier profiles suit wider spans and higher exposure. The headbox and side guides frame the view, so choose shapes and colours that blend with frames, gutters and façade tones.
- Slat size and vents: 40–42 mm foam‑filled slats are common; add vented slats if you want filtered daylight.
- Box profile: Compact, square or rounded headboxes; deeper boxes suit larger curtains and long drops.
- Colours and finish: Powder‑coated guides, box and bottom bar in standard neutrals or custom hues to match existing trim for a cohesive façade.
Measuring, quoting and lead times
Accurate measuring and a like‑for‑like quote are the difference between smooth delivery and avoidable delays. For residential security shutters, decide on face or reveal mount, check for obstructions (awnings, taps, lights, cameras), and allow space for the headbox and side guides. If motorised, plan power points or solar panel aspect early. Lead times vary with season, colour choice and installer workload, so book ahead—especially before summer—while repairs and standard colours typically move faster than custom builds.
- Measure right: Take width at top/middle/bottom and drop at both sides; use the smallest width and note any out‑of‑square.
- Headbox and guides: Confirm clearance to eaves, lintels and sills; choose guide depth suited to wind exposure.
- Power/solar planning: Identify switch locations, isolation needs, or solar panel sun access; note any cabling constraints.
- Photos and access: Provide clear photos, heights and access notes (ladders/scaffolds) to speed quoting and scheduling.
- Quote like‑for‑like: Ask suppliers to specify slat profile, wall thickness, guide depth, headbox size, drive type, controls and colour.
- Inclusions: Clarify electrical works, disposal of packaging, sealing, warranties and any strata/council requirements.
- Lead times: Expect longer for custom colours or large orders; lock in install dates once deposits and final measures are complete.
How to read reviews and compare suppliers
Strong reviews help you separate slick sales talk from proven delivery on residential security shutters. Look for patterns across platforms, not just star averages. Detailed, recent, local feedback that mentions installation quality, tidiness, commissioning and after‑sales support is more telling than short praise. Then, compare quotes side‑by‑side on specification, not just price.
- Recency and locality: Favour recent Adelaide jobs with suburb names and photos.
- Detail over stars: Mentions of measuring accuracy, neat cabling, limit‑setting and cleanup.
- Negative review handling: Professional, timely responses and fixes show accountability.
- Spec transparency: Quotes list slat profile, wall thickness, guide depth, headbox size, drive and controls.
- Licensed works noted: Clear allowance for electrical/solar commissioning and isolation switches.
- Warranty and service: Written terms for motors, parts and labour; stated response times.
- Like‑for‑like price: Same sizes, colours and inclusions; note exclusions and lead times.
Adelaide buyer’s checklist: local climate and compliance tips
Adelaide swings from scorching northerlies to chilly coastal fronts, with salt air on the coast and ember risk in the Hills. To get long‑term performance from residential security shutters, match the spec to your suburb and lock down safe, compliant installation before you sign.
- Sun and heat: Prioritise west‑facing windows; lighter colours reflect more heat.
- Wind exposure: Deeper side guides and correct fixings for coast/Hills sites.
- Bushfire readiness: Aluminium curtain, enclosed headbox, seals; manual override; keep an alternate exit.
- Coastal corrosion: Marine‑grade powder coat, stainless fixings; rinse salt regularly.
- Noise corridors: Heavier‑gauge slats and snug guides improve acoustic comfort.
- Power and wiring: Licensed electrician, isolation switch; ensure manual override; solar needs unshaded, north‑facing aspect.
- Clearances: Confirm headbox/eave space and avoid clashes with awnings, cameras or lights.
- Approvals: Check heritage/strata and any council rules affecting façade appearance.
- Support: Prefer local warranty and service; book installs ahead of summer storms.
Maintenance and repairs: servicing schedules and common fixes
Well‑maintained residential security shutters run quieter, seal better and last longer. In Adelaide’s dust, wind and salt air, plan light cleaning every 3–6 months and a yearly service for high‑use or coastal sites. Operate each shutter weekly, and listen for changes in speed or noise that signal wear. Avoid pressure washers and solvent sprays; gentle cleaning and correct lubrication protect motors, slats and guides.
- Routine upkeep: Hose off gently, wipe slats and clear side guides; clean solar panels; check paint for chips near the coast.
- Quick user checks: Test up/down, confirm limits stop cleanly, replace remote batteries, and practise the manual override.
- Lubrication: Use a dry silicone spray on guides and rubber seals; avoid oil‑based sprays that attract grit.
- Common fixes: Frayed straps or winders, limit drift, noisy or jerky travel from dry guides, jammed slats/end‑clips, worn bottom‑bar stoppers, sluggish motors (often capacitor related).
- Call a pro when: Motors overheat or won’t hold, wiring is exposed, solar/battery won’t charge, curtains are misaligned, or there’s storm/impact damage—especially on windows used for egress.
- Post‑storm routine: Remove debris from guides, check seals and stoppers, and re‑test limits on all roller shutters before returning to normal use.
Upgrades for existing shutters: motor replacements and manual-to-electric conversions
Upgrading existing shutters is often faster and far cheaper than full replacement. If the curtain, side guides and headbox are sound, a new tubular motor or a manual‑to‑electric conversion breathes life into residential security shutters, adding smooth, push‑button control and grouped operation without touching the window frame or façade.
- Motor replacement: Sluggish travel, stalling or drifting limits; match torque and tube size; include a manual override.
- Manual‑to‑electric: Add motor plus power/solar and switch/remote; use a licensed electrician and plan an isolation switch.
- Keep vs replace: Upgrade if slats/guides are straight; replace if the curtain is bent, guides damaged or hardware corroded.
- Smart‑ready: Start with a remote; add a hub later for app schedules and groups.
- Quote essentials: Measurements, slat profile, guide depth, headbox clearance, motor brand/spec and written warranties.
Alternatives to shutters: security screens, laminated glass and bars
Not every opening needs the full blackout, noise and climate control that residential security shutters provide. If you’re focused mainly on daytime airflow, discreet strengthening or heritage aesthetics, these alternatives can be smart, budget‑savvy complements—or interim steps until you add roller shutters to key rooms.
- Security screens: Stainless mesh resists forced entry while keeping breezes and light; great for daytime ventilation. They don’t blackout or cut road noise like shutters.
- Laminated glass: Holds together when broken and adds acoustic/UV benefits, but it doesn’t shade or deter like an external barrier.
- Bars/grilles: Strong, low‑maintenance deterrent, yet impacts street appeal and must preserve safe egress; no thermal or blackout gains.
FAQs about residential security shutters
As you shortlist residential security shutters, the same questions come up. Use these quick answers to compare options confidently and avoid surprises during quoting and installation.
- How much do they cost? Broad online ranges run around $300–$1,000 depending on size, drive and quality; fully measured-and-installed solutions price higher than DIY kits.
- Do they block all light? Fully closed, yes. Vented slats let in filtered daylight and airflow when partially open.
- Can they be retrofitted? Usually, with face or reveal mounting. Plan power for motorised models or consider solar.
- What about blackouts? Specify motors with a manual override and keep the winder key accessible.
- Do I need approval? Heritage and strata façades may require permission—check before ordering.
- Are they noisy? Quality shutters are quiet; squeaks or jerks often signal dry guides or wear—book a service.
- Coastal homes? Choose marine‑grade powder coat and stainless fixings, and rinse salt periodically.
- DIY or sparkie? DIY suits manual kits; all mains wiring for residential security shutters must be done by a licensed electrician.
Next steps
You’re now ready to choose a spec that suits your home: slat profile, drive (manual, electric or solar), smart controls, and a safe, compliant installation. The simplest move is to book an accurate measure and like‑for‑like quote with a trusted local. For fast advice, upgrades or new installs across Adelaide and surrounds—with no call‑out fees—speak with the team at Roller Shutter Repairs Adelaide and get your shutters working the way they should.