Roller Shutter Maintenance Guide: Step-by-Step PDF Checklist
Roller shutters work hard in Adelaide—shielding your home from heat, glare, noise and break-ins. But grit in the guides, salt in the air, sticky sprays, or over-cycling a motor can quickly turn a smooth shutter into a noisy, jerky, or jammed one. Leave it too long and you risk expensive repairs, voided warranties, and a shutter that won’t budge on the one day you really need it.
The good news: keeping shutters reliable doesn’t require specialist tools or hours of your weekend. With a clear routine, safe cleaning, the right (non-sticky) products, and a few simple checks, you can prevent most faults before they start. This guide lays out exactly what to do—and when—plus a printable PDF checklist you can stick in the cupboard and tick off in minutes.
Inside, you’ll identify your shutter type and parts, make the area safe, and run a quick monthly inspection. You’ll learn how to clean slats, guides and pelmets correctly, tighten fixings, test travel and balance, care for seals, and—if motorised—check controls, limits and batteries. We’ll troubleshoot common issues, tailor the routine for Adelaide conditions, map out a simple service schedule, and explain when to call a professional and how to protect your warranty. Grab the checklist and let’s get started.
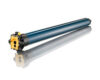
Step 1. Identify your shutter type and key parts
Before you touch a thing, confirm what you have. Is it manual (strap, winder or spring‑assist) or motorised (wall switch, remote, smart hub)? Knowing the setup and the parts you’ll be working around makes this roller shutter maintenance guide safer and faster.
- Curtain/slats: The moving panels.
- Side guides/tracks: Vertical channels the slats run in.
- Bottom bar & weather strip: Seals against the sill.
- Pelmet/headbox: Covers the roll and mechanism.
- Drive: Axle and springs or an electric motor.
- Controls: Strap/winder, wall switch, remote, battery backup.
Step 2. Gather tools and make it safe
A little prep makes maintenance faster and prevents damage. Lay a towel at the sill, clear the area, and have everything to hand so you’re not juggling a running shutter and missing tools.
- Tools: soft broom/brush, soft sponge, bucket with warm water + mild detergent (dishwashing liquid), garden hose (gentle spray), microfibre cloths, torch, screwdrivers/spanners, stable ladder; non‑silicone, anti‑static dry spray only if specified (see Step 5).
- Make it safe: for motorised shutters, switch power off at the wall/circuit; close windows before lowering; keep fingers out of guides; don’t operate if the shutter shows faults; avoid high winds and secure the ladder; if a motor trips, wait 15–20 minutes for thermal reset.
Step 3. Do a 5-minute monthly inspection
This is your quick health check to catch problems early before they become repairs. You’re looking for debris, damage and signs of strain, not fixing anything yet. Keep it gentle—do not force a stuck shutter and don’t use lubricants in this step. If anything seems off, you’ll address it in later steps.
- Lower to vented: Use a torch to spot debris in the guides.
- Scan surfaces: Look for dents, corrosion, bird droppings, sap or salt haze.
- Check fixings: Ensure guide screws, brackets and pelmet cover are secure.
- Inspect seal: Bottom weather strip shouldn’t be torn, flat or missing.
- Run once (if safe): For motorised units, briefly power on, cycle up/down, listen for scraping or grinding, watch for racking or hesitation, then isolate power again.
- Note issues: Flag anything abnormal for Step 4 cleaning or a technician if severe.
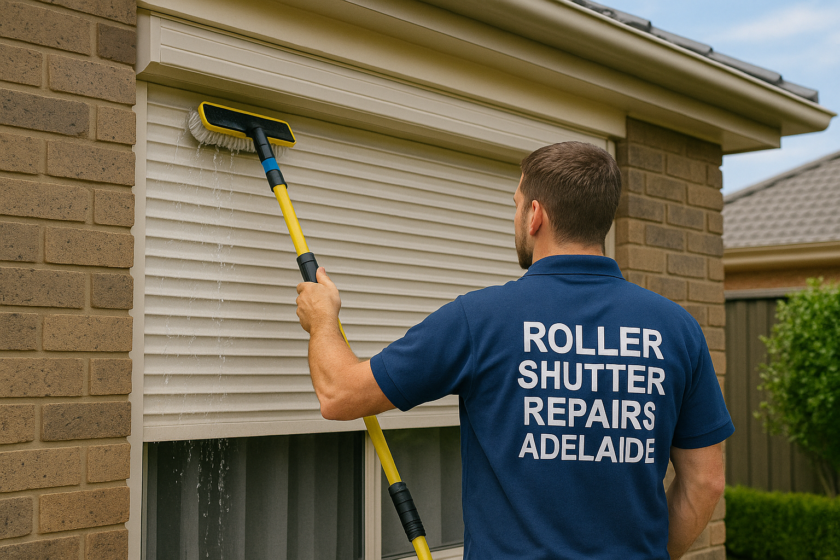
Step 4. Clean slats, guides and pelmets the right way
Most stiffness and noise disappear with a proper clean. Protect the baked‑enamel finish by keeping things gentle—no abrasives or harsh chemicals, and don’t blast the headbox. Pre‑wet surfaces, then let grime soak for 5–10 minutes so time, not force, does the hard work.
- Lower to vented; close windows.
- Dust slats and guides with a soft broom.
- Gentle hose pre‑rinse; never pressure‑wash.
- Wash with warm water + mild detergent; soft sponge. Open vents to wipe between slats and clear guides.
- Rinse, then dry fully with microfibre; leave down. Stubborn stains: dab methylated spirits. Pelmet: wipe exterior only.
Step 5. Avoid sticky lubricants; use only if specified
Most roller shutters are designed to run dry. Sticky lubricants (silicone, oil, grease) trap dust, clog guides and can damage finishes or void warranties. Only lubricate if your manufacturer explicitly recommends it—then use a non‑silicone, anti‑static dry spray, sparingly. Never spray inside pelmets or onto electrics.
Step 6. Check and tighten fixings and hardware
Loose hardware makes shutters rattle, bind in the guides and wear prematurely. After cleaning and drying, work methodically from top to bottom with the power isolated (for motorised). Use the right screwdriver/spanner and firm, not forceful, pressure. If a fastener spins, is rusted or the substrate is cracked, stop and call a technician.
- Guide screws and brackets: Snug up fixings securing side tracks to the wall; check for gaps or movement.
- Pelmet/headbox cover: Confirm cover screws/clips are secure; do not open the pelmet unless power is off.
- Bottom bar and end caps: Tighten loose screws/rivets; check the locking stoppers are intact.
- Curtain stops/limit blocks: Ensure top stops are present and tight to prevent over‑rolling.
- Controls: Tighten strap/winder plates, wall switch fascias and remote wall mounts.
- Motor/axle mounts (visual check): Look for missing bolts or sagging mounts—do not adjust springs or motor mounts yourself.
Step 7. Test for smooth travel, alignment and balance
This quick test confirms your clean and tighten has paid off. For motorised shutters, restore power. Run only controlled cycles—never force movement, and don’t cycle more than three times in a row. If the motor cuts out, wait 15–20 minutes for thermal reset.
- Smooth run: Raise fully and lower once. Listen for scraping, grinding or squeals; note any hesitation or binding points.
- Alignment: Gaps should be even both sides; the bottom bar should meet the sill level. One end high/low = misalignment—stop and investigate.
- Balance (manual): Mid‑height, the curtain shouldn’t free‑fall or need excessive effort. A sudden drop suggests spring/drive issues—book a technician.
- No racking: The curtain shouldn’t twist or “lead” on one guide. If it does, stop use and seek professional assessment as part of this roller shutter maintenance guide.
Step 8. Keep seals and weather strips healthy
Seals and weather strips do the quiet work—keeping out draughts, grit and water while cushioning the bottom bar. When they harden or split, shutters get noisy, leak and wear faster. Keep them clean and supple and replace at the first signs of failure.
- Clean and clear: Wipe the bottom seal and brush/felt guide inserts; remove grit.
- Inspect damage: Look for cracks, flattening, gaps or frayed brush—replace if found.
- Keep flexible: If left open, cycle weekly; if kept closed, cycle every two weeks.
- No lubricants: Don’t apply silicone, oil or grease to seals or guides.
Step 9. If motorised: test controls, limits, batteries and safety
With motorised shutters, a quick controls-and-safety test prevents surprises. Isolate power for physical checks; when live-testing, don’t cycle more than three times. If it cuts out, wait 15–20 minutes for thermal reset before trying again.
- Controls: wall switch responds; remote battery fresh and channels select.
- Limits: top/bottom stops land cleanly; no over‑roll, stall or drift.
- Safety/override: manual release reachable and working; never force movement.
- Battery backup: every 6 months kill mains, run one shutter; reboot after outages.
Step 10. Troubleshoot common problems early
Catch faults early and you’ll avoid costly repairs. Always isolate power, work gently and never force a stuck curtain. Most issues trace back to dirt, loose fixings or a tripped motor—use this roller shutter maintenance guide to diagnose fast.
- Jammed mid‑travel: Isolate. Clear grit from guides. Don’t force. Re‑test.
- Noisy: Clean slats/guides; tighten fixings. Avoid all lubricants.
- Motorised won’t move: Check power, remote battery, limits. Over‑cycled? Wait 15–20 min.
- Manual won’t move: Strap/winder damaged—stop and book repair.
- Uneven/racking: Bottom bar not level—stop; needs technician.
- Draughts/leaks: Replace worn bottom weather strip; clean brush/felt inserts.
Burning smell, grinding or repeated trips: isolate power and call a professional.
Step 11. Adjust your maintenance for Adelaide conditions
Adelaide’s salty coast, leafy hills and dusty northerlies mean your routine should reflect where you live. Adjust the rhythm below to protect finishes, guides and motors year‑round, using the frequencies from this roller shutter maintenance guide as your baseline.
- Coastal: full wash every 2 months; wipe salt haze from the pelmet between cleans to prevent corrosion.
- Hills/rural: clear guides of twigs and leaves monthly; wash every 4 months.
- After winds/heat: quick debris check; run a single test cycle; if a motor trips, wait 15–20 minutes before retrying.
Step 12. Follow a simple service schedule (monthly, quarterly, yearly)
Keep maintenance quick and predictable. Use this simple schedule, adjust for your area (Step 11) and your manufacturer’s advice, and keep brief dated notes for warranty support.
- Monthly (5 minutes): Quick inspection, clear grit from guides, wipe bottom seal, run one gentle cycle.
- Quarterly (20–30 minutes): Wash slats and guides, dry thoroughly, tighten fixings, test smooth travel/alignment, verify motorised controls/limits. Test battery backup at least every 6 months.
- Yearly: Professional service for heavy‑use, commercial or fire‑rated shutters; replace worn weather strips; lubricate only if your model specifies a non‑silicone, anti‑static dry spray; confirm warranty requirements.
Step 13. Download and use the printable PDF checklist
Download the printable PDF checklist that accompanies this roller shutter maintenance guide. Save it to your phone or print and stick it inside the meter cupboard. Tick off monthly, quarterly and yearly tasks, add dates and notes, snap a photo after each service, and set calendar reminders so nothing gets missed—all the essentials on a single page.
Step 14. Know when to book professional servicing
Some issues need a qualified technician. An annual service is wise for motorised, heavy‑use or fire‑rated shutters, and DIY repairs can void warranties. Pros can safely deal with springs, motors and electrics, set limits correctly, and spot wear you’ll miss.
- Burning smell, grinding, or repeated motor trips.
- Uneven travel or a crooked bottom bar.
- Jammed curtain, dented slats, pelmet moving.
- Broken strap/winder, failed spring, seized bearings.
- Limits drifting, over‑rolling, or stopping short.
- Electrical faults or storm/impact damage.
If in doubt, stop using the shutter, isolate power (motorised) and book a local technician promptly.
Step 15. Protect your warranty and compliance

Warranties and safety are simple: follow the manual, don’t modify the system, and keep records. Many manufacturers forbid DIY repairs on motors/springs and warn against silicone or oily sprays. Good documentation and licensed work keep you compliant and covered if something fails.
- Keep records: dated log, photos and service invoices.
- Approved care only: gentle cleaning; no abrasives; no silicone/oily sprays.
- No DIY adjustments: don’t open pelmets or set springs/limits—book a tech.
- Licensed work: electricians for wiring/battery backups; fire‑rated units need documented annual servicing.
Wrap up and next steps
A few minutes each month, a gentle quarterly clean and a yearly professional check can keep your shutters quiet, safe and reliable for years. Follow the steps above, avoid sticky sprays, and you’ll prevent most jams, noise and wear before they start while keeping warranties intact.
Download the PDF checklist, print it, and stick it in your meter cupboard. Set calendar reminders for monthly, quarterly and annual tasks. If you notice uneven travel, repeated motor cut‑outs, damaged seals or it’s simply been 12 months since your last service, it’s time to book a pro. Our Adelaide technicians bring 40+ years’ know‑how, fast response, quality parts and no call‑out fees—servicing all suburbs, the Hills and Barossa.
Ready for help or a scheduled service? Contact Roller Shutter Repairs Adelaide today: Roller Shutter Repairs Adelaide.