How to Replace Your Roller Shutter Cord: Parts, DIY & Costs
Frayed strap, shutter refuses to budge, or the cord slips through your fingers? Chances are the woven belt hidden behind the wall plate has reached the end of its life. Swapping it for a new 14 mm polyester strap is usually a one-hour, AU$15–$60 job: pop off the pelmet, release the winder drum, thread the fresh cord through the pulley, tension the spring, and you’re done. Get any step wrong, however, and you risk a runaway shutter or a jammed axle.
This guide shows you how to tackle the task safely and cheaply—diagnosing the fault, choosing parts, tools you already own, and each stage of the replacement. You’ll also find tables of local Adelaide prices, tips to keep the strap running smoothly for years, and a reality check on when calling a technician is the smarter move. If your shutter sits above ground level or the axle feels heavy, consider professional help. Otherwise, let’s get that curtain rolling again.
Step 1 – Confirm the Cord Is the Real Issue
Before buying parts or reaching for a screwdriver, make sure the humble roller shutter cord is actually to blame. A jammed shutter can stem from a bent slat, seized axle bearings, or a burnt-out motor just as easily as a frayed strap. A two-minute diagnosis spares you an afternoon of head-scratching later.
Spot the tell-tale signs of cord failure
- Fluffy fibres or nicks where the strap exits the wall plate
- Cord slipping or “jumping teeth” when you pull the winder
- Shutter starts, then stalls halfway, yet feels light when lifted by hand
- Visible thinning or discolouration near the pulley wheel
- No grinding noises from inside the pelmet (points to strap rather than axle)
If you hear metal scraping, see lopsided slats, or notice the shutter dropping under its own weight, look beyond the cord—springs or slats may be the culprits.
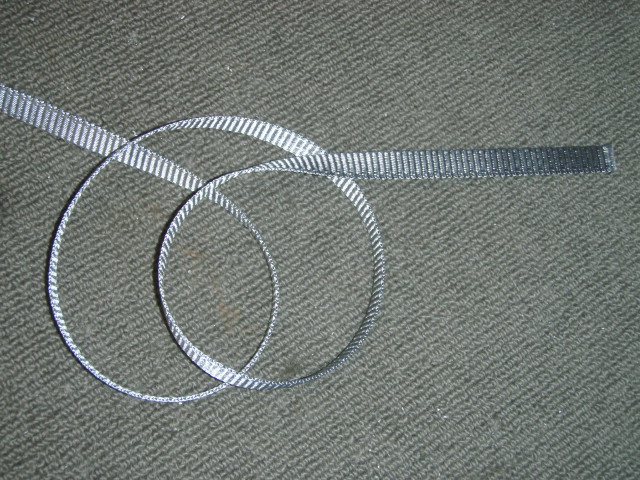
Identify your cord type, width, and length
Roller shutters use either:
- 14 mm flat woven strap (most South Australian installs)
- 5 mm round polyester rope found on older timber boxes
Measure the width at the wall plate with a ruler—no need to remove the pelmet. As for length, a quick rule of thumb is:
usable opening height × 2 + 0.5 m = strap length
Most standard windows land at ~5 m; patio doors can need 8–10 m. Some brands tint straps grey or beige to match facias—note yours if aesthetics matter.
Decide on repair, upgrade, or pro service
Replace the cord if:
- The strap is frayed but the shutter otherwise runs true
- You’re comfortable with basic hand tools and can reach the pelmet safely
Consider upgrading to an electric motor or calling a technician when:
- Multiple shutters need work—bulk labour is cheaper per unit
- The shutter is on the first floor or heavier than expected
- You fancy a push-button remote instead of ongoing strap maintenance
Confirming the problem now keeps your fix focused and your weekend intact.
Step 2 – Source the Correct Parts and Tools Before You Start
Nothing stalls a Saturday project like discovering halfway through that you’re missing a $2 screw or the right-size strap. A quick parts run before you pop the pelmet off your window keeps the shutter – and your mood – rolling smoothly. Below you’ll find the minimum gear for a plain cord swap plus a few “nice-to-replace-while-you’re-there” items. Grab everything first and you’ll finish the job in one hit instead of three.
Essential parts checklist
| Part | Typical spec | Average price (AU$) | Where to find it* |
|---|---|---|---|
| Replacement strap / roller shutter cord | 14 mm UV-stabilised polyester, 5 m roll | 15 – 25 | Bunnings aisle 21 (window hardware) or online shutter stores |
| Pulley wheel | Nylon, 45 mm Ø | 8 – 12 | Local shutter supplier, some Mitre 10s |
| Winder box (complete) | Spring-loaded, suits 14 mm strap | 25 – 35 | Special-order desk at Bunnings or click-and-collect |
| Axle pin / drive wheel | OCT 45 or RD 45 | 10 – 15 | Specialist parts sites |
| Stainless screws / pop rivets | 3.2 × 10 mm | 3 – 5 | Any hardware store |
*Stock varies in regional SA – phone ahead or allow two-day postage for online orders.
Only the first line is strictly mandatory for a working repair. Swapping aged pulleys or a tired spring while the pelmet is open, however, adds mere minutes and saves another ladder session next year.
Tools you’ll need for a hassle-free job
- #2 Phillips and flat screwdrivers
- 18 V cordless drill/driver with 3 mm bit
- Rivet gun (if pelmet is riveted) or a handful of self-tappers
- Long-nose pliers for teasing out the old strap
- Sharp scissors or utility knife
- Cigarette lighter / heat-shrink tubing to seal cut ends
- Step ladder rated for your weight plus 15 kg
- Safety glasses and light gloves
- Stubby flat blade or plastic pry tool for stubborn pelmet clips
Time and budget planning
Most Adelaide DIYers already own the basics, so tool outlay is often nil. Expect:
- Parts: AU$15 – 60 per shutter (strap alone vs full refresh)
- Tools: AU$0 – 40 if you need a rivet gun or decent scissors
- Time: 45 – 90 minutes start-to-finish for a first-timer
With the right pieces on the bench, replacing a roller shutter cord is a straightforward, single-cuppa job rather than an all-day saga.
Step 3 – Prepare Your Workspace and Stay Safe
Before you take a screwdriver to the pelmet, set yourself up for success. A tidy work zone, controlled shutter weight and a couple of commonsense safeguards will stop the job from turning into a broken-slat saga or, worse, a trip to the clinic.
Clear and protect the area
Move furniture and ornaments away from the window, then spread a drop sheet to catch stray screws. Keep a small tub or magnetic tray nearby and label each batch of fasteners as they come off—pelmet caps, guide screws, winder box bolts. Five organised minutes now saves frantic guessing later.
Secure the shutter before releasing tension
Wind the shutter fully open so the slats rest in the pelmet, then lock it in place:
- Slide a 20 mm timber block under the bottom bar, or
- Clamp the guide rails with padded G-clamps.
This stops the curtain crashing down the moment the old strap is cut and keeps both hands free while you fish out the winder drum.
Must-do safety checks
Pop on safety glasses; a frayed strap can flick fibres when pulled clear. Hold the spring drum firmly as you pop the winder faceplate—expect a short rewind. If you’re working off the ground, rope in a mate to foot the ladder or use a scaffold plank. When in doubt, call a technician.
Step 4 – Open the Pelmet and Remove the Damaged Cord
Time to get inside the shutter’s “engine bay”. Work slowly—most dents, bent clips and misplaced screws happen when the pelmet is rushed off. Keep your phone handy and snap photos as you go; they’re gold when things need to go back in the same order.
Accessing different pelmet styles
- Screw-fixed aluminium: look for 2–4 visible self-tappers along the bottom lip. Back them out, then hinge the cover upward and slide it off the side plates.
- Clip-on (press-fit) fascia: insert a plastic pry tool or stubby flat blade at one end, lever gently until the first clip pops, then walk the tool along the length. Avoid twisting—the thin alloy kinks easily.
- Riveted boxes on older installs: drill the rivet heads with a 3 mm bit, support the cover so it doesn’t drop, and mark which holes had rivets (you’ll replace them with new 3.2 mm aluminium rivets later).
Once the lid is clear you’ll see the rolled curtain, axle and the tired roller shutter cord draped over a small nylon pulley.
Release and detach inside the winder box
- Remove the two screws holding the winder faceplate.
- Grip the spring drum firmly—expect a mild kick.
- Allow the drum to unwind slowly until all tension is gone.
- Cut or unclip the frayed strap from the drum hub; pull any remaining stub clear.
If the drum shows rust or won’t rewind smoothly, plan to swap it now rather than reopening the wall next month.
Remove cord from pulley and axle
Follow the path you photographed: through the guide eyelet, around the ceiling-mounted pulley, then into the axle’s drive wheel slot. Tug the strap free with long-nose pliers. Spin the pulley; if it rattles or has flat spots, replace it—rough bearings shred new cords fast. With the old strap out, vacuum dust from the pelmet so nothing abrades your fresh cord later.
Step 5 – Fit the New Cord Correctly
With the pelmet open and the old roller shutter cord binned, you’re halfway home. This part is about precision: if the strap is one notch off the drive wheel or the spring is under-tensioned, the shutter will feel spongy or refuse to close all the way. Work methodically, keep the cord flat, and follow the exact routing you documented earlier.
Measure, cut, and seal the new strap
A strap that’s too short yanks the winder box off the wall; too long, and it loops inside the pelmet. Use this rule of thumb:
(clear opening height × 2) + 0.5 m = strap length
So a 2.1 m patio door needs roughly 4.7 m. Add another 0.3 m if the pulley is offset from the centre. Once measured:
- Cut the 14 mm polyester strap square with sharp scissors.
- Singe the cut end gently with a lighter until the fibres fuse, or slip on 10 mm of 2:1 heat-shrink tubing and warm it—both methods stop fraying.
- Repeat for the second end and let it cool.
Thread through pulley and axle groove
Feed the sealed end through the guide eyelet in the wall, then over the ceiling-mounted pulley. Keep the woven face of the strap pointing towards you to prevent twists. Next:
- Slide the strap into the drive wheel’s “S”-shaped slot until the first 50 mm pops out the axle side.
- Rotate the axle by hand to ensure the cord seats flush and doesn’t ride up the wheel’s shoulders.
- Visually confirm the strap tracks dead-centre on the pulley—adjust by nudging the wheel sideways if needed.
A half-twist will chafe the webbing within weeks, so fix it now, not later.
Attach and tension the winder box
- Reel the free end down the wall and through the winder box entry slot.
- Pre-wind the spring drum clockwise two full turns for windows under 1.5 m high, three turns for anything larger, and up to five for doors—each full turn equals roughly 0.6 m of lift.
- Hold the drum, insert the strap tail, and secure it with the factory screw or locking peg.
- Let the drum rewind slowly, drawing the excess strap into the box. The winder should now retract 150–200 mm of strap with a crisp snap.
Give the cord a gentle tug; if it feeds out smoothly and retracts on its own, you’ve nailed the tension. Too slack? Add half a turn. Too fierce? Back one off. Once satisfied, replace the winder faceplate and move on to reassembly.
Step 6 – Reassemble, Test and Fine-Tune
The new roller shutter cord is in and tensioned; now it’s time to button everything up and make sure the shutter runs like new. Work slowly, check alignment at every stage, and you’ll avoid scuffing that fresh strap.
Close pelmet and reinstall wall components
Snap or screw the pelmet cover back on, taking care not to pinch the cord between the fascia and side plates. Re-fit any guide eyelets or brush seals so the strap exits the wall perfectly straight—just a few degrees of rub can halve cord life. If you drilled out rivets earlier, pop in new 3.2 mm aluminium rivets and give them a quick dab of touch-up paint to prevent bimetallic corrosion.
Function test checklist
- Pull the winder fully to lower the shutter.
- Raise it again, listening for scraping or clicking.
- Check that the bottom bar stops level with the head box—no daylight gaps.
- Confirm the winder box reels in 150–200 mm of strap when released.
- Lightly tug the cord sideways; it should glide through the guide without fray marks.
Troubleshoot common hiccups
- Cord feels spongy: add half a turn of spring tension.
- Shutter won’t reach the top: strap likely slipped in the drive wheel—re-seat and tighten fixing screw.
- Strap bunches inside winder box: rewind, ensuring the cord lays evenly across the drum.
- Uneven roll or scraping: inspect slats for dents and verify the axle brackets are square.
A final wipe with a damp cloth removes greasy fingerprints and leaves the job looking as tidy as it operates. Your roller shutter cord replacement is complete—on to clean-up and cost tallying.
Step 7 – Clean-Up, Maintenance Tips and True Cost Breakdown
You’ve tested the shutter, everything runs sweet, and no screws are left over—time to wrap up. A quick tidy and an easy upkeep routine will keep that new roller shutter cord gliding for years. We’ll finish with the dollars and cents so you know exactly how much you saved (or could have).
Preventive maintenance to extend cord life
Even UV-stabilised webbing hates grit and sharp edges. Five minutes every change of season is all it takes:
- Wipe the exposed strap with a damp microfibre cloth and a drop of dish soap; rinse and let dry.
- Give the pulley wheel a shot of silicone spray—avoid oil-based lubes that attract dust.
- Inspect the first 150 mm of cord near the wall plate; if fuzz starts appearing, trim single loose fibres with nail scissors.
- Once a year, pop the pelmet lid and vacuum out leaf litter before it cakes on the axle.
- Keep the shutter either fully up or down in high winds; half-open positions saw the cord against the guide eyelet.
Follow that checklist and a quality polyester strap should last 8–12 years in Adelaide’s sun.
DIY cost vs professional service in Adelaide
Here’s what most households spend on a single-window repair:
| Scenario | Parts | Labour | Total outlay | Pros | Cons |
|---|---|---|---|---|---|
| DIY cord swap | $15–$60 | Your time (≈1 hr) | $15–$60 | Cheapest, learn a new skill | Ladder work, no workmanship warranty |
| Local technician | Included | $120–$150 | $120–$180 | Fast, warranty, no risk | More expensive, need to be home for booking |
| Full motor retrofit | $230–$300 kit | $220–$300 | $450–$600 | No more cords, remote control | Highest upfront cost |
DIY wins on price when the window’s accessible and you own basic tools. Call a pro if the shutter is above shoulder height, multiple units need doing, or the axle feels heavier than expected—extra muscle and liability insurance are worth the fee.
Dispose of or recycle the old cord responsibly
The spent strap is mostly polyester:
- Cut it into 300 mm lengths (reduces tangle risk).
- Drop it in your council’s textile-recycling bin or soft-plastics collection point—check SA council websites for locations.
- Metal clips or screws go in the yellow-lid recycling, not landfill.
Job done, conscience clear, and your roller shutter is back to smooth, secure service.
Ready for Smoother Shutter Operation
A fresh roller shutter cord, correctly tensioned and protected from grit, transforms a stubborn blind into a smooth-gliding, whisper-quiet barrier. The job we’ve walked through is hardly wizardry: gather a quality strap, a handful of hand tools, lock the shutter in place, swap the webbing, and button everything back up. For most ground-floor windows the whole exercise takes 45–90 minutes and less than a tank of petrol; factor in a quick clean-up and you’re still done before the footy starts.
Remember the essentials: double-check the fault first, buy UV-stable parts, photograph the routing, and respect that spring tension. Follow those four rules and you’ll avoid 90 per-cent of rookie mistakes while adding years of reliable service to your shutter.
Prefer to skip the ladders and the learning curve? Adelaide homeowners can book a same-day, fixed-price visit with the local experts at Roller Shutter Repairs Adelaide and get back to easy living—no frayed nerves, no frayed cords.