15 Top Roller Shutter Remote Control Replacements and Tips
Lost the fob down the side of the ute, the spare won’t talk to the motor, or the kids have worn the buttons smooth—whatever brought you here, you need a roller shutter remote that simply works. The stakes are higher than convenience alone: the right handset keeps your home secure, matches the 433 MHz (or 433.42 MHz) receiver already hiding in the pelmet, and spares you the cost of a whole new motor. To save you sifting through pages of tech jargon, we’ve hand-picked the best-selling replacements you can actually buy in Australia, along with clear, step-by-step pairing notes tested on real shutters in Adelaide.
Below you’ll find single-channel clickers for a lone bedroom window, multi-channel units that tame an entire façade, and smart hubs that bring Google Home or Alexa into the mix—each entry flagged with local stockists so you can order before sunset. We wrap up with a quick-start maintenance kit and DIY fault-finding cheatsheet, giving you everything you need to code, mount, and keep your shutters gliding without calling a technician. Let’s get you back in control.
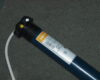
1. Somfy Situo 1 RTS Single-Channel Remote
A stylish pocket-size upgrade for any Somfy motorised shutter, the Situo 1 replaces the chunky Telis series with something lighter, faster, and easier to programme. One button press raises, stops, or lowers a single shutter—perfect when the bedroom window is the only one on motors.
Compatibility & Technical Specs
- Pairs with all Somfy RTS tubular and battery motors
- Secure rolling-code at 433.42 MHz; ±20 m indoor range through brick
- Powered by a CR2430 coin cell (supplied)
- Indoor rating IP30; operating temp 0–60 °C
- Magnetic wall mount included for quick docking
Stand-out Features for Homeowners
- “My” button stores a partial height—ideal for letting morning light in without losing privacy
- Slim 36 mm width slips into kitchen drawers instead of living on a coffee table
- Matte white finish with soft-touch silicone keypad resists greasy fingers and kids’ knocks
Programming & Quick Fix Tips
- On any existing Somfy remote, press the recessed PROG button for 2 s until the shutter jogs.
- Within 30 s, press PROG on the new Situo 1 for 2 s—shutter jogs again to confirm.
- Range fading? Swap the battery first; if that fails, straighten the motor’s antenna wire so it hangs freely inside the pelmet.
- Accidental wipe? Hold UP + DOWN + “My” together for 7 s to factory-reset the handset, then re-pair.
2. Somfy Situo 5 RTS Multi-Channel Remote
If one Somfy Situo is good, five is better. The Situo 5 keeps the same slim chassis as the single-channel model but adds a scroll wheel that lets you jump between up to five individual shutters —or groups of shutters—without juggling multiple handsets. It’s the simplest way to bring a whole façade under one roller shutter remote control while staying inside the Somfy RTS ecosystem already wired into most Australian installs.
Who Needs a 5-Channel Handset?
- Homeowners with more than one motorised window or a mix of windows and alfresco café blinds
- Small offices wanting separate control of meeting-room, reception, and kitchen shutters
- Anyone planning future motor additions; unused channels sit dormant until you need them
Advanced Functions
- Sequential switching: long-press UP or DOWN to move every programmed channel together
- Back-lit LCD shows the active channel number—no torch needed for late-night adjustments
- “My” favourite position still works per channel, so mornings can open half, lounge full, nursery dark
Set-Up & Grouping Walk-through
- Put the first remote already linked to a shutter into PROG mode (2 s).
- On the Situo 5, select Channel 1, press PROG (2 s). Shutter jogs—channel saved.
- Repeat for Channels 2–5 as required.
- To create an “all” group, select the sixth icon (double arrows), then hold “My” + UP for 5 s until all shutters jog in unison.
- Mis-tagged a channel? Hold UP + DOWN + “My” for 7 s on that channel to reset only that address.
3. OzRoll E-Series RF Single-Channel Remote
Dropped your old OzRoll fob in the rainwater tank? This ivory clicker is the straight-swap many South-Australian installers keep in the van. It speaks the same 433.92 MHz fixed code used by E-Series retrofit receivers, so you can restore full control without touching the motor or wiring.
Made for Australian E-Series Tubular Motors
- Works with every OzRoll RF controller shipped since 2005
- Fixed-code 433.92 MHz transmission; ≈ 15 m indoor range
- Ships with wall cradle and 12 V A23 battery pre-installed
Why We Like It
- About half the cost of a premium rolling-code handset
- Key-ring slot keeps it handy for tradies or tenants
- Plays nicely with older manual-to-electric conversion kits—no firmware clashes
Pairing Steps & Troubleshooting
- Press the receiver’s “P” button until its LED blinks.
- Within five seconds press UP on the new remote—shutter jogs once.
- Shutter travels only 10 cm? Re-set motor limits, then re-pair.
- No response? Replace the A23 battery and ensure the receiver antenna isn’t kinked.
4. OzRoll E-Series 5-Channel Remote
When one bedroom clicker won’t cut it, the E-Series 5-channel handset lets you steer up to five OzRoll-equipped shutters from a single palm-sized controller—no Wi-Fi, hubs, or new wiring required.
Multi-Zone Control Without Wi-Fi
- Five numbered LEDs confirm which shutter (or group) you’re driving
- Channels can be paired individually or all together for a façade “one-touch” open/close
- Same 433.92 MHz fixed code as the single-channel model, so it works with any existing E-Series receiver
Extra Convenience Features
- Clip-on desk stand keeps the remote upright and easy to grab
- Vacation-mode slider disables all buttons, stopping kids or would-be intruders from cycling the shutters
- Supplied decals let you label channels—helpful when tenant turnover is high
Programming Advice
- On the receiver, tap “P” until the LED blinks.
- Press the desired channel button on the remote, then UP. Shutter jogs—channel saved.
- Repeat for other shutters.
- Need a full reset? Hold the receiver’s “P” for eight seconds; all stored codes clear, then re-pair in sequence.
- Label each channel straight after coding to avoid mix-ups later.
5. EzyFit Single-Channel Remote (433 MHz, Black)
Need a cheap, no-nonsense roller shutter remote control? The matte-black EzyFit single-channel clicker snaps onto any 433 MHz EzyFit receiver—ideal for tradies, tenants, or as a glove-box backup.
Where It Excels
- Key-ring size; survives pockets, dashboards, and dusty site lockers
- Raised arrow icons mean you can pause the shutter by feel
- Costs less than a takeaway pizza yet feels sturdier than many clones
Specs & In-Box Contents
- Pre-coded to EzyFit 433 MHz fixed-code receivers; no DIP switches
- IP33 ABS shell, gloss black with rubber seal round the seam
- A23 alkaline battery, wall cradle, and lanyard loop included
Installation Hack
No original remote? Short the two brass ‘PROG’ pads on the window controller with an insulated screwdriver, then press UP to bind.
6. E-Trans 15-Channel LCD Remote
Running more than a handful of shutters? The E-Trans 15-Channel LCD remote is designed to corral a whole house, shopfront or classroom block from a single, palm-sized unit. Operating on the common 433 MHz platform, it happily talks to most aftermarket receivers, so you can grow the system without being locked into one brand of motor or controller.
Perfect for Large Homes & Light Commercial Sites
- Controls 15 individual channels plus a built-in “ALL” channel for one-touch open/close
- Handy when bedrooms, living areas and patio blinds all need separate timing
- Commercial users can dedicate channels to each bay door or kiosk window and still have capacity left over
Menu Highlights
- Back-lit LCD shows channel name, battery level and clock at a glance
- Soft scheduling lets you set basic morning-open / evening-close times without a separate hub
- Rubberised arrow keys give positive feedback even with work gloves on
Programming Quick Guide
- Press
SET for 3 s to enter the menu, scroll to the desired channel and hit OK. - Activate learning mode on the receiver, then press
UP; shutter jogs to confirm. - To add timers: set real-time clock first, then navigate to
TMR and choose open/close times—saving won’t stick otherwise. - Need a wipe? Hold
SET + DOWN for 5 s on the chosen channel to clear only that address.
7. Orvibo Allone Pro Universal Smart Hub
Want phone or voice control without swapping motors? Drop the puck-shaped Allone Pro on a shelf and it will translate Wi-Fi commands into the same 433 MHz bursts your existing roller shutter remote control sends. That means hands-free “Hey Google, close the lounge shutters” in under ten minutes.
Turn Any RF Shutter Into a Smart-Home Device
- 2.4 GHz Wi-Fi; works with Google Home and Amazon Alexa routines
- Learns most fixed-code 433 MHz remotes sold in Australia, including OzRoll, EzyFit and older Jaycar models
- IR blaster onboard, so it can simultaneously command the TV or split-system
App-Based Benefits
- HomeMate app offers sunrise/sunset or weekday scheduling without extra hubs
- One-tap scene buttons: e.g., “Movie Night” lowers shutters, dims lights, and powers the projector
- Secure QR sharing lets family or tenants add the hub without revealing your Wi-Fi password
Set-Up & Learning Mode
- Power the hub, join its Wi-Fi hotspot, then add it to your home network.
- Hold the original remote 2 cm from the hub, tap “Learning” in HomeMate, press UP—device saves within three flashes.
- Learning fails? Drop router channel width from 40 MHz to 20 MHz and retry; it stabilises RF capture.
8. Shelly Plus 2 PM Wi-Fi Relay (In-Wall)
Prefer to keep the wall switch you already like but still want app or voice control? Pop the Shelly Plus 2 PM behind the existing plate and the whole circuit becomes a Wi-Fi–enabled roller shutter remote control, no extra hand-held needed. Because it sits in the cavity, you don’t change the room’s look, yet you gain full Google Home, Alexa and MQTT compatibility—handy for tech-savvy renovators who hate proprietary hubs.
Why It’s on the List
- Lets any 240 V tubular motor run via phone, schedule or voice without replacing the motor.
- Dual relays mean one module can handle UP and DOWN directions separately while measuring real-time power draw.
- Firmware is open (REST & CoAP), so integrators can fold shutters into Home Assistant or Hubitat scenes.
Key Specs
| Spec | Value |
|---|---|
| Max load | 10 A per output (combined 16 A) |
| Supply | 110–240 V AC, 50/60 Hz |
| Wi-Fi | 802.11 b/g/n 2.4 GHz |
| Modes | Cover (shutter), Relay, Timer |
| Measurement | Active energy + instantaneous W |
Wiring & Safety Tips
- Isolate mains at the switchboard—verify with a non-contact tester.
- Shelly needs neutral, line and two motor outputs; label wires before removal.
- After powering up, join the Shelly app, select “Shutter Mode” and set travel time (e.g. 18 s). This prevents over-run and motor strain.
- If the shutter runs backwards, swap the two output wires in the app rather than rewiring—quicker and safer.
- Finalise by tucking the module deep in the wall box, keeping antenna clear of earth and metal conduit to maximise Wi-Fi range.
9. Arlec Grid Connect Roller Shutter Controller (Bunnings)
Need a replacement you can grab this afternoon rather than waiting for the postie? The Arlec Grid Connect kit sits on the shelves at nearly every Bunnings, so you can be back in business before the kids’ bedtime. It combines a familiar four-button hand-held with a Wi-Fi wall module that drops into the existing switch box, giving you both physical and app control in one affordable bundle.
Big-Box Convenience
- Stocked nationwide; no special ordering or freight delays
- Uses the free Grid Connect app that already runs many Arlec plugs and lights
- Works with Google Assistant and Amazon Alexa for voice commands
What You Get
| Item | Purpose |
|---|---|
| 4-button remote | Everyday UP, STOP, DOWN, pair |
| Wi-Fi wall plate | Converts 240 V motor to smart control |
| Mounting screws & wiring loom | Saves an extra trip down the aisle |
Quick Pair & Factory Reset
- With power on, hold STOP on the remote for 5 seconds—receiver LED flashes blue.
- Press UP to bind; shutter jogs.
- Factory reset: press the recessed PROG on the wall plate for 10 seconds until the LED flickers rapidly, then re-pair all remotes.
10. Generic 433.92 MHz Learning Remote (4-Button, Cloning Type)
This pocket-size cloner is the duct-tape solution of the roller shutter world: cheap, cheerful and usually good enough to get a stuck shutter moving again. It records the fixed-code signal from your existing roller shutter remote control and stores it on any of its four buttons, giving you an instant spare for the glove box or Airbnb guest drawer.
Budget-Friendly Spare
- Costs under $20 at electronics outlets or eBay sellers
- Tough alloy shell with slide cover to stop pocket dials
- Works with most 433.92 MHz fixed-code OzRoll, EzyFit and Jaycar receivers
Copy Procedure
- Hold the top two buttons until the LED blinks slowly.
- Release, then press the button you wish to program (LED stays on).
- Place original remote nose-to-nose (≤2 cm).
- Press and hold the source button until LED flashes rapidly.
- Test on shutter; repeat for other keys.
When It Won’t Work
- Rolling-code systems (Somfy RTS, Merlin Security+ 2.0)
- Encrypted multi-frequency units above 434 MHz
- Remotes with dead batteries or cracked solder joints—fix those first
11. Jaycar 4-Button Rolling-Code Remote (KC-5434)
Tinkerers love this Jaycar handset because it’s one of the few off-the-shelf options that speaks secure rolling code yet still lets you set the address yourself. If your shed, shopfront or custom Arduino receiver already uses Jaycar’s KC-5430/5432 boards, this roller shutter remote control drops straight in without soldering or firmware tweaks.
Electronics Hobbyist Favourite
- Stocked year-round in most Jaycar branches across Australia
- Uses common 433 MHz AM modulation with KeeLoq™ encryption
- Tough ABS case survives tool-bag abuse; replaceable CR2032 battery
Special Features
- 10-bit DIP switch selects one of 1,024 user codes
- Four independent buttons—handy when shutters and roller doors share the same receiver bank
- Red power LED doubles as low-battery indicator
Programming Snapshot
- Match the DIP switches on the remote to those on your receiver board.
- Power-cycle the receiver, then press any button for two seconds; LED on board flashes to confirm learn.
- Need to re-key? Change the DIP pattern, press the board’s “LEARN” once, then re-send.
12. Nu-Style Wireless Remote Controller (3-Channel)
Need a handset that’s easy to source locally and speaks the same RF dialect as your Nu-Style motor kit? This three-channel remote is stocked by several Adelaide distributors, so downtime is usually measured in hours, not days. Three generous buttons let you dedicate one channel per window or run grouped façades without paying for functions you’ll never use.
South-Australian Supplier Pick
- Ships from Nu-Style’s Lonsdale warehouse, meaning faster delivery and better after-sales support for SA homeowners.
Features to Highlight
- Rubberised keys stay grippy in dusty sheds or gloved hands.
- Clip-on visor mount keeps the remote handy in utes and work vans.
- Bright channel LEDs confirm which shutter you’re about to move—no accidental nursery wake-ups.
Pairing Steps
- Tap the receiver’s learn button once; red LED flashes.
- Press desired channel key twice—shutter jogs to confirm.
- No jog? Check the in-line receiver fuse; storms often pop it before the motor.
- Hold all three keys 8 s to factory-reset the remote.
13. Somfy Connexoon Window RTS + Key-Fob Bundle
Think of Connexoon as the brains that turns your tried-and-tested Somfy RTS motors into a genuine smart-home system—without forcing everyone in the house to whip out a phone each time they want light. The bundle ships with both the Wi-Fi gateway and a pocket key-fob, so you gain app, voice and old-school button control in one hit. For households already invested in Somfy handsets, it’s the smoothest upgrade path: no extra wiring, no change of frequency, and your existing roller shutter remote control still works as a fall-back.
Phone + Remote in One Ecosystem
- Connexoon app (iOS/Android) handles scheduling, scenes and remote access over 4G.
- Key-fob talks direct to motors at 433.42 MHz, so shutters still move if the NBN drops.
- Supports up to 30 devices—mix shutters, blinds and awnings in the same dashboard.
Smart Scenarios
- “Away Mode” randomly opens and closes selected shutters to mimic occupancy.
- Geo-location can auto-close everything when the last family phone leaves a 500 m radius.
- Voice control via Google Assistant or Alexa—no third-party skills required.
Onboarding Checklist
- Plug in gateway, press its Wi-Fi button; join “ConnexoonRTS” on your phone.
- Launch app, create account, update firmware (≈5 min).
- Within 2 m of the gateway, press PROG on existing remote for 2 s, then tap “Add” in app—motor jogs.
- Repeat for key-fob: hold PROG until LED glows, press desired button twice.
- Switch your router to 2.4 GHz-only during pairing if you’re on mesh Wi-Fi; reconnect 5 GHz after setup.
14. Merlin Security+ 2.0 E960M Remote (Shutter/Door Combo)
If your garage door already runs a Merlin opener, chances are there’s a compatible receiver module sitting inside the nearby window pelmet as well. The pocket-size E960M lets you drive both from one secure handset, trimming key-ring clutter while keeping the same high-grade encryption trusted by Australian insurers. It’s a smart pick when the alfresco shutter and garage door need to move together—say, when you’re backing the ute out before dawn.
Dual-Purpose for Shutters & Roller Doors
- Four buttons can be mapped to separate Merlin garage doors, gate motors, or the add-on shutter receiver.
- Bright channel LEDs confirm which output you’re triggering, cutting accidental door lifts.
Encryption & Frequency
- Security+ 2.0 rolling-code with 100 billion code cycling.
- Tri-frequency hopping (433.30, 433.54, 434.92 MHz) punches through Wi-Fi and LED-light interference.
- Weather-sealed ABS shell; CR2032 battery lasts roughly two years.
Adding to the Control Box
- Press the Learn button on the motor head; status LED glows.
- Within 30 s, press the desired key on the E960M twice—LED flashes to confirm.
- Receiver full (64 devices)? Hold Learn for 6 s to purge memory, then re-add each roller shutter remote control in order.
15. Programming & Maintenance Quick-Start Kit + Pro Tips
Before you toss the old remote or ring a technician, a small kit and a repeatable method will solve 90 % of shutter niggles on the spot. Throw the items below in a lunch-box, tape the timings to the lid and you’ll be the household hero when a handset goes AWOL.
Essential Tools in the Kit
- Insulated 3 mm flat-head screwdriver for pressing recessed PROG/LEARN buttons
- CR2430 and A23 spare batteries (keep them in blister packs so they don’t short)
- Can of silicone spray—two quick blasts down each track cuts motor load by up to 30 %
- Microfibre cloth for wiping dust off pelmet antennas (dust is RF kryptonite)
- Zip-lock bag with channel stickers and a fine Sharpie for quick labelling
Step-By-Step Universal Coding Guide
- Kill power to the shutter for 5 s, then restore—puts most receivers in “fresh” state.
- Enter learning mode (button, jumper, or double-tap STOP depending on brand).
- Send the remote signal within 10 s; shutter should “jog”.
- Test full travel; if limits are wrong, recalibrate immediately.
- Exit learning mode or wait for timeout.
Typical press durations:
Action           Hold Time
Enter learn      3 s
Send code        1 s
Factory reset    8 s
Common Problems & Fast Fixes
- LED glows but nothing moves → check 240 V feed or in-line fuse before blaming the remote.
- Shutter stops halfway → reset upper/lower limits, then lube tracks.
- Range suddenly poor → swap battery; if no joy, extend motor antenna outside metal pelmet with heat-shrink tubing.
- Remote pairs but loses memory overnight → cheap coin cells; replace with name-brand and retest.
Spend ten minutes with the kit once a year and your shutters will keep humming long after the neighbours call in the pros.
Take Control of Your Shutters Today
The tech is out there, the how-to’s are above, and now the ball is in your court. Match the handset to the motor’s frequency, follow the coding cheat-sheet, and give the tracks a yearly squirt of silicone—do that trio and most shutters will run longer than the batteries in the remote. Should a motor forget its limits or a pelmet fuse pop, you’ve also got the troubleshooting pointers to bring everything back online without waiting for a tradie.
Of course, not everyone has the time (or the ladder) to tinker. If you’re in Adelaide and would rather a seasoned technician handle stubborn remotes, dead motors, or a full manual-to-electric upgrade, our local team is only a phone call away. Book a fast, no-call-out-fee visit through Roller Shutter Repairs Adelaide and reclaim smooth, reliable control—minus the guesswork.