Somfy Remote Programming Guide: RTS Setup, Limits & Reset
You’ve got a new Somfy RTS motor or remote sitting in front of you, and the instruction manual reads like it was written for engineers. The buttons won’t respond. The blind moves in the wrong direction. Or worse, nothing happens at all when you press a button. You’re not alone in this. Most people struggle with Somfy remote programming because the process isn’t obvious, and one wrong step sends you back to square one.
The good news is that programming your Somfy remote follows a logical sequence. Once you know which buttons to press and when to press them, you can have your motorised blinds, shutters or awnings responding perfectly in about 10 minutes. The key is understanding the programming mode, setting your travel limits correctly, and knowing how to pair multiple remotes if you need them.
This guide walks you through every step of Somfy RTS programming. You’ll learn how to enter programming mode, set your upper and lower limits, add extra remotes or channels, and fix common problems when things don’t work as expected. We’ve stripped out the technical jargon and focused on what actually works.
Prerequisites for Somfy RTS programming
Before you start programming your Somfy remote, you need to gather the right equipment and confirm your motor is ready. Missing even one item can stop the process halfway through, and that wastes time. The good news is that you only need a few basic things, and most of them come with your motor or remote kit. This somfy remote programming guide assumes you’ve already installed your motor and blind, so we’re focusing purely on the remote setup.
What you need to have ready
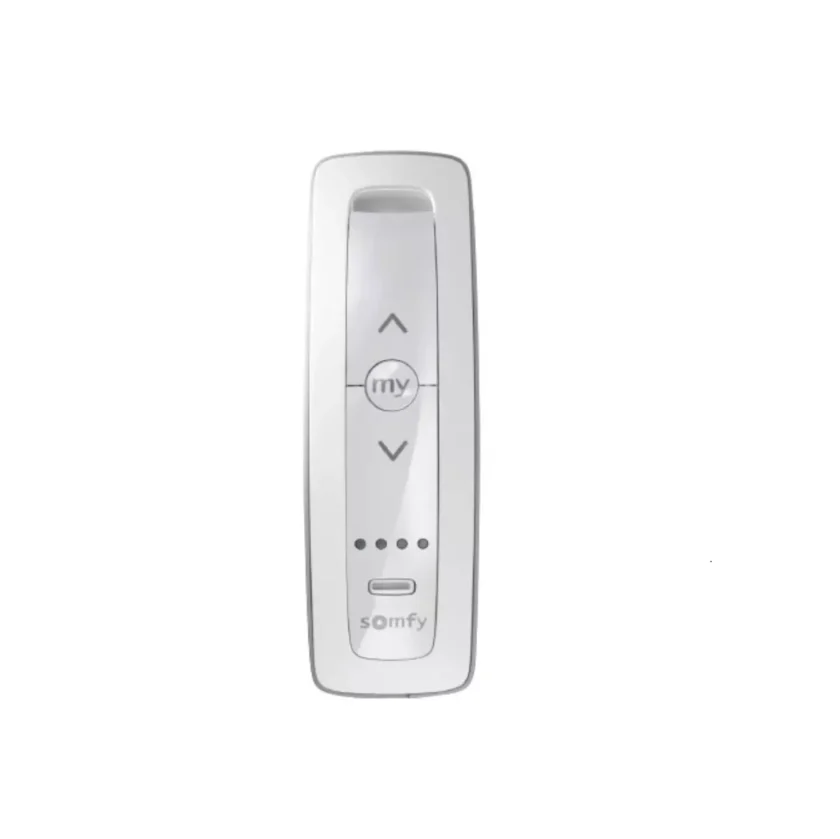
You’ll need your Somfy RTS remote (either a 1-channel or 5-channel model), a paperclip or small pin to access the programming button on the back of the remote, and access to your motor. For battery-powered motors like the Somfy Sonesse or Altus, make sure the battery is fully charged before you begin. A dead or low battery causes the motor to stop responding mid-programming. For wired motors, confirm the power is switched on at the wall socket.
Keep a step ladder nearby if your blind is mounted high, as you’ll need to reach the motor head during setup.
Understanding your motor type
Battery-powered Somfy motors have either a pin hole (Sonesse) or a button (Altus) on the motor head that you’ll press to wake the motor. These buttons sit on the side of the tube near the bracket. Wired motors don’t have these buttons because they activate automatically when powered on. If you’re programming multiple wired motors, turn off all other blinds at the power point before starting. This prevents them from responding to your programming commands accidentally.
Step 1. Enter RTS programming mode
Programming mode is the state where your Somfy motor actively listens for commands from your remote. Without entering this mode correctly, the motor ignores everything you press. This step forms the foundation of your entire setup, so take your time here. The process differs slightly between battery-powered and wired motors, but both follow the same principle: wake the motor, then put it into a receptive state.
For battery-powered motors (Sonesse and Altus)
Locate the pin hole or button on your motor head. On Sonesse motors, you’ll see a small pin hole that needs a paperclip. Altus motors have an accessible button you can press with your finger. Press and hold this button for 2 to 3 seconds, then release. The blind should jog (move up and down briefly) to confirm the motor has woken up. This jog tells you the motor is ready to receive programming commands.
If the blind doesn’t jog after 3 seconds, your battery needs charging before you continue.
Now grab your remote. Press and hold both the up and down buttons simultaneously for about 2 seconds. Release the buttons when the blind jogs again. This second jog confirms you’ve entered programming mode successfully. The motor is now paired to this specific remote channel and ready for the next steps in this somfy remote programming guide.
For wired motors
Wired motors skip the wake-up step because they activate automatically when powered on. Make sure the power is turned on at the wall socket and that any other blinds in the room are switched off. This prevents other motors from responding to your programming commands.
Pick up your remote and press both the up and down buttons together for 2 seconds. The blind will jog once to confirm you’ve entered programming mode. If multiple blinds respond, you haven’t isolated the motor properly. Switch off the extra blinds at their power points and try again.
Confirming you’re in programming mode
Your motor stays in programming mode for about 2 minutes before timing out. If nothing happens when you press the up or down buttons individually, you’ve likely timed out and need to re-enter programming mode. The jog movement is your only visual confirmation, so watch the blind carefully during each step.
Step 2. Set direction and travel limits
Setting your travel limits tells the motor exactly where to stop at the top and bottom positions. Without this step, your blind could roll too far and damage the fabric, or stop short and leave gaps. You’re teaching the motor its boundaries, and this somfy remote programming guide section shows you how to do it precisely. The process takes about 5 minutes per blind once you understand the sequence.
Check and correct motor direction
Test the motor direction first by pressing the up button on your remote. The blind should roll upwards (away from the sill). If it rolls down instead, you need to reverse the direction before setting any limits. This happens frequently during initial setup and takes seconds to fix.
Hold down the “my” button (centre button) on your remote for 2 seconds until the blind jogs. Release the button and press the up arrow again. The motor now runs in the opposite direction. You’ve just reversed the travel without touching any wiring or motor settings.
Set the upper limit position
Press the up button and let the blind roll completely up to where you want it to stop permanently. This becomes your upper limit. Most people set this just before the fabric touches the motor tube, leaving about 5mm of clearance to prevent bunching. Use the down button to nudge the blind down slightly if you overshoot.
Once you have the perfect position, hold down the “my” and “down” buttons simultaneously. The blind automatically runs downwards, then release both buttons and press the “my” button to stop it before it reaches the bottom. This action locks your upper limit into the motor’s memory.
The motor remembers this exact position, so the blind will always stop here when you press the up button.
Set the lower limit position
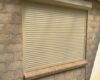
Press the down button and let the blind roll to your desired lower position. For roller shutters, this usually means fully closed against the sill. For interior blinds, you might want the fabric to stop just above the window frame bottom. The choice depends on your specific installation and preference.
Hold down the “my” and “up” buttons together until the blind runs automatically to your upper limit. This confirms both limits are now stored. Press and hold the “my” button for 2 seconds until the blind jogs once. Your travel limits are now permanently set unless you choose to reprogram them later.
Step 3. Add remotes, channels and groups
Once you’ve programmed your first remote and set your limits, you might want to add extra remotes for convenience or control multiple blinds from a single remote. The Somfy RTS system lets you pair unlimited remotes to one motor, assign different blinds to separate channels on a 5-channel remote, or group several blinds together for simultaneous control. This section of the somfy remote programming guide shows you exactly how to expand your setup.
Adding a second remote to the same motor
You can pair additional remotes to a motor that’s already programmed. Grab the remote that’s already working with your blind and a paperclip. Press and hold the program button on the back of the working remote until the blind jogs. This puts the motor into pairing mode for about 2 minutes.
Now take your new remote and press the program button once (tap it quickly for less than 1 second). The blind will jog to confirm the new remote is paired. Both remotes now control the same motor independently. Repeat this process for any additional remotes you want to add.
If the blind doesn’t respond to the new remote, you likely held the program button too long instead of tapping it briefly.
Programming multiple blinds on separate channels
Five-channel remotes let you control up to five different motors from one device. Before programming each blind, press the channel button at the bottom of your remote until the LED shows your chosen channel number. For battery motors, put only the blind you’re programming into sleep mode by pressing its motor head button, or for wired motors, switch off all other blinds at the power point.
Follow the programming steps from earlier sections for each blind individually. The key is ensuring only one motor is active when you enter programming mode. Once programmed, switch channels using the channel button to control different blinds.
Creating groups for simultaneous control
Groups let you operate multiple blinds with one button press. First, program each blind to its own channel following the steps above. Choose the first blind’s channel, then press and hold the program button until the blind jogs. Switch to your group channel (often channel 5), then tap the program button once. The blind jogs to confirm it’s now part of the group.
Repeat this for each blind you want in the group. Your group channel now controls all paired blinds together, while individual channels still work independently.
Reset, erase and troubleshoot Somfy RTS
Sometimes you need to start from scratch or fix problems that crop up during programming. This section of the somfy remote programming guide covers the most common issues you’ll face and how to solve them quickly. Resetting your motor erases all programmed remotes and limits, giving you a clean slate. You might need this if you’ve lost track of which remotes are paired, or if someone programmed the motor before you and left incorrect settings.
Factory reset your motor
A factory reset wipes every setting from your motor’s memory, including all paired remotes and travel limits. For battery-powered motors, press and hold the motor head button or pin hole for 13 to 60 seconds continuously. The blind will jog three times during this process. Release the button after the third jog. Your motor now sits in factory default state, ready for fresh programming.
Wired motors reset differently. Unplug the motor from power at the wall socket and wait 10 seconds. Plug it back in and the motor returns to factory settings. All previously programmed remotes stop working immediately, so you’ll need to reprogram from Step 1 again.
Remove specific remotes from memory
You might want to unpair one remote without erasing all settings. Press and hold the program button on the remote you want to keep until the blind jogs. This puts the motor into pairing mode. Now grab the remote you want to delete and press its program button for 3 seconds. The blind jogs twice to confirm deletion. The removed remote no longer controls the motor, while your other remotes continue working normally.
This method lets you revoke access to lost remotes or remove old remotes from previous owners without affecting your current setup.
Fix common programming problems
The blind doesn’t jog when you press buttons. Your motor has timed out of programming mode after 2 minutes of inactivity. Start again from Step 1 and work faster through the sequence. For battery motors, check your battery charge using the Somfy charger until the LED shows solid green.
Multiple blinds respond to your remote commands. You haven’t isolated the motor properly. For wired motors, switch off power to all other blinds before programming. Battery motors need sleep mode activated by pressing their motor head button until they jog, then pressing it briefly again for two jogs.
Your travel limits drift over time. Mechanical wear in the motor or fabric stretching causes this. Reprogram your limits by entering programming mode and following Step 2 again. The new limits overwrite the old positions completely.
The blind runs backwards despite reversing direction. You reversed direction after setting limits instead of before. Factory reset the motor and complete the entire programming sequence in the correct order: direction first, then upper limit, then lower limit.
Somfy RTS programming made simple or call the experts on 0414611662
You now have everything you need to program your Somfy remote successfully. The entire process takes about 10 minutes once you understand the sequence: enter programming mode, set your direction and limits, then add any extra remotes or groups you need. This somfy remote programming guide removes the confusion that stops most people from completing the setup on their first attempt. The key is following each step in order without skipping ahead or assuming the motor will figure out what you want.
Most programming problems stem from rushing through the steps or missing the 2-minute timeout window. Take your time, watch for the jog movements that confirm each action, and keep your motor charged or powered throughout the process. If something goes wrong, a factory reset gives you a clean start without any permanent consequences.
When your roller shutter motor fails completely or stops responding to your remote entirely, programming won’t fix mechanical faults. Contact our roller shutter repair team in Adelaide for motor replacements, strap repairs, or full system upgrades that bring your shutters back to reliable operation.