Merlin Roller Door Opener Manual: How to Program & Repair
Your Merlin roller door opener stops responding to the remote, or the door reverses halfway up, or you need to add a new handset but the instruction sheet walked off with the installer three years ago. Without the manual, every beep and flash becomes a guessing game that leaves you standing in the driveway with a torch and mounting frustration.
The good news? Merlin publishes free PDF manuals for every model, covering everything from limit adjustment to remote pairing. Once you identify your motor’s model number, you can download the exact guide, follow the step by step instructions, and get your roller door working properly again without waiting for a technician or paying for a callout.
This article walks you through finding the correct Merlin roller door opener manual for your model, programming new remotes, adjusting travel limits, resetting fault codes, and fixing common problems yourself. You’ll also learn when a DIY fix makes sense and when it’s smarter to call an Adelaide roller door specialist who can diagnose the issue in minutes rather than hours.
What to know before you start
Before you download any Merlin roller door opener manual or touch a single button on the motor, you need to identify your exact model number and understand what work is actually safe to tackle yourself. Merlin has released dozens of roller door models over the past 20 years, and each one uses different programming sequences, force settings and safety beam requirements. The MR650 from 2010 won’t respond to the same button presses as the MR855MYQ from 2023, and following the wrong instructions can lock you out or corrupt the memory.
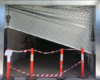
Safety also matters before you climb a ladder or pull the manual release cord. Make sure the roller door is balanced and won’t slam shut if you disengage the motor, and never adjust spring tension yourself unless you’ve been trained. Springs store enough energy to cause serious injury, so leave that work to technicians who carry the right tools and insurance.
Most roller door injuries happen when homeowners attempt spring adjustments without proper training or equipment.
Locate your model number
Your Merlin opener’s model number sits on a white or silver label stuck to the motor housing, usually on the side facing the garage interior. Common roller door models include the MR230, MR650, MR655MYQ, MR855MYQ and the newer MR1055MYQ. Write down the full model code including any suffix letters, because even a single character changes which manual you need.
If the label has faded or peeled off, check the back of your original remote control. Many remotes carry a model code that corresponds to the opener generation. Alternatively, measure the motor’s physical dimensions and compare them to photos in the Merlin product archive, though this method is less reliable for pinpointing the exact variant.
Gather your tools
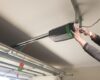
Programming and basic troubleshooting require minimal equipment, but having the right items on hand saves repeated trips up and down the ladder. Keep a stepladder tall enough to reach the motor comfortably, a torch for reading tiny labels in dim garages, and your mobile phone to photograph settings before you change them.
You’ll also want a flathead screwdriver to open the motor cover on older models, fresh batteries for remotes, and a notepad to record error codes or flashing LED patterns. Most Merlin motors display faults through coloured lights, and documenting the sequence helps you match the symptom to the right troubleshooting section in the manual.
Step 1. Find the right Merlin roller manual
Once you’ve confirmed your model number, head to the official Merlin support page to grab the correct PDF. Merlin hosts free downloadable manuals for every roller door opener they’ve manufactured, organised by model series and year. The files cover installation, programming, troubleshooting and parts diagrams, and each one matches the motor’s specific electronics and safety features.
Download from the Merlin website
Visit the Merlin Product Support Centre and navigate to the roller door opener section. You’ll see a list of current and legacy models grouped by series. Click on your model (for example, MR855MYQ or MR650), then select the manual type you need:
- Installation Manual for wiring diagrams and mounting instructions
- User Guide for daily operation and remote pairing
- Programming Guide for limit adjustment and force settings
- Troubleshooting Manual for error codes and diagnostic steps
Download the PDF and save it to your phone so you can reference it while standing near the motor. The manuals are usually 12 to 20 pages long and include labelled photos of the control panel buttons.
Always download the manual that exactly matches your model suffix, because button sequences and safety beam requirements vary between generations.
Search archived manuals
If Merlin has removed your older model from the current support page, search for “[your model number] installation manual PDF” in your browser. Several Australian door specialists and parts suppliers host archived copies of discontinued Merlin roller door opener manuals on their sites. You can also check the Wayback Machine archive if the official page has changed, though this method takes longer and may produce outdated versions.
Compare any archived manual against your motor’s production date sticker to confirm compatibility before following the instructions.
Step 2. Program remotes and travel limits
Programming your Merlin roller door opener correctly prevents the door from crashing into the ground or stopping short of the fully open position, and ensures every family member’s remote works reliably. Your Merlin roller door opener manual breaks this process into clear button sequences that take about five minutes per task, though you’ll need access to the motor’s control panel and patience to watch the door complete several test cycles. Most errors at this stage come from rushing the steps or skipping the force calibration at the end, which leaves the door either too sensitive or dangerously insensitive to obstructions.
Pair a new remote control
Locate the Learn button on your Merlin motor, usually found behind a small plastic cover on the control panel. The button glows yellow or green depending on your model’s radio frequency. Press and release the Learn button once so the indicator light turns on and stays solid, then immediately press the button on your new remote that you want to program. Hold the remote button for two seconds until you hear a click from the motor, which confirms the code has been stored.
Test the newly paired remote by pressing the button from inside the garage. If the door doesn’t respond, repeat the process but hold the remote closer to the motor antenna, typically a white wire hanging from the control board. Older MR230 and MR650 models only store up to six remote codes, so if pairing fails, you may need to clear the memory first (covered in Step 3).
Set the UP travel limit
Pull the red manual release cord to disengage the motor, then manually push the roller door to the exact position where you want it to stop when fully open. Re-engage the motor by pulling the cord again, then locate the UP arrow button on the control panel. Press and hold the UP button for approximately three seconds until the motor beeps twice and the door begins to move upward on its own.
Watch the door travel all the way up. If it stops too low, press the UP arrow in short taps to nudge the limit higher. Each tap moves the endpoint by roughly 25 millimetres, so multiple small adjustments work better than one big guess. When the door reaches the perfect height, press and hold the UP button again for three seconds to lock the setting. The motor will beep once to confirm.
Set the DOWN travel limit
Position the door at the fully closed position where the curtain just touches the ground without buckling or leaving a gap. Press and hold the DOWN arrow button for three seconds until the motor beeps twice, then release. The door will automatically travel downward to test the new limit.
Merlin motors apply force sensing at the bottom limit, so the door should stop gently when it detects resistance. If the curtain buckles or folds at the bottom, your limit is set too low and the motor is over-travelling. Tap the DOWN arrow upward (yes, counterintuitive) to raise the closed position by small increments until the door lands flat and square.
Setting travel limits too tight causes premature motor wear, while setting them too loose leaves gaps for wind, dust and security risks.
Adjust force sensitivity
After programming both limits, your motor automatically runs a force calibration cycle where it opens and closes the door twice to learn the normal operating resistance. Don’t interrupt this cycle or press any buttons while the LED flashes orange. Once calibration finishes, test the door by placing a 50-millimetre thick block of wood on the ground in the door’s path and pressing the close button.
The door should reverse within one second of contacting the wood. If it crushes the block or doesn’t reverse, consult your manual’s force adjustment section. Most Merlin roller models let you increase or decrease force sensitivity by pressing the UP and DOWN arrows simultaneously for five seconds, then tapping UP to increase or DOWN to decrease. Each adjustment shifts sensitivity by roughly 10 per cent.
Step 3. Reset, recode and clear errors
Your Merlin roller door opener stores fault codes, remote pairings and custom settings in memory, and sometimes that memory becomes corrupted or filled with old data that causes erratic behaviour. When the door stops responding to remotes, reverses randomly, or displays a flashing LED pattern you don’t recognise, a reset clears the slate and lets you reprogram from scratch. Your Merlin roller door opener manual lists specific error codes and reset sequences for your model, but the core process remains similar across the entire MR series lineup.
Clear all remote codes
Press and hold the Learn button on your motor’s control panel for exactly six seconds until the indicator LED turns off completely, then release. This action erases every remote code stored in the memory, freeing up space for new pairings and removing any accidentally programmed fobs. The motor will beep three times to confirm the deletion, and all previously working remotes will stop operating the door immediately.
After clearing the memory, you need to re-pair every remote you want to keep using. Follow the pairing sequence from Step 2: press the Learn button once (LED glows solid), then press the remote button for two seconds until you hear a click. Repeat this process for each handset, including wall-mounted keypads and car visor remotes.
Perform a full factory reset
A complete factory reset wipes travel limits, force settings, remote codes and timer settings all at once, returning the motor to the exact state it left the factory. You need this nuclear option when the control board behaves unpredictably after a power surge or when multiple error codes flash simultaneously. Locate the Learn button and the Light button (usually marked with a bulb icon) on your control panel, then press and hold both buttons together for ten seconds.
The motor will beep rapidly and all LEDs will flash in sequence, confirming the reset. Release both buttons and wait 30 seconds for the electronics to reboot. You must now reprogram travel limits, force sensitivity and remote codes following your manual’s installation section, because the motor has forgotten everything. Expect this process to take 15 to 20 minutes.
Factory resetting erases all customisation, so photograph your current settings before you start.
Decode error LED patterns
Merlin motors communicate faults through the control panel LED, which blinks in specific patterns that correspond to different problems. Count the number of flashes in each burst, then match the pattern to your manual’s troubleshooting chart. Common error codes include:
| LED Pattern | Fault Description | Typical Fix |
|---|---|---|
| 1 flash | Safety beam misaligned or blocked | Clean and realign beam sensors |
| 2 flashes | Door travelled too far or hit obstruction | Adjust DOWN travel limit |
| 3 flashes | Motor overheated from excessive cycling | Wait 15 minutes, reduce force setting |
| 4 flashes | Control board fault or wiring issue | Check all cable connections, call technician if persistent |
| 5 flashes | Remote frequency interference detected | Change to alternative frequency band (868 MHz models only) |
Press the Light button once to acknowledge and clear a displayed error code. If the same pattern returns within three cycles, the underlying fault hasn’t been fixed and you need to address the root cause rather than repeatedly clearing the warning. Persistent 4-flash errors usually indicate damaged electronics that require professional diagnosis and replacement parts.
Step 4. Repair issues or call an Adelaide technician
Your Merlin roller door opener manual includes a troubleshooting section that covers about 80 per cent of common faults, from blocked safety beams to worn drive gears, and most of these problems take under 30 minutes to fix with basic tools. However, some repairs involve high-voltage wiring, spring tension systems, or damaged circuit boards that require specialist equipment and training. Knowing which category your problem falls into saves you time, money and the risk of turning a simple fault into an expensive disaster.
Fix these problems yourself
Check your manual’s troubleshooting chart and tackle these repairs with confidence. Misaligned safety beams cause the door to reverse immediately when closing, so clean both sensor lenses with a dry cloth and adjust them until the indicator LEDs glow solid green. Flat remote batteries are the number one callout that isn’t actually a callout, so swap the CR2032 coin cell before assuming the handset is broken.
If your door creaks or jerks during operation, the drive chain or belt needs lubrication. Spray white lithium grease along the full length of the chain every six months, wipe off excess, then run three open-close cycles to distribute the lubricant evenly. Worn curtain straps that show fraying or cracking need replacement before they snap, and you can order genuine Merlin parts through authorised suppliers.
Attempting spring adjustments without proper training causes approximately 70 per cent of serious garage door injuries in Australia.
Call an Adelaide specialist for these faults
Contact a qualified roller shutter technician when you encounter broken torsion springs (the door feels extremely heavy in manual mode), burnt motor windings (smell like melted plastic), damaged control boards showing multiple error codes simultaneously, or any issue involving mains voltage wiring. Adelaide specialists carry replacement parts on their vans, complete repairs in one visit, and provide warranty coverage that protects you if the same fault returns.
Professional diagnosis also makes financial sense when you’ve already spent two hours following your manual without success. Roller Shutter Repairs Adelaide technicians charge no callout fees and arrive within hours across all Adelaide suburbs, so you spend less time troubleshooting and more time with a working door.
Ready to fix your Merlin opener – or call the experts on 0414611662
You now have the knowledge to download your Merlin roller door opener manual, program remotes, adjust travel limits, and clear error codes without waiting for outside help. Most Merlin troubleshooting tasks take under 30 minutes once you follow the correct model-specific instructions, and you’ll save the cost of an unnecessary service call for problems you can fix yourself. The manual gives you control over your door’s operation and helps you understand what’s happening when something goes wrong.
However, problems involving spring tension, burnt motors, or persistent electrical faults need professional attention to avoid injury or further damage. Roller Shutter Repairs Adelaide provides fast, no-callout-fee service across all Adelaide suburbs, with technicians who carry genuine Merlin parts and complete most repairs in a single visit. Contact the team when your manual leads you to a repair that’s beyond DIY scope, or when you’d rather spend your Saturday doing something other than standing on a ladder.