Top 15 Roller Shutter Replacement Parts & Buying Guide
Need a new winder strap, motor or a handful of axle clips? Below are the fifteen roller-shutter parts Adelaide homeowners order most often when a curtain jams, rattles or refuses to budge:
- Replacement winder strap
- Winder box
- Tubular motor
- Remote control & receiver
- Roller axle
- Bearings & end caps
- Aluminium slats
- Bottom bar & weather seal
- Guide rails & brushes
- Spring fasteners
- V-stoppers
- Manual crank handle & gearbox
- Locking hardware
- Solar panel & battery kit
- Smart switch / timer
Choosing the right part first time saves more than frustration—it protects security, insulation and, in many cases, your insurance. Measure twice, match materials and check motor torque before clicking “buy”. Straps and stoppers are an easy DIY afternoon; motors and hard-wired switches legally require a licensed electrician in South Australia. The guide that follows breaks every item into three quick sections: what the part does, how to pick the correct replacement, and a snapshot of installation difficulty and price. Keep this page open, grab a tape measure, and get that shutter rolling again. or call us on 0414611662 to do it for you.
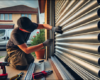
1. Replacement Winder Strap (Webbing/Tape)
A frayed or snapped strap is the number-one culprit behind “stuck” manual shutters we’re called to fix. Swap it early and you’ll avoid the domino effect that can wreck the winder box and axle—saving money and keeping the curtain sealed for security and insulation.
What It Does & Why It Matters
The strap runs from the spring reel inside the winder box up to the axle, converting your pull into smooth curtain movement. UV, heat and daily tugging slowly abrade the fibres; once threads start to fluff or the strap stretches more than 10 mm under tension, failure is imminent.
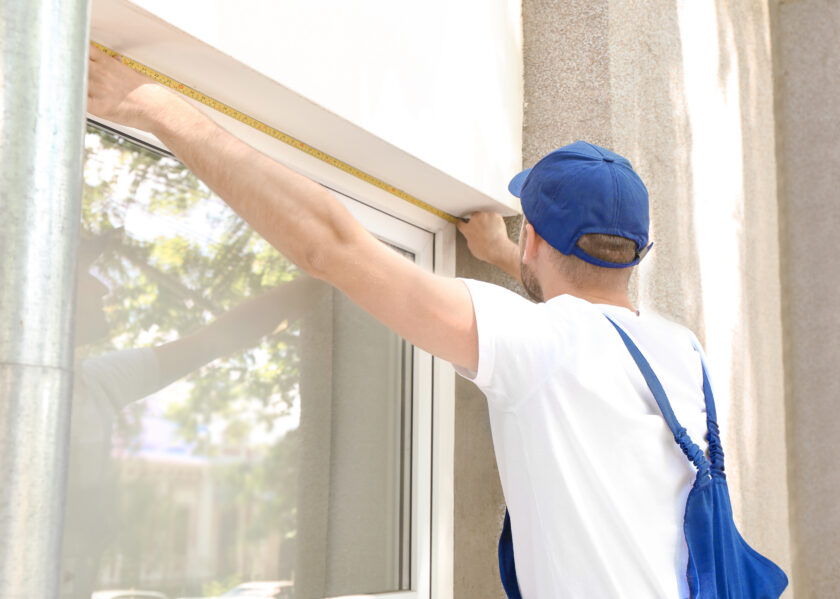
Choosing the Right Replacement (Width, Length, Material)
- Widths: 14 mm suits most windows; 22 mm for wide doors—measure the old strap with callipers.
- Length: take reveal height × 2, then add 1 m spare for the reel wind.
- Material: polyester webbing with UV-stable coating outlasts cotton blends.
- Colour: grey and beige dominate Aussie stock; match to existing to avoid an obvious strip inside the room.
Installation Snapshot & Cost Range in Australia
Lock the curtain halfway, pop the winder cover, and unwind the spring tension carefully before cutting the old strap. Thread the new tape, pre-wind five turns, then re-attach. DIY parts cost $15–$20 for a 5 m roll; hiring a tech comes in at roughly $130–$180 including call-out.
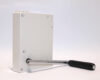
2. Winder Box / Strap Winder
That plastic (or aluminium) cassette screwed to the reveal does more than tidy the strap—it contains the spring-loaded reel that rewinds the tape after every lift. When the spring fatigues or the spindle bearings grind, the strap droops, grates or stops retracting altogether. Swapping the whole box is usually faster and cheaper than trying to rebuild the internals.
Function & Failure Signs
- Spring reel maintains tension so the strap stays flat against the wall
- Worn unit sounds like sandpaper, feels jerky or needs hand-feeding
- Cracked housing lets dust in and accelerates strap wear
Sizing & Compatibility
- Mount style: flush-mount sits inside the plaster; face-fit screws onto the surface
- Box width: common 155 mm and 165 mm—measure existing hole before ordering
- Spindle length & bolt pattern vary by brand; match these or drilling gets messy
- Casings: UV-stable ABS for indoor use, powder-coated aluminium for harsh sun
Install & Budgeting
Isolate the strap by locking the curtain, undo two to four screws, transfer the strap onto the new reel, then refit. Basic tools: Phillips driver and a strap pin. Expect to pay $50–$70 for a quality box; a technician will charge about $130–$180 including a fresh strap and disposal of the old unit.
3. Tubular Motor (240 V or Low-Voltage)
When a roller shutter refuses to budge at the press of a button, 9 times out of 10 the tubular motor hiding inside the axle is to blame. Swapping the motor is less daunting than most people think, but choosing the right spec is critical—buy the wrong torque or shaft diameter and the rest of your roller shutter replacement parts shopping will be wasted.
Role in Automated Shutters
The motor sits inside the octagonal drum and turns the axle, lifting or lowering the curtain. An internal limit switch stops travel at the exact open/close points you set. Common failure clues include:
- Buzzing or clicking but no movement
- Motor overheats and trips the breaker
- Curtain stops short because limits have drifted
Selecting Torque & Diameter
Rule of thumb: heavier or wider curtains need higher Newton-metre (Nm) output and a fatter motor body.
| Shutter width (m) | Approx. weight (kg) | Suggested torque (Nm) |
|---|---|---|
| up to 1.5 | 12–18 | 10 Nm |
| 1.5 – 2.4 | 18–28 | 20 Nm |
| 2.4 – 3.0 | 28–40 | 40 Nm |
Quick calc: Torque (Nm) = (curtain weight × axle radius) ÷ efficiency factor. Most residential installs use 60 mm drums, but slim 45 mm motors are available for tight headboxes—double-check your axle inner diameter before ordering.
Installation & Electrical Compliance
Because motors connect to mains, South Australian regulations demand a licensed electrician under AS/NZS 3000. The process:
- Isolate power at the switchboard.
- Remove end plate, slide the old motor free.
- Fit adaptor wheel and drive plug to new unit, then insert.
- Reconnect wiring, restore power and reset limits.
Expect to pay $180 –$750 for the motor (low-voltage solar units sit at the lower end), and $450–$900 fully installed and warranted. Skipping the sparkie risks insurance knock-backs and a toasty fried motor—money well spent on peace of mind. price varies on motors needs and if its standard or remote.
4. Remote Control & Radio Receiver Kit
The brain of an electric shutter is the radio receiver tucked beside the motor; the handset is its voice. When either goes missing or fails, swapping in a matched kit is one of the simplest roller shutter replacement parts jobs you can tackle.
Why You Might Need a New Set
Lost remotes, worn membrane buttons, water damage or outdated fixed-code security are all common triggers. A new transmitter–receiver pair instantly modernises security encryption and can add extra channels for group control.
Matching Frequencies & Brands
Check the sticker on your existing motor: most Australian units run 433 MHz rolling-code, while newer European brands use 868 MHz. If labels are unreadable, measure the receiver plug—universal 5-wire adaptors fit nearly every brand and let you mix old motors with modern handsets.
Pairing Steps & Cost
- Isolate power, plug in the new receiver.
- Restore power, press the “P2” or “Prog” button until the shutter jogs.
- Press the remote’s up button twice—paired.
Expect to pay $60–$160 for a multi-channel kit; labour is negligible if the headbox is already open for other work.
5. Roller Axle / Octagonal Drum
Think of the axle as the spine of your shutter: every slat, clip and motor load is transferred through this hollow steel or aluminium tube. A bent or rust-pitted drum throws everything out of alignment, overworks the motor and chews out bearings, so catching damage early keeps the repair bill small.
Purpose & Wear Indicators
- Carries the curtain weight and transmits motor or strap torque
- Houses the drive adaptor for the tubular motor
- Red flags: visible bowing, surface rust, “egg-shaped” rotation, or the curtain tracking to one side
Measuring for Replacement
Most domestic shutters in Australia use 40 mm or 60 mm octagonal drums. Measure across the flat faces, not point-to-point. Length should equal the reveal width plus roughly 10 mm clearance for bearing plates. If you’re upgrading to a larger motor, confirm the new shaft fits both the drum and end bearings.
Swap-Out Tips & Expenses
Lock the curtain mid-way, prop it with timber blocks, then remove bearing plates and slide the axle clear. Transfer spring fasteners or motor adaptors before refitting. Parts cost $10–$120 depending on diameter and galvanised versus aluminium finish; add $10 for fresh bearings if they show play. A technician swap, including realignment, typically lands between $220 and $350.
6. Bearing & Axle End Caps
These small, often-overlooked components sit inside the headbox where the axle meets the side plates. Good bearings keep the drum spinning freely while the end caps stop lateral movement and shield the bearing from grit and moisture. Ignore a squeak or wobble and you risk accelerated motor wear and an out-of-square curtain.
Job & Common Issues
- Bearings cut friction; end caps centre the axle.
- Tell-tale problems: metallic grinding, stiff hand operation, or the curtain tracking hard to one side.
- Rust, dried grease and cracked nylon housings are the usual culprits.
Bearing Types & Dimensions
- Budget shutters use a nylon bush (cheap, quiet, shorter life).
- Mid-range units upgrade to sealed steel ball bearings, typically 12 mm ID × 40 mm OD.
- Measure both inner and outer diameters with callipers; mismatched sizes will bind.
Replacement How-To & Price
Pop the bearing plate, tap the old bush out with a drift, press-fit the new unit and add a pea-sized dab of lithium grease. Parts run $15–$35 a pair; a full service with axle realignment sits around $150.
7. Aluminium Slats (Curtain Panels)
Lightweight yet rigid, the interlocking slats form the visible “curtain” that blocks heat, light and prying eyes. Because every lift rolls and unrolls them around the axle, they cop dents, scratches and foam fatigue long before other roller shutter replacement parts give up.
Function & Damage Clues
Healthy slats:
- insulate with injected polyurethane foam
- lock together to resist crow-bar attacks
- guide smoothly without snagging
Replace any panel that shows:
- creases or kinks (the curtain will telescope off-centre)
- crushed end hooks or broken hinging lips
- rattling caused by de-bonded foam or loose inner rods
- severe chalking or faded powder coat that spoils kerb appeal
Ordering Correct Profile & Colour
Measure one intact slat, heel to toe:
- 40 mm curved profile suits most windows
- 55 mm “high-density” profile carries thicker foam for large doors
Confirm the hook style matches your existing spring fasteners, then pick a powder-coat colour from the standard Colorbond palette so any new panels blend in. Ask the supplier to pre-punch drain holes if the headbox is exposed to rain.
Installation & Costs
- Lock the shutter halfway and remove the bottom bar screws.
- Slide the damaged slat sideways and pull it down.
- Feed the replacement upward, ensuring hooks interlock cleanly.
- Refit bottom bar and V-stoppers.
DIY on a ground-floor window takes 15 minutes; anything higher usually needs two people and a sturdy ladder. Expect to pay $8–$15 per slat, or around $250 for a full curtain rebuild, plus labour if you’d rather let a tech tackle the height.
8. Bottom Bar & Weather Seal
The bottom bar is the curtain’s steel-toe boot. With its seal it adds weight for smooth rolling and blocks drafts, bugs and rain.
Why It’s Crucial
A bent or missing bar lets the curtain flap, invites attacks and leaves daylight gaps that raise heating bills. Replacing it restores security, noise control and efficiency.
Measuring & Seal Options
Measure curtain width; order a bar cut to size with 2 mm side clearance. Extruded aluminium resists dents; roll-formed suits smaller shutters. Pick brush seals for smooth sills, rubber fins for rough brick.
Replacement Steps & Cost
Lock the shutter halfway, remove the V-stoppers, undo retaining screws and slide the old bar off. Tap the new seal into its groove, slide bar on, refit stops. Parts: bar $25–$60, seal $10–$20 /m; professional swap around $120.
9. Guide Rails & Brush Inserts
Even the best motor or strap won’t save a shutter whose curtain scrapes the brickwork. The side guide rails and the fuzzy brush that lines them keep everything centred, quiet and draught-free. When they bend, rust or lose their bristles, the curtain rattles like a loose blind and heat pours out.
Role in Stability & Noise Reduction
- Rails act as tracks, stopping the curtain drifting sideways and jamming.
- Nylon or polyester brush inserts cushion each slat, cutting metal-on-metal clatter.
- An intact brush also seals out insects and reduces convection gaps around the edges.
Selecting the Right Rail Profile
Measure external width with callipers:
- 53 mm face-fit rails screw onto masonry—common on retro-fits.
- 66 mm build-in rails sit behind render on new builds.
Choose colour-matched, powder-coated aluminium for corrosion resistance; thin steel rails can twist during storms. Replace brushes when the pile is under 5 mm or missing sections.
Fitting & Budget
Remove the bottom bar, unscrew old rails and flick out spent brushes. Shim new rails plumb with PVC packers, then fix using wafer-head, silicone-free screws at 300 mm centres. Slide fresh brush strip into the channel before refitting the curtain. Expect $60–$120 for a rail pair and about $3–$5 per metre for brush—cheap insurance against larger roller shutter replacement parts later.
10. Spring Fasteners / Axle Clips
Hidden inside the headbox, these little stainless or galvanised clips lock the first curtain slats to the axle so every turn of the drum lifts the whole shutter. When they break or stretch, the axle spins but the curtain stays put—one of the most frustrating faults we see.
Purpose & Failure Symptoms
- Transfers torque from axle to curtain
- Typical failures: cracked spring steel, missing retaining tongues, or rusted-through tabs
- Tell-tale sign: drum rotates freely while slats barely move
Clip Variants & Material
Choose clips that match your slat profile:
- Flat spring steel clips for 40 mm curved slats
- “Top-fix” plastic snap-ins for 55 mm high-density panels
Coated stainless resists coastal corrosion better than mild steel.
Replacement & Cost
Count existing clip spacing (roughly every 400 mm) before removal. With the shutter locked halfway, slide the axle clear, pry out damaged clips and press new ones until they click. A bag of 10 costs $8–$15; labour is negligible if the drum is already exposed for other roller shutter replacement parts work.
11. V-Stoppers & End Stops
Small but critical, V-stoppers sit at each end of the bottom bar and act like parking brakes for the curtain when sourcing roller shutter replacement parts.
Why They’re Needed
They stop overshoot, balance spring tension, and keep the weather seal from scuffing the sill.
Sizing & Material Choice
Standard sizes: 15 mm or 20 mm. Rubber-coated PVC hushes closing; rigid nylon shrugs off knocks.
Fast Fit & Pricing
Lock shutter midway, unscrew old plugs, fit new pair flush and tighten. Cost $2–$5; job takes minutes tops.
12. Manual Crank Handle & Gearbox
Cranking a large or upstairs shutter with a tired strap is hard yakka. A detachable handle coupled to a wall-mounted gearbox multiplies your effort, so one person can raise a 30 kg curtain without broken shoulders.
Function for Large or High Shutters
Inside the die-cast housing, bevel gears convert each turn of the handle into smooth axle rotation. Unclip the handle when finished and it becomes a security feature—no crank, no forced lift from outside.
Specifying Length & Gear Ratio
Choose a telescopic handle that reaches comfortably to shoulder height; 1–1.6 m units suit most homes. Match gearbox gearing to load: 1:3 for standard windows, 1:5 for extra-wide doors or cyclone-rated curtains.
Installation & Cost Estimate
Position the gearbox square to the axle, anchor with 8 mm masonry screws, insert the ball-joint pin and clip in place. Expect parts to cost $30–$50 for the handle and $60–$110 for the gearbox; professional supply-and-fit hovers around $180.
13. Locking Mechanisms & Security Clips
A solid motor or strap is useless if a burglar can simply lift the curtain by hand. Fresh locking hardware is therefore one of the smartest roller shutter replacement parts you can buy, especially if your insurer insists on “positive-locking devices” for ground-floor openings.
Importance for Security Compliance
Working locks clamp the bottom slats to the guide rails, resist crow-bar torque and stop wind lift in a storm. South Australian building insurers often void break-in claims when shutters were left unlocked or fitted with obsolete devices, so upgrading keeps both property and paperwork safe.
Options Available
- Centre key locks with twin steel rods for wide spans
- Slim side-bolt locks that shoot into each guide rail
- Spring-loaded security clips that auto-engage when the curtain is fully down (great for rental properties)
Choose stainless or zinc-plated components to avoid coastal corrosion, and confirm rod length matches your shutter height.
Fitment & Costs
Mark the lock barrel hole 100 mm above the bottom bar, drill through the slat, insert the barrel and secure the escutcheon. Feed connecting rods into pre-punched holes and test engagement. DIY kits run $35–$80; a full set with rods, clips and professional installation typically costs $120–$180 and takes under an hour.
14. Solar Panel & Battery Pack Kits
Converting a shutter from mains to solar power is a popular way to sidestep wiring costs and keep the curtain moving during black-outs. A compact mono-crystalline panel bolts to the headbox or roof, trickle-charges a lithium battery pack and lets the existing DC motor run free of the grid. For many Adelaide homes that get 2,600+ sunshine hours a year, it’s the one upgrade that pays for itself while slashing the need for future roller shutter replacement parts tied to electrical faults.
Why Upgrade
- No electrician needed if you already have a 12 V DC motor – just plug and play.
- Zero running costs; every open/close cycle after install is powered by the sun.
- Battery backup keeps security intact during storms and black-outs.
- Eco cred that nudges property value up for energy-conscious buyers.
Choosing Output & Panel Size
Match kit voltage to your motor: 12 V for windows, 24 V for wide doors. Then check usage:
| Daily cycles | Suggested panel | Battery capacity |
|---|---|---|
| 1–4 | 10 W | 2.2 Ah |
| 5–8 | 20 W | 4.4 Ah |
| 9–12 | 30 W | 6 Ah+ |
Aim the panel north at a 30°–35° tilt in Adelaide for year-round harvest.
Installation Snapshot & Budget
- Bolt the bracket through existing headbox holes.
- Clip solar lead into the battery pack; attach pack to wall with Velcro strips.
- Unplug motor’s old adapter, push the two-pin battery plug home, test.
Most homeowners finish in under an hour with only a drill and Phillips driver. Kit prices sit around $300–$550, with a 2–4 year payback depending on electricity tariffs and cycle frequency.
15. Control Switches, Timers & Smart Wi-Fi Modules (Plus Buyer’s Checklist)
A fresh switch plate or smart hub is the finishing touch that turns a repaired shutter into a convenience upgrade. From rockers to app-driven Wi-Fi bridges, these controls let you set-and-forget security, insulation and light control.
Part Overview & Smart Home Benefits
- Wall rocker or key switches for simple up-stop-down control
- Seven-day timers that auto-close at dusk for heat retention
- Plug-in Wi-Fi modules that add Alexa/Google voice and geo-fencing so the curtain shuts when you leave
Compatibility & Future-Proofing
Check relay rating: ≥4 A for low-torque motors, ≥10 A for doors wider than 2.4 m. Dry-contact modules suit any brand; proprietary “enabled” motors need the matching bus cable. Pick gear with firmware updates and Aussie C-Tick so it won’t brick after an OS upgrade.
Quick-Fire Buying Checklist
- Measure shutter width & weight before ordering electronics.
- Confirm motor model in the PDF spec sheet.
- Verify supply voltage (240 V, 24 V or 12 V).
- Demand a minimum two-year warranty and local stock for fast returns.
- Check shipping ETA—regional SA can add a week.
Cost Guide & Install Tips
Basic rocker: ~$25. Seven-day timer: $400–$900. Wi-Fi hub bundle: $220–$250. Allow 30–60 minutes’ labour for a licensed electrician to swap a mains switch; low-voltage plug-ins are safe DIY if you follow the manual.
A Quick Wrap-Up
Replacing a single dodgy component can bring a sluggish shutter back to showroom smooth, but only if the part you order genuinely fits. Here’s the 30-second cheat sheet:
- Measure everything twice: strap width, axle diameter, rail profile, motor torque.
- Match materials: aluminium drums love steel bearings; coastal homes need stainless clips and locks.
- Keep systems compatible: 433 MHz remotes won’t talk to 868 MHz receivers, 60 mm motors won’t sit in a 40 mm drum.
- Check DIY difficulty: straps, stoppers and brushes = weekend projects; mains motors and wall switches = call a sparky.
- Budget realistically: a $12 V-stopper is useless if a bent rail ($90) keeps chewing it up—fix root causes, not just symptoms.
Balancing up-front spend against long-term reliability and safety is the real money saver. Skimp on bearings today and you’ll be shopping for another motor tomorrow; over-spec a quality part and you may never touch it again. If any measurement, wiring or ladder work feels beyond your comfort zone, flick a message to the local experts at Roller Shutter Repairs Adelaide and get the job done right—no call-out fees, no dramas.