DIY Guide: How to Replace a Roller Shutter Cord Like a Pro
A snapped roller shutter cord always seems to break at the worst moment—right when you’re heading out the door or locking up the shop. The shutter won’t budge, the frayed end is mocking you, and you’re debating an expensive call-out against having a crack at it yourself. The truth is, with a like-for-like cord, basic hand tools and about an hour of care, you can get that shutter gliding again without disturbing the internal spring.
Quick answer: open the pelmet, unspool and remove the damaged cord, thread an identical replacement through the drum and wall winder, tension it, then reassemble—most DIYers finish inside 60–90 minutes. or call us on 0414611662 for all your shutter needs
In the sections that follow you’ll learn how to confirm the cord is actually the culprit, pick the right replacement kit available from us, and tension the new line so the shutter stays exactly where you leave it. We’ll flag the pitfalls that chew up cords prematurely and share the safety shortcuts our Adelaide techs swear by. Follow along and you’ll save cash now while adding years to your shutter’s life.
Step 1 – Confirm the Cord Is the Culprit
Before you start hunting for screwdrivers, make certain the cord is really to blame. A jammed shutter can stem from bent slats, gummed-up tracks, or a tired internal spring, and replacing the cord won’t fix any of those. This quick triage will keep your repair on target.
Inspect for visible damage
Look at the cord where it enters the wall winder and where it loops over the top pulley. Classic red flags are:
- Fuzzy, frayed fibres or a glossy “glazed” patch
- Cord bunching or jumping teeth on the pulley
- A completely snapped tail disappearing into the wall box
If you can see daylight through strands, the cord is past its use-by date.
Rule out other manual-shutter faults
Run the shutter up and down a little (if it still moves):
- Listen for scraping — could be debris in the guides
- Feel for uneven resistance — a bent slat or misaligned track
- Check the axle spring by lifting the bottom rail slightly; no rebound means the spring, not the cord, has failed
Fixing these first prevents a fresh cord wearing out prematurely.
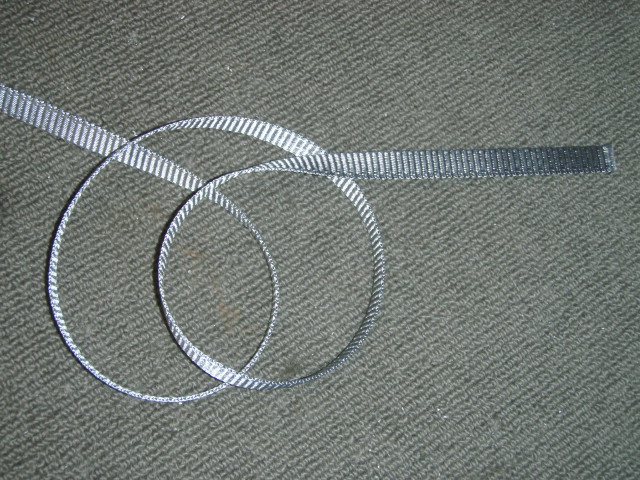
Decide between cord, strap, or tape replacement
Cord, strap and tape all do the same job but only if they match the existing hardware. Measure what you have or check the winder label, then use the chart below.
| Style | Typical width/diameter | Fits common AU winders | Safe working load |
|---|---|---|---|
| Round cord | 3–4 mm | Small wall boxes | 150 kg |
| Flat strap | 14–16 mm | Standard crank winders | 180 kg |
| Narrow tape | 10–12 mm | Slimline units | 120 kg |
Choosing the right style now will make the rest of this guide on how to replace roller shutter cord a breeze.
Step 2 – Gather Tools, Materials, and the Right Replacement Kit
Nothing stalls a weekend project faster than realising you’re one screw short or the new cord is 300 mm shy of the floor. Spend five minutes collecting everything now and the actual swap-over will run like clockwork. Here’s the shopping list our Adelaide technicians hand to customers who ask how to replace roller shutter cord without repeat trips to Bunnings.
Shopping list and part specs
- Replacement cord or strap – length =
opening height × 2 + 500 mmslack- 3–4 mm round polyester or 14–16 mm webbing strap
- UV-stabilised, minimum 150 kg breaking strain
- Cord winder screws – 8G countersunk, stainless if near the coast
- Wall plugs – 6 mm nylon for crumbling brick
- Spare rivets or self-tappers for the pelmet cover (check what’s fitted now)
Essential tools
- Phillips #2 and flat-blade screwdrivers
- Nut drivers – 5 mm & 10 mm for common axle bolts
- Drill/driver with 4 mm metal bit (handy for drilling out pelmet rivets noted in the PAA snippet)
- Long-nose pliers for teasing knots and fishing cord through the guide hole
- Sharp scissors or side cutters plus a lighter to heat-seal cord ends
- Optional: spring clamp to hold the shutter rolled up, head torch for dim pelmets
Safety gear
- Certified step-ladder rated 120 kg or higher
- Protective eyewear for drilling aluminium
- Cut-resistant gloves; frayed cords act like mini saws on fingers
- Dust mask if pelmet shows signs of insulation debris or bird nests
Lay these items within arm’s reach and you’re ready to crack on with the cord removal.
Step 3 – Prepare the Work Area and Secure the Shutter
A tidy, controlled work zone saves skinned knuckles and rogue screws. Before you lay a hand on the pelmet, take five minutes to set up properly. The roller curtain will be unsupported once the old cord is cut, so stability is everything.
Isolate the window or door
Slide furniture back, roll up rugs, and spread an old sheet to catch dust and the inevitable tiny parts. Close interior doors to keep kids and pets out. If you’re working on a shopfront, tape a “Maintenance — Do Not Operate” sign over the winder handle to stop well-meaning helpers from giving it a crank while you’re perched on the ladder.
Roll the shutter fully up and lock it
Wind the curtain to its highest point, then wedge a timber off-cut or slip a small G-clamp inside each guide rail just above the bottom bar. These improvised locks stop the slats free-falling when the cord is removed and protect both fingers and glazing.
Disconnect any secondary fasteners
Some commercial and patio shutters have padlocks, sliding bolts, or strap anchors that tether the bottom rail. Remove or slacken these now. Forgetting one can twist the curtain and undo all the careful tensioning you’ll do later when replacing the roller shutter cord.
Step 4 – Open the Pelmet and Access Internal Components
This is the point where most DIYers hesitate, but popping the pelmet lid is far less dramatic than it looks. The cover is simply a thin sheet of aluminium or steel hiding the drum axle and pulley—think of it as the bonnet on a car. Treat it gently and re-assembly will be painless; bend or dent it and you’ll fight rattles forever. Work methodically, keep one hand supporting the panel at all times, and you’ll be staring at the shutter’s guts in five minutes.
Remove the pelmet/box cover without damage
Roller shutter housings in Australia usually fall into three camps:
- Snap-on steel lids — start at one end, slip a wide flat-blade screwdriver under the lip and twist. Walk the tool along until the edge releases.
- Screw-fixed alloy trims — remove the visible 8 G or 10 G screws, then pull the cover straight out toward you. Keep the screws in a magnetic tray.
- Riveted aluminium boxes — plug in the drill/driver, fit a 4 mm metal bit and drill the centre of each rivet slowly. As soon as the head pops, stop; pushing through risks scoring the wall. Have a helper catch the cover so it doesn’t cartwheel off the ladder.
Tip: wear eye protection—aluminium swarf is needle-sharp.
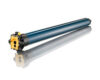
Locate the drum axle, pulley wheel, and cord route
With the lid off you’ll see:
- A hollow drum axle running full width; the shutter curtain wraps around it.
- A small plastic or nylon pulley wheel on one side—the old cord knots here.
- A guide hole in the wall where the cord disappears toward the winder box.
Imagine a clock face: the cord leaves the axle at roughly 7 o’clock, travels over the pulley, then drops vertically through the guide. Keep this orientation in mind when threading the new line.
Photograph or label before disassembly
Before loosening anything, grab your phone and take a couple of clear shots from different angles. If you prefer analogue, stick masking tape on the axle and mark the cord path with arrows. These references are gold when you’re midway through learning how to replace roller shutter cord and wondering which way the wrap goes. Five seconds of documentation now will save twenty minutes of head-scratching later.
Step 5 – Detach and Remove the Old Cord
With the pelmet open and everything photographed, it’s time to free the worn-out line. The goal is to keep the shutter secure while you release tension from the wall winder, then disconnect the knot at the drum. Work slowly—an uncontrolled spring rewind can bruise knuckles or chip paint.
Unwind the cord from the wall winder box
Crack the winder lid and locate the spool. Hold the handle with one hand while you gently let the cord feed back inside until the spring feels neutral, roughly half a turn before it wants to snap back. Slip a 3 mm Allen key or small screwdriver through the locking hole in the side of the spool; this pins the spring and prevents surprise rewinds. Now pull the loose tail clear of the spool hub.
Release the knot or clamp on the axle
Back up at the pelmet, follow the cord to its fixing point on the pulley. You’ll usually meet one of three fasteners:
- A simple clove-hitch around a plastic lug
- A figure-eight knot through a drilled eyelet
- A moulded wedge clip pushed into a slot
Whichever you find, ease it out with long-nose pliers; if it’s stubborn, cut it flush and pick out the fibres.
Pull the cord through the guide hole
With both ends free, tug the cord downward through the wall guide until it slides out of the winder cavity. Coil it up, bin it, and run a fingertip around the guide and pulley for burrs—any sharp edge left behind will chew up your brand-new line and have you Googling “how to replace roller shutter cord” all over again.
Step 6 – Thread and Secure the New Cord
The tricky part is keeping even tension while you marry the new line to the old hardware. Work slowly and think of the cord as a drive belt: no kinks, no twists and no bulky knots. A clean run here is what separates a silky-smooth shutter from one that chatters and slips a week later.
Pre-treat cord ends
Cut both ends square with sharp scissors, then pass each tip through a lighter flame for one second until the fibres melt and taper. Roll the molten edge between gloved fingers. This prevents fraying and gives you a rigid “needle” that slips through tight guides. If you’re using 14 mm webbing strap, fold the last 10 mm, melt lightly and press flat with pliers to create a thin spear.
Attach to axle pulley first
Wrap the treated end once around the pulley hub in the same direction the old cord left the drum (check your photos). Tie a compact double fisherman’s knot or snap the factory lug clip into place, pulling firmly to seat it. Trim any tail longer than 15 mm—excess will catch on the rolling curtain and chew itself apart.
Route down through wall guide and into winder box
Feed the free end through the guide hole toward the interior. If the angle is awkward, tape the cord to a length of stiff electrical wire and fish it through. Keep gentle tension so loops don’t spring off the pulley while you’re juggling ladders. Once inside, thread the line through the centre of the winder spool.
Wind onto the spool under tension
Remove the locking pin just enough to allow the spool to turn. Hold the handle and wind the cord clockwise (or match the original direction) while maintaining light back-pressure on the line. Stop when the shutter sits half-open unaided—this means spring and cord are balanced. Replace the winder lid, tug the cord briskly a few times to confirm it seats without skip, and you’re ready for reassembly.
Step 7 – Reassemble, Test, and Fine-Tune
Cord’s in, tension feels good—time to button everything up and make sure the shutter behaves. This stage is mostly about reversing what you pulled apart, but the order matters. A slipped pelmet lid, a missing screw or an over-wound spool can undo the last hour’s work, so move slowly and check each item off.
Once reassembled, run the shutter through several full cycles. You’re listening for clean, even motion and watching that the bottom rail stops exactly where you want it. A couple of minor tweaks now will save another climb up the ladder next weekend.
Replace pelmet cover securely
- Lift the cover into place from the top edge first, supporting the weight to avoid bending.
- Snap, screw or re-rivet according to the original fixing method—use new fasteners if the old ones were rusty or stretched.
- If re-rivetting, fit neoprene washers under the heads; they stop metal-to-metal chatter and keep rain out.
- Run a finger along the seam to confirm it’s flush against the wall—gaps invite whistling wind noise.
Operate shutter through full range
- Remove the wedges or G-clamps from the guide rails.
- Wind the shutter fully down until the bottom rail meets the sill; note the cord stacking on the winder—no overlapping loops should appear.
- Wind it back up to the top. Listen for scraping or ticking that could indicate a twist in the new line.
- Repeat twice more; smooth, repeatable motion means the tension is close.
Adjust tension if shutter drops or stalls
- Shutter drifts downward: pop the winder lid, add half a clockwise turn to the spool spring, refit and retest.
- Shutter stops mid-way or feels heavy on the crank: back the spring off by half a turn.
- Aim for the sweet spot where the curtain will hover when left half-open but still sits firmly on the sill when fully down.
Final safety check
- Peek inside the pelmet with a torch—confirm no tools, rag ends or loose screws remain.
- Tighten any ladder or scaffold braces you loosened, then clear the work area of off-cuts and drill swarf.
- Give the glass and guides a quick wipe; fine aluminium dust can scratch panes if left.
- Finally, wind the shutter one last time while listening from outside—silence means you’ve nailed how to replace roller shutter cord like a pro.
Step 8 – Maintain and Troubleshoot for Long-Term Performance
Swapping in a fresh cord isn’t the end of the story; a little monthly TLC keeps the whole assembly gliding and spares you another Sunday figuring out how to replace roller shutter cord prematurely. The good news is that the upkeep is quick, clean, and needs nothing fancier than a spray can and a rag.
Monthly DIY upkeep
- Dust the guide tracks with a soft brush or vac nozzle—grit is enemy number one for cords.
- Run a light bead of silicone spray down each track; wipe the excess so it doesn’t attract more dust.
- With the shutter half-open, eyeball the cord or strap for fuzzing or flat spots and nip issues in the bud.
Quick fixes for common issues
- Shutter stuck halfway? Nine times out of ten the winder spool is overtensioned—pop the lid off, back the spring off a single turn, then test.
- Cord slipping or squeaking? Check the nylon pulley for a shiny glaze; a quick scuff with 400-grit sandpaper restores grip and silence.
When to call in the pros
DIY stops here if you spot a broken internal spring, bent axle, or you’re tempted by a motor conversion. These jobs need specialised tools (and sometimes a new drum). A licensed technician can sort them safely and keep your warranty intact.
Ready to Roll Smoothly Again 0414611662 we can handle all your repair needs in Adelaide
That’s the job wrapped. By confirming the fault, setting up safely, cracking open the pelmet, swapping the cord, and dialling in the tension, you’ve ticked off all eight steps and learned first-hand how to replace roller shutter cord without drama. The shutter should now glide up, stay parked wherever you leave it, and settle down snug when closed.
Keep the tracks clean, give the winder a monthly once-over, and that fresh cord will outlast the old one by years. If you run into bigger headaches—snapped internal springs, dented axles, or the urge to go fully motorised—don’t wrestle with it solo. Our local techs are a phone call away and can usually sort it the same day. Get in touch with the team at Roller Shutter Repairs Adelaide for fast, no-fuss help and upgrades when DIY has done its dash.