Roller Shutter Remote Programming: Complete How-To Guide
Pressing the UP button and watching nothing happen is frustrating—especially when that shutter protects your front room or shopfront. Before you book a call-out, most remotes can be paired, reset or re-programmed in minutes with nothing more than a paper clip and a steady hand. This guide walks you through every brand Australians typically see—Somfy, Neco, Alpha, E-Port, Ozroll and more—so you can get the curtain moving again without guesswork.
You’ll learn how to identify your handset, wipe old codes, add extra channels, set precise limits and cure the glitches that stop a shutter halfway. Always switch the circuit off at the board and work from a stable ladder—no remote is worth a trip to A&E. Clear button-press sequences, timing cues and safety notes follow each step. Grab a torch and keep reading: the first thing to check is the tiny label on the back of your remote.
1. Identify Your Remote, Motor and Control System
Before jabbing random buttons, confirm that the handset, receiver and motor are speaking the same language. A Somfy RTS remote, for instance, won’t pair with an Ozroll E-Series head unit, no matter how long you hold PROG. Spend two minutes gathering the facts below and you’ll save thirty minutes of failed programming later.
1.1 Locate brand, model and frequency information
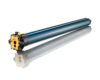
Flip the remote over or slide off the battery cover; most units hide a silver sticker showing brand, model code and frequency. Motors carry the same data on a decal near the power lead. Popular Australian names include:
- Somfy RTS / IO
- Neco NG / Gemini
- Alpha Tubular RF
- E-Port RF (Ozroll)
- Centurion & Grifco garage-style operators
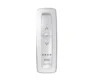
1.2 Understand single-channel vs multi-channel handsets
Single-channel remotes control one shutter only and usually have three buttons (▲ ■ ▼). Multi-channel handsets add a CH+ or wheel letting you cycle through up to 16 channels plus an “ALL” group—handy for whole-house control.
1.3 Check compatibility between remote and receiver
Match both the radio band (433 MHz or 868 MHz) and coding method (fixed-code DIP switch or rolling-code). Mismatched gear simply refuses to learn, so verify before proceeding.
1.4 Gather the essentials before you start
You’ll need:
- Small flat screwdriver or paper clip for recessed PROG buttons
- Torch and ladder for motor heads in pelmets
- Fresh batteries (CR2430/2032)
- PDF manual or quick-start sheet (download to phone)
- Pen and notepad to log channel assignments
With these on hand, you’re ready to reset any existing settings.
2. Reset Existing Settings (Optional but Recommended)
Wiping the memory first guarantees you’re not fighting against half-remembered codes from a previous owner or a dodgy pairing attempt. A clean slate also tightens security—only the handsets you add afterwards will operate the shutter.
2.1 When and why to perform a reset
Do it after moving in, losing a remote, changing batteries and nothing works, or when the curtain shudders the wrong way. In short, reset any time behaviour feels off.
2.2 Soft reset vs hard reset
- Soft reset: clears the selected channel only—ideal when one remote misbehaves.
- Hard reset: erases every handset in receiver memory; you’ll re-add each one from scratch.
2.3 Step-by-step reset procedures
- Somfy RTS: hold the recessed
PROGbutton for 7 s until the shutter jogs twice. - Neco: press and hold
LEARN15 s; LED flashes rapidly, then extinguishes. - Ozroll E-Series: remove battery, reinsert, then hold
UP+STOP5 s until a single jog.
2.4 Confirm reset success
Look for a jog, long LED blink or two beeps. If nothing, repeat—timing must be precise.
3. Pair the Remote to a Single Roller Shutter
Once the memory is clear, you can start fresh―this is the fun bit of roller shutter remote programming. The idea is simple: put the receiver (inside the motor or control box) into “learning” mode, then send it a teach-signal from your handset while you’re standing close enough for the radio waves to register. Follow the brand-specific timing below and you’ll be rolling in under two minutes.
3.1 Enter programming mode on the receiver or motor
Most tubular motors hide a small PROG, SET, or CODE button behind a rubber bung near the power lead. Wall-mounted controllers usually have a pencil-tip recess on the underside.
- Somfy RTS head: press
PROGonce – shutter jogs. - Neco controller: tap
LEARNbriefly – LED glows solid red. - Alpha tube: hold
SET2 s – unit beeps once.
3.2 Send the teach signal from the remote
Within 10 seconds:
- Somfy: poke the remote’s own recessed
PROGuntil the curtain jogs. - Alpha: hold
UP+DOWNtogether 2 s, then tapSTOPonce. - E-Port RF: press
UP>STOP>DOWNin quick succession.
Keep the handset about 30 cm from the receiver—too close can overload the RF front end.
3.3 Confirm pairing – visual and audible cues
A single jog, solid green LED or double-beep means success. No reaction? Retry; you have a 60 s window before learning mode times out.
3.4 Test basic operation
Run a full open and close. If the shutter travels the wrong way, don’t panic—direction is fixed in Step 5.
3.5 If pairing fails: quick fixes
- Fit fresh batteries.
- Kill nearby Wi-Fi routers for a minute.
- Remove metal objects blocking line-of-sight.
Repeat the sequence; most failures are battery or interference related.
4. Add Additional Remotes or Create Group Channels
Once one handset works, expanding control is easy—no ladders, no screw-drivers. Most receivers stay in “learn” mode for a short time after a successful pair, so you can teach extra fobs on the spot or come back later and follow the same few-button dance. Whether you want Mum to have her own key-ring remote or you’d like one channel that lifts every ground-floor shutter before sunrise, the steps below cover it.
4.1 Cloning an existing programmed remote
Skip the motor head entirely:
- On the working remote, press its recessed
PROGfor 3 s (Somfy) orLEARNtwice (Neco) until the shutter jogs. - Within 10 s, press the same button on the new remote once.
- Shutter jogs again—clone complete.
Repeat for each spare handset; no limit other than the receiver’s memory cap.
4.2 Assigning multiple shutters to one channel
Multi-channel handsets have a CH+ button or rotary wheel:
- Select an unused channel.
- Put each target shutter into learn mode (as in Step 3.1).
- Send the teach signal from the chosen channel.
Now a single tap opens the lot—handy for shopfront closing time.
4.3 Assigning one shutter to multiple channels
Useful when you want both “Bedroom” and “All Up” to move the same curtain:
- Pair the shutter to its dedicated channel first.
- Re-enter learn mode and repeat the process from a group channel.
The shutter will now answer to either.
4.4 Managing channel memory limits
Most receivers store 12–16 remotes or channels. If you hit the ceiling:
- Delete the oldest code by holding
PROG8 s (Somfy) orLEARN20 s (Neco) until three jogs. - Re-add only the handsets you still use.
4.5 Labelling and documenting channels
Save confusion later—fill in a quick log like the one below and tape it inside the switch box.
| Channel | Location | Notes |
|---|---|---|
| 1 | Living room east | Single shutter |
| 2 | All ground-floor | Group channel |
| 3 | Garage door | Key-fob only |
Keeping this record means future roller shutter remote programming takes seconds, not hours.
5. Set Upper, Lower and Intermediate Positions
Programming travel limits sounds fiddly, yet it’s the single best way to stop a motor straining, slats rattling or sun sneaking through at dawn. Each brand hides limit adjustment behind a specific button dance, but the concept never changes: enter limit mode, run the curtain to the exact spot, save. Take it slowly—one sloppy press can wipe both limits and send the shutter spinning off the tube.
5.1 Why limit settings matter
- Protects motor gearbox from over-run
- Ensures a firm seal at the sill for security and insulation
- Lets you create a repeatable “privacy” gap without guesswork
5.2 Enter limit-adjustment mode
Typical tubular motors: hold UP + DOWN together for 5 s until the shutter performs a short ‘jog’. Somfy adds a beep; Alpha flashes the head-unit LED.
5.3 Adjust downward (closed) limit
Press DOWN to creep the curtain to the perfect stop, then tap STOP (or MY on Somfy). The jog confirms the new lower limit.
5.4 Adjust upward (open) limit
Press UP, watch the roll stop just before the axle is visible, then hit STOP. Double-jog = saved.
5.5 Program a favourite intermediate position
Most remotes store a third spot: run the shutter to your ventilation gap and hold STOP/MY for 5 s. Future long-press calls it instantly.
5.6 What to do if direction is reversed
If UP sends the shutter down, reverse polarity: Somfy—hold MY for 5 s; Neco—press UP five times quickly; Alpha—toggle the tiny DIP marked “DIR”.
5.7 Document your final limit settings
Jot the number of screw turns or encoder counts in your notepad; tomorrow’s you will thank today’s you during any future roller shutter remote programming session.
6. Final Testing and Fine-Tuning
With limits saved and every handset taught, run a few real-world checks to make sure the motor, radio signal and safety cut-outs all behave exactly as planned.
6.1 Perform three complete cycles
Operate fully up and down three times, watching for smooth speed, no grinding noises and perfect stops on the marks.
6.2 Check signal range and interference
Walk to the furthest room and trigger the shutter; if response is patchy, straighten the antenna or shift the Wi-Fi router a metre away.
6.3 Secure your remote codes
Rolling-code systems scramble the signal each press; avoid cloning apps and never share remotes casually.
6.4 Replace or upgrade remote batteries
Common cells: CR2430, CR2032, A27. Swap every two years, recycle spent batteries, enjoy trouble-free clicks.
7. Troubleshooting Common Programming Problems
Nailed every step yet the shutter still misbehaves? Don’t bin the handset just yet. Most hiccups in roller shutter remote programming boil down to power, memory, or radio-frequency gremlins rather than a dead motor.
7.1 Remote LED lights up but shutter doesn’t move
- Receiver may have forgotten the code—re-pair on an empty channel.
- Check the isolation switch and circuit breaker.
- If power is present, a tired motor capacitor or loose neutral can stop movement; inspect wiring or book a sparky.
7.2 Shutter only moves in short bursts
Many controllers enter “step” mode after a collision or thermal trip. Hold STOP/MY for 5 s to clear. Allow the motor 15 minutes to cool if overheated.
7.3 Receiver won’t enter learning mode
Kill mains for 30 seconds, then retry. Still stuck? Measure supply voltage (should read 230 V ±10 %). As a last resort, perform a factory reset and start from Step 3.
7.4 RF interference and ghost operations
Baby monitors, neighbour’s garage doors, even metal down-pipes can swamp 433 MHz. Re-route the antenna away from cabling, or relocate the receiver box by 300 mm.
7.5 When to call a professional technician
Persistent overload faults, grinding noises, or a shutter jammed off-square signal mechanical trouble. A qualified roller-shutter specialist can replace motors, slats or guides safely.
Keep Your Roller Shutters Running Smoothly
Here’s the cheat-sheet:
- Identify your gear
- Reset old codes
- Pair the first handset
- Add extra remotes or groups
- Set accurate limits
- Test and fine-tune
- Troubleshoot the stragglers
Stick to that seven-step loop and most programming drama disappears.
A little routine care keeps things sweet between re-codes. Give tracks a quick vacuum every quarter, mist hinges with silicone spray, and swap remote batteries before they fade. Once a year, cycle each shutter a dozen times while listening for squeaks—early noise often signals a dry bearing or frayed tape. Record channel notes and limit positions in your phone so future tweaks take seconds.
If a motor still groans or a strap snaps, save yourself the headache and call the local experts at Roller Shutter Repairs Adelaide for same-day help across the metro area.