Roller Door Motor Replacement
What You Need to Know
If your roller door has started grinding, stalling, or refusing to budge altogether, chances are the motor is on its way out. A faulty roller door motor isn’t just an inconvenience—it’s a potential risk to your home or business security, and can quickly disrupt daily routines. Knowing when it’s time for a replacement, what’s involved in the process, and how to choose the right motor is essential for keeping your property safe, accessible, and running smoothly.
This guide is designed to walk you through every stage of roller door motor replacement. You’ll learn how to spot early warning signs of motor failure, understand the different types and features of roller door motors, and navigate the safety and energy standards that apply in South Australia. We’ll break down all the costs, compare DIY and professional installation, and offer clear, practical advice for each step—right through to sourcing quality parts and maintaining your new system for years to come.
Whether you’re a hands-on homeowner eager to tackle the job yourself or simply want to make an informed decision before calling in the experts, you’ll find the answers you need here. By the end of this article, you’ll know how to diagnose problems, select the right motor, ensure compliance with Australian standards, and keep your roller door operating at its best—all with confidence and peace of mind.
1. Diagnosing When Your Roller Door Motor Needs Replacement
Even a well-maintained roller door motor will eventually reach the end of its usable life. The key is spotting the difference between a unit that simply needs a service—cleaning, lubrication or sensor realignment—and one that’s starting to fail. Ignoring the warning signs not only risks leaving you stranded but may also lead to more costly repairs down the line. In this section, we’ll cover how to recognise motor failure symptoms, gauge the age and expected lifespan of your current unit, and run through basic maintenance checks to make sure replacement is truly necessary.
1.1 Common Motor Failure Symptoms
Noisy or unusual operation often heralds a dying motor. Listen for grinding, whirring or rattling sounds when the door opens and closes—these indicate worn gears or a failing gearbox. You might also notice the door moving in fits and starts, running slower than usual or hesitating midway. If the motor struggles to start, cuts out intermittently or simply refuses to budge, it’s time to investigate further. A quick feel of the motor housing after operation can tell you if it’s overheating—excess heat is a clear sign the internals are under too much stress. For more on troubleshooting roller door issues, see our common roller shutter problems.
1.2 Assessing Motor Age and Expected Lifespan
Most residential roller door motors will last between seven and fifteen years, while commercial units can endure up to twenty years under light use. Factors such as frequency of operation, exposure to dust and moisture, and regular maintenance will influence that lifespan. If your motor is approaching a decade of service—or has clocked tens of thousands of open/close cycles—start budgeting for a replacement. Routine maintenance can stretch those years, but a high-use environment or coastal salt spray will shorten them. When you’re unsure, check any date stamps or serial numbers on the motor casing and compare them to the manufacturer’s life-expectancy guidelines.
1.3 Performing Basic Maintenance Checks
Before you write off your motor, carry out these simple checks. Clean any debris from the door tracks and rollers, then apply a light silicone spray or garage-door lubricant to moving parts. Inspect limit switches and safety sensors: wipe their lenses, confirm they’re aligned and use the manual release to test obstruction-reversal. Tighten loose bolts on the motor bracket and verify that the drive chain or belt isn’t overly slack or worn. Often, a few minutes of cleaning and basic tuning will restore smooth operation—leaving a full replacement until you’ve ruled out simpler fixes.
2. Understanding Roller Door Motor Components and Types
Roller door motors may look like a single unit, but inside they’re a carefully engineered system of components working in concert to raise and lower your door safely and reliably. Familiarising yourself with these parts and the different motor styles available will help you choose the right replacement and ensure you get exactly what your door needs.
2.1 Key Components of a Roller Door Motor
Most roller door motors share the same basic elements:
- Motor unit: The electric motor itself, sized to provide the torque required for your door’s weight and area.
- Gearbox: A set of gears—or sometimes a belt drive—that reduces motor speed while boosting torque.
- Drive chain or belt: Transfers motion from the gearbox to the roller barrel, winding the curtain up or down.
- Control board: The ‘brain’ that interprets signals from remotes, keypads or home automation systems and controls motor functions.
- Limit switches: These stop the door at its fully open and closed positions to prevent over-travel.
- Safety sensors: Photoelectric beams or pressure edges that detect obstructions and trigger an automatic reversal.
- Emergency-release mechanism: A manual override—often a pull cord—allowing operation during power failures.
If you were to sketch a labelled diagram, you’d see the motor bolted to the side of the barrel, the gearbox at the motor’s output shaft, and the drive chain looping around a sprocket on the barrel. The control board usually sits in a weatherproof enclosure nearby, with sensors mounted at floor level and limit switches tucked inside the motor housing.
2.2 Types of Roller Door Motors
Roller door motors come in several flavours, each suited to different environments and usage patterns:
- Single-phase mains-driven motors: The most common choice for residential applications. They’re reliable, cost-effective and connect directly to a standard 240 V power supply.
- DC and battery-backup units: These use low-voltage DC power and include an integrated battery pack. If the mains supply fails, the battery will still operate the door—ideal for critical security situations.
- Commercial-grade motors: Built to handle heavier doors and more frequent cycles. They boast higher torque ratings, longer duty cycles and often feature enhanced weatherproofing for exposed locations.
Choosing between them depends on your door’s size, how often it’s used and whether power outages are a concern.
2.3 Compatibility with Different Door Systems
Not every motor will suit every roller shutter or curtain type. To find the right match:
- Measure your door’s area in square metres (width × height). Check the motor’s rated torque—expressed in Newton metres (Nm)—to make sure it can move that load comfortably.
- Identify your curtain material: aluminium shutters are lighter, while steel curtains need more torque. Heavy insulated doors or grilles also demand specialist motors.
- Note the barrel diameter and mounting style: some motors fit between brackets, others wrap around the barrel. Confirm the drive chain length and bracket spacing match your existing setup.
For commercial doors—especially larger industrial shutters—you’ll often require a purpose-built motor with oversized bearings, sealed controls and advanced safety interlocks. Always refer to the manufacturer’s compatibility charts or consult a professional if you’re unsure.
3. Complying with Safety Standards During Motor Replacement
Replacing a roller door motor isn’t just a mechanical job—it’s an exercise in safety and legal compliance. Australian regulations set out clear guidelines for the design, installation and maintenance of electric drives on doors and shutters. Sticking to these standards not only protects anyone who uses the door but may also be a condition of your insurance policy or the motor’s warranty.
3.1 Overview of AS/NZS 60335.2.103:2024 Requirements
AS/NZS 60335.2.103:2024 covers the safety of electric drives for gates, doors and windows, including roller shutters. The standard focuses on preventing physical injuries or property damage by limiting drive forces and ensuring automatic reversal in the event of obstruction. Key requirements include:
- Limiting static force to a maximum of 400 N and dynamic force to 1 400 N.
- Mandating automatic reversal or stop if the door encounters an obstruction during movement.
- Ensuring inrush current protection and thermal cut-outs to prevent overheating and electrical hazards.
Full details of the standard are available from the Standards Australia store: AS/NZS 60335.2.103:2024
3.2 Essential Safety Features to Maintain or Upgrade
Your roller door motor must work alongside safety devices that catch faults before they become accidents. Make sure these features are present and in good order:
- Photoelectric sensors: Infra-red beams across the door opening that halt or reverse the door if the beam is broken.
- Safety edges: Pressure-sensitive strips on the bottom edge of the curtain that detect contact and trigger an immediate stop or reversal.
- Adjustable force sensitivity: Lets you fine-tune the motor’s closing force so it complies with AS/NZS 60335.2.103:2024 limits.
- Emergency-stop buttons and key-switches: Easily accessible controls to cut power in an emergency, mounted at a safe distance from moving parts.
- Audible and visual warnings: Sirens, buzzers or flashing lights that activate briefly before the door moves, giving bystanders a clear pre-movement alert.
Upgrading older installs to include missing devices is often a straightforward retrofit and well worth the investment.
3.3 Testing and Servicing Safety Devices
Routine checks keep safety systems reliable and compliant:
- Test photo-electric sensors and safety edges every six months: simulate an obstruction and verify the door reverses immediately.
- Verify emergency-release mechanisms: pull the manual-release cord or operate the key-switch to confirm the door can be opened safely in a power outage.
- Check audible and visual alarms: ensure warning buzzers and lights work before each service, replacing any worn or expired components.
Failure to test and maintain these safety devices can void warranties, breach insurance conditions and—most importantly—put lives at risk. Always document each service and keep records handy for compliance audits or claims.
4. Considering Energy Efficiency and MEPS for New Motors
When you’re replacing your roller door motor, efficiency should be high on the priority list. A motor that meets or exceeds Australia’s Minimum Energy Performance Standards (MEPS) not only helps you comply with regulations but also cuts electricity bills and shrinks your carbon footprint. In this section, we’ll unpack what MEPS means for roller door motors, how to spot truly efficient models and why the long-term savings make a smarter investment today.
4.1 Understanding Minimum Energy Performance Standards (MEPS)
Australia’s MEPS framework, managed under the GEMS Scheme, sets baseline efficiency requirements for a wide range of electric motors, including those used in roller shutters and garage doors. Its goals are to:
- Phase out under-performing motors that waste power.
- Drive manufacturers to improve motor designs.
- Help end-users reduce energy consumption and operating costs.
Under MEPS, any motor sold in Australia must demonstrate an efficiency level at or above the prescribed threshold for its power rating. While most roller door motors fall into the lower kilowatt brackets, they’re still subject to test standards that measure input versus output power. For the full details on MEPS requirements, visit the Australian Government’s guide: https://www.energyrating.gov.au/industry-information/understand-requirements/minimum-energy-performance-standards
4.2 Selecting Energy-Efficient Roller Door Motors
When comparing models, look beyond just the advertised torque or cycle rating. Key efficiency metrics to consider include:
- Rated Power Consumption (W): Lower wattage at full load often translates to less energy usage per cycle.
- Standby Losses: Some motors draw power even when idle; top-tier units keep this below 1–2 W.
- Battery-Backup Efficiency: For DC units, examine how often and how long the battery must recharge after a mains outage. More efficient charging circuits reduce extra draw on your supply.
Modern motors may feature “sleep” or programmable standby modes that cut power after a period of inactivity. Others allow you to schedule off-peak operation or limit power to non-essential functions like lighting. When in doubt, request the motor’s test certificate or efficiency curve from the supplier—you’re entitled to see the data that proves MEPS compliance.
4.3 Long-Term Cost Savings and Environmental Benefits
Investing in a MEPS-compliant motor pays off over its lifetime. To illustrate, assume you replace an older 100 W standby motor with a new model that draws just 2 W when idle. If your door spends an average of 23 hours per day in standby, at an electricity rate of $0.30 per kWh, you save:
(100 W – 2 W) × 23 h/day × 365 days × $0.30/kWh
= 0.098 kW × 8 395 h × $0.30
≈ $246 per year
Over a 10-year service life, that’s roughly $2 460 back in your pocket—enough to cover part of the motor’s upfront cost. On the environmental side, every kilowatt-hour saved avoids about 0.82 kg of CO₂ emissions, so this swap prevents around 2 011 kg of CO₂ over a decade.
By choosing a MEPS-rated roller door motor, you lock in compliance, reduce running costs and contribute to a greener Adelaide. It’s a small detail in the replacement process, but one with significant payback both financially and environmentally.
5. Calculating the Cost of Roller Door Motor Replacement
Knowing how much you’re likely to spend is crucial for budgeting and avoiding unwelcome surprises. The total cost of roller door motor replacement breaks down into three main parts: the motor itself, the labour to install it, and any extras you choose to add. Costs can vary by brand, features, and the complexity of the installation, especially across different Adelaide suburbs. Here’s how to work out what you’ll pay.
5.1 Breakdown of Motor and Installation Costs
- Motor unit: Expect to pay between $200 and $800 for a new roller door motor. Entry-level single-phase mains units sit at the lower end, while commercial-grade or battery-backup models push towards the top.
- Labour and professional fitting: In Adelaide, qualified technicians typically charge between $300 and $600 for installation. This covers site attendance, mounting, wiring, commissioning and basic safety checks. Urgent call-outs or complex setups (for oversized doors or integrated home-automation systems) can add to this figure.
Putting those figures together, a standard residential motor replacement usually falls in the $500–$1,400 range. If you opt for a high-end motor or need extra safety upgrades, the total can edge closer to $1,500—but you’ll gain peace of mind and a longer warranty.
5.2 Additional Costs: Accessories and Old Motor Removal
Beyond the motor and labour, you might want or need the following extras:
- Remote controls and keypads: Replacement remotes cost from $50 each, while wall-mounted keypads start at about $120.
- Safety beam kits and pressure edges: Upgrading to photo-eyes or safety strips adds roughly $150–$300, depending on door width and sensor type.
- Smartphone control modules: A smart-home interface kit can range from $200 to $350, with some brands including setup in their price.
- Disposal or recycling: Some installers charge a small fee—around $50–$80—to remove and responsibly recycle your old motor and wiring.
- Call-out fees: Our team at Roller Shutter Repairs Adelaide doesn’t charge a call-out fee, but many providers add $80–$120 simply for attending your property.
When you tally these extras, you could be looking at an additional $100–$600 on top of the base replacement cost—so plan accordingly.
5.3 Tips for Saving Money on Replacement
- Bundle your needs: Combine motor replacement with other maintenance—lubrication, spring adjustments, safety device upgrades—to reduce repeat call-out fees.
- Shop around: Obtain quotes from two or three reputable suppliers in your area. Look for transparent pricing that includes all fees and warranty details.
- Consider value, not just price: A cheaper motor may cost less upfront but incur higher running expenses or warranty call-backs. Factor in energy efficiency (MEPS compliance) and reliability.
- Ask about package deals: Many installers offer discounted accessories when purchased alongside a new motor. You could knock 10–15 per cent off remotes or safety kits.
- Time your replacement: Off-peak seasons—late autumn or early spring—often see quieter call-outs for roller door repairers, which can translate to more competitive rates.
By breaking down each element of the job and comparing quotes, you’ll be able to make an informed choice that suits both your budget and your security needs.
6. Choosing Between DIY and Professional Installation
Deciding who fits your new roller door motor can save time, money and potential headaches. Tackling the job yourself might sound appealing, but it’s worth weighing up the risks alongside the rewards. In this section, we’ll explore when a DIY approach makes sense, when you should call in the experts and what to ask before signing off on any installation.
6.1 Pros and Cons of DIY Replacement
Replacing a roller door motor yourself can shave labour costs and give you full control over scheduling. You’ll learn more about your door’s mechanics and gain satisfaction from completing the work. That said, messing with mains wiring, safety sensors and tensioned springs carries real hazards. Mistakes can lead to non-compliant installations, voided warranties or even injury. Without the right tools, test equipment and experience, you may find yourself with a half-fitted motor or, worse, paying a professional to fix your errors.
Pros of DIY:
- Lower overall outlay (no labour fees).
- Flexible timing—you work around your own schedule.
- Hands-on learning about your door system.
Cons of DIY:
- Risk of non-compliance with AS/NZS safety standards.
- Potential voiding of manufacturer warranties.
- Safety hazards from live wiring, springs and heavy components.
- Additional costs if professional help becomes necessary to correct mistakes.
6.2 When to Hire a Professional Technician
Some situations call for a qualified technician rather than a weekend warrior. If your installation involves complex wiring, integration with home-automation systems or upgrading safety features to meet current standards, a professional is the safest bet. Rapid response is crucial when a broken motor compromises security or business operations. Local specialists like Roller Shutter Repairs Adelaide bring over 20 years of experience, use quality parts, charge no call-out fees and offer swift turnaround across the Adelaide metro and surrounding regions.
Consider hiring a pro when:
- The door is large, heavy or custom-engineered.
- You require compliance certification for insurance or regulatory purposes.
- You’re adding advanced accessories like smartphone control kits.
- A recent safety inspection flagged force-limit or sensor failures.
- Your motor replacement is urgent and you need a guaranteed fast response.
6.3 Questions to Ask Before Hiring
Before you commit to an installer, arm yourself with the right questions to ensure a smooth and compliant job:
- Are your technicians licensed, insured and trained in AS/NZS 60335.2.103:2024 requirements?
- Which brands do you service and install—do you work on Gliderol, B&D or Merlin systems?
- What warranties do you offer on parts and labour?
- Will you provide a detailed quote, including call-out fees, motor cost and any additional accessories?
- How soon can you be on site, and what’s your standard response time for emergency repairs?
Clear answers to these queries will help you choose a reliable installer who stands behind their workmanship and keeps your roller door operating safely and efficiently.
7. Step-by-Step Guide to DIY Roller Door Motor Replacement
Tackling a roller door motor swap yourself can save on labour costs, but it’s vital to follow each step carefully to ensure safety and compliance. Before you begin, make sure you’re comfortable with basic electrical work, mechanical assembly and the safety requirements outlined earlier.
7.1 Preparing Your Work Area and Tools
First, clear space around the door and set up a sturdy ladder on level ground. Lay down a drop-sheet or board to catch debris and protect your floor. Gather the following tools and equipment:
- Multimeter (to verify power isolation)
- Insulated screwdrivers and spanners
- Socket set with deep and shallow sockets
- Adjustable wrench or spanner set
- Work gloves and safety glasses
- Insulating gloves (for live‐circuit protection)
- Torch or headlamp (for dimly lit brackets)
- Cable ties and labelled tape (for marking wiring)
- Door prop or clamp (to secure the curtain in the open position)
Switch off the roller door circuit at your switchboard and lock out the breaker. Use the multimeter to confirm there’s no voltage at the motor terminals. Engage the manual release and prop the door open—this prevents the curtain from dropping unexpectedly when the motor is removed.
7.2 Safely Disconnecting and Removing the Old Motor
- Remove the motor’s weatherproof cover, taking care not to strip screws.
- Label each wire using tape—note colours and terminal markings (e.g. L, N, earth, control).
- Unscrew the live, neutral and earth connections, then stow the wires neatly out of the way.
- Release the drive chain or belt from the barrel sprocket: some models have a spring‐loaded tensioner you must push aside.
- Support the motor with one hand (or a second person) as you unbolt the mounting bracket—typically four bolts secure the motor to the barrel support.
- Lower the motor assembly gently and place it aside for recycling or disposal in accordance with local regulations.
Never leave the door unsupported once the motor is free—always keep a prop or clamp in place until the new motor is fully mounted and secured.
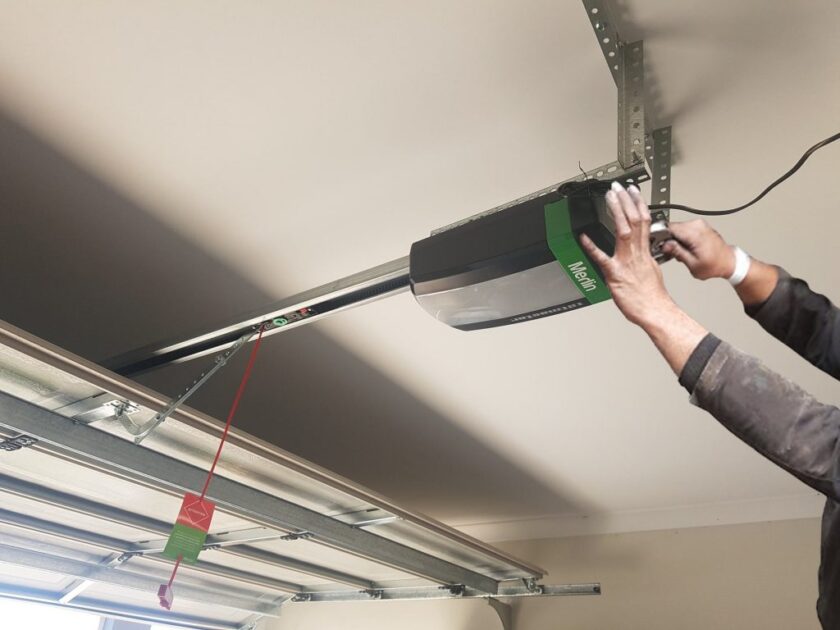
7.3 Installing the New Motor: Mounting and Wiring
- Position the new motor on the barrel bracket, aligning the mounting holes.
- Hand-tighten the mounting bolts, then torque them to the manufacturer’s specification—this prevents misalignment and vibration.
- Refit the drive chain or belt around the barrel sprocket, adjusting the tension so there’s about 10–15 mm of sag midway between sprockets. Too tight a chain accelerates wear; too loose risks skipping.
- Connect the power leads, matching your labelled wires to the motor’s L (live), N (neutral) and earth terminals. Use a screwdriver to ensure each terminal screw is snug—loose connections lead to overheating.
- Reinstall the control board or receiver unit, hooking up any limit‐switch wires and low-voltage sensor cables as per the wiring diagram supplied with your motor.
Double-check every fastener, electrical connection and cable tie before restoring power. A quick visual audit now can save hours of troubleshooting later.
7.4 Configuring Remotes, Keypads and Sensors
With the motor securely mounted and wired, you can programme accessories:
- Remotes: Press the ‘Learn’ or ‘Prog’ button on the control board until the indicator light flashes. Within 30 seconds, press the remote button you wish to associate. A confirmation blink or beep indicates success.
- Keypad: Enter the factory code (found in your manual), then press ‘Program’ and your chosen new code. Finish by hitting ‘Enter’ to lock in the change.
- Photoelectric sensors: Mount each eye roughly 150 mm above floor level, facing each other on opposite jambs. Adjust the bracket until both LEDs show a steady green (aligned) or red (obstructed).
- Force and travel limits: Use the motor’s adjustment knobs or dip switches to set the door’s top and bottom stops. Run a few test cycles and fine-tune until the curtain closes fully without excessive force.
If you’ve fitted a smartphone control kit, download the manufacturer’s app and follow the on-screen prompts—usually pairing via Wi-Fi or Bluetooth and scanning a QR code on the control board.
7.5 Testing and Troubleshooting
Once programming is complete, conduct a full safety and functionality check:
- Cycle the door open and closed via wall button, remote and keypad.
- Place a block of wood or a foot pedal beneath the closing curtain to test the auto-reverse function. The door should halt and retract immediately on contact or beam interruption.
- Listen for smooth, even operation—any rattles, jerks or hesitations may signal loose fasteners, misaligned tracks or incorrect chain tension.
- Check all electrical connections for warmth after several cycles; an overheating terminal warns of a poor connection.
- Verify manual release works by disengaging the motor and operating the door by hand—this is vital for emergencies.
Common fixes:
- If the door binds, re-adjust chain tension and retighten sprocket bolts.
- Should a remote fail to work, clear the control board memory and re-programme each transmitter.
- In the event of sensor misalignment, loosen the mounting bracket, realign the beam and re-secure.
By following these steps carefully, you’ll achieve a properly installed roller door motor that’s safe, compliant and built to last. If you hit an unexpected snag, it’s often quicker and safer to call in a professional than risk repeated DIY tinkering.
8. Where to Buy Quality Roller Door Motors and Parts
Finding the right components is just as important as selecting the correct motor type. Whether you prefer tried-and-trusted OEM parts or versatile universal kits, sourcing from reputable suppliers ensures you get reliable performance and proper warranty coverage. Below, we outline top brands, discuss custom versus off-the-shelf options, and weigh up the pros and cons of local stockists versus online retailers.
8.1 Recommended Brands and Suppliers
When it comes to roller door motors and accessories, some names consistently deliver quality and support:
- B&D: An Australian icon known for durable motors, extensive warranties and local support networks.
- Merlin: A go-to for both residential and commercial installations, with a broad range of battery-backup and smart-home compatible units.
- ATA (Automatic Technology Australia): Offers commercial-grade openers and a variety of remotes, keypads and safety sensors.
- Steel-Line: Renowned for heavy-duty motors suited to larger doors, complete with stainless-steel gearing options.
- Centurion: Specialists in high-torque motors and advanced safety systems, ideal for industrial-style shutters.
Many of these brands have authorised distributors right here in Adelaide. Sourcing through an official partner guarantees genuine parts, technical assistance and full warranty support.
8.2 Custom Parts vs Off-the-Shelf Components
Choosing between OEM (original equipment manufacturer) parts and universal kits comes down to fit, function and budget:
- OEM Parts: Designed specifically for a given motor or door model. You’ll get perfect alignment of gearboxes, brackets and electronic controls, plus peace of mind that every component meets the original specification.
- Universal Kits: Often more affordable and stocked in a wider range of outlets. These adaptors and brackets can suit multiple barrel sizes and motor types, but may require minor modifications or extra fiddling to achieve a snug fit.
Before you buy a universal option, double-check torque ratings, mounting dimensions and electrical requirements against your door’s specifications. If in doubt, lean towards genuine parts—especially on safety-critical items like photo-eyes and pressure strips.
8.3 Local Suppliers vs Online Retailers
Both local and online sources have their advantages:
Local Stockists
- Rapid access to parts and accessories—no waiting days for delivery.
- Face-to-face advice from experienced technicians who understand Adelaide’s climate and common door setups.
- Easier warranty claims and returns when you deal with a bricks-and-mortar store.
Online Retailers
- Often better pricing and occasional specials across a broader product range.
- Handy for sourcing hard-to-find or discontinued parts.
- 24/7 browsing makes it convenient to compare models, read reviews and secure the right item at your own pace.
Keep shipping times, freight costs and return policies in mind when ordering online—sometimes a small local premium is worth the fast turnaround and expert backup.
By choosing a reputable brand, confirming compatibility and deciding on the right supplier channel, you’ll set your roller door motor replacement up for success.
9. Extending the Life of Your Roller Door Motor: Maintenance Tips
Even the most robust roller door motor will perform better and last longer with regular upkeep. Adopting a few simple maintenance routines can help you avoid premature wear, reduce energy consumption and keep your system compliant with safety standards. Below are the key practices to follow if you want to get the maximum service life from your motor.
9.1 Routine Servicing Schedule
Scheduling professional servicing at regular intervals is the cornerstone of motor longevity. We recommend:
- Every 12 months for light-use residential doors.
- Every 6–9 months for high-use or commercial installations, including shops and warehouses.
- After severe weather if your door is exposed to dust, salt spray or driving rain.
At each servicing visit, a qualified technician should:
- Test safety sensors and automatic reversal to confirm compliance with AS/NZS 60335.2.103:2024.
- Check limit-switch settings and force-adjustment knobs, then recalibrate if the door shows hesitation or fails to stop cleanly.
- Inspect springs, bearings and brackets for signs of fatigue, corrosion or excessive play.
- Review the control board for error codes and update firmware or replace worn components as needed.
Maintaining a written log of every service call helps track your motor’s history and flags any recurring issues before they develop into major failures.
9.2 Lubrication and Cleaning Best Practices
A clean, well-lubricated running gear reduces friction, prevents corrosion and keeps noise levels down. Follow these steps every six months—or more often if you live in a dusty or coastal area:
- Clean the tracks and rollers
- Wipe out accumulated grit and debris from the guide rails with a soft cloth or brush.
- Inspect rollers for cracks or uneven wear; replace any damaged rollers promptly.
- Lubricate moving parts
- Use a silicone-based spray on steel and nylon rollers, as well as door hinges and pivot points.
- Avoid heavy oils or grease on the track itself; excessive lubricant can attract dirt and form abrasive paste.
- Apply a light coating to the drive chain or belt links to stop squeaks and minimise wear.
- Protect exposed metal
- Check for rust on springs and mounting brackets, treating small spots with a rust-inhibitor spray.
- Touch up any chipped paint on the barrel or door curtain to prevent moisture ingress.
Clean, correctly lubricated components demand less torque from the motor, cutting down heat-related strain and extending service life.
9.3 Signs You Need Servicing vs Replacement
Knowing when to call for a tune-up and when to plan a motor swap is crucial for budgeting and safety:
- Servicing is due if
- The door still opens and closes smoothly but makes a little extra noise.
- Safety sensors trigger inconsistently or the door takes a noticeable pause before reversing.
- You observe minor rust or slight slack in the drive chain that can be adjusted.
- Replacement should be considered if
- You experience intermittent failures, such as the motor stalling or not starting at all.
- The unit is more than 12–15 years old, or has clocked tens of thousands of cycles.
- You’ve had two or more major repairs in quick succession—ongoing fixes can soon cost more than a new motor.
If in doubt, a professional inspection will clarify whether a few adjustments will suffice or if your motor’s performance is so compromised that replacement is the safer, more economical choice.
10. Addressing Common FAQs About Roller Door Motor Replacement
Even with a detailed guide at your fingertips, you may still have a few lingering questions. Below we tackle the most common queries about roller door motor replacement, drawing on industry best practice and local experience in Adelaide.
10.1 Can I Replace Just the Roller Door Motor?
Yes— in most cases you can swap out only the motor without replacing the entire door or its tracks. Roller door motors, gearboxes and control boards are distinct from the curtain and guide rails, so a compatible new motor can be fitted to your existing system. Before you proceed, verify:
- That the mounting brackets and drive chain or belt dimensions match your current setup.
- The replacement motor’s torque rating suits your door’s weight and area.
- Electrical connections (voltage, control wiring) line up with your existing switchboard and accessories.
If in doubt, a quick site visit by a qualified technician will confirm compatibility and save time on retrofitting.
10.2 What Is the Typical Lifecycle of a Roller Door Motor?
Most residential roller door motors last between seven and fifteen years; commercial-grade units can endure up to twenty years under light or moderate use. Key factors affecting lifespan include:
- Frequency of operation (daily cycles vs occasional use).
- Environmental exposure (dusty workshops or coastal salt spray).
- Quality of routine maintenance (lubrication, sensor cleaning, spring adjustments).
If your motor is approaching a decade of service or showing intermittent faults, start planning a replacement to avoid unexpected downtime and security risks.
10.3 How Much Will Roller Door Motor Replacement Cost?
Replacement costs vary by motor type, installation complexity and any accessories you add. Here’s a quick recap:
- Motor unit: $200–$800 (standard residential to battery-backup models).
- Labour and fitting: $300–$600 in Adelaide, depending on urgency and door size.
- Extras (remotes, safety sensors, smartphone kits): $100–$600 more.
Altogether, professional replacement typically falls in the $600–$1,500 range. DIYers who only purchase the motor can pay as little as $200, but must factor in the risks of non-compliance and voided warranties.
10.4 How Do I Ensure My New Motor Is Compatible?
A mismatch between motor and door can lead to poor performance or safety breaches. Use this checklist before purchasing:
- Door area (width × height in m²) vs motor torque rating (Nm).
- Material and weight of the curtain (aluminium, steel, insulated).
- Mounting style: between brackets or wrap-around barrel fit.
- Drive mechanism: chain, belt or direct drive compatibility.
- Voltage and control wiring: single-phase 240 V, low-voltage DC or battery-backup.
- Safety features: photo-eyes, pressure edges and force-limit adjustability per AS/NZS 60335.2.103:2024.
With these points confirmed, you can choose a motor that fits seamlessly, operates safely and carries the right warranty for your roller door system.
Next Steps for Your Roller Door Motor Replacement
With a clear grasp of diagnostics, compliance requirements and cost factors, you’re in the driver’s seat for your roller door motor replacement. Here’s how to keep the momentum rolling:
- Revisit Your Priorities
Reflect on your door’s usage frequency, security needs and tolerance for DIY work. If you have the skills and time, a home-installation may suit—but complex wiring, safety upgrades or urgent security concerns often call for expert hands. - Factor in Compliance and Efficiency
Ensure your chosen motor meets AS/NZS 60335.2.103:2024 safety standards and Australia’s MEPS energy criteria. A compliant, energy-efficient unit not only protects you and your property but also cuts running costs and reduces your carbon footprint over the long term. - Plan for Ongoing Maintenance
Whether you install the motor yourself or engage a professional, schedule regular checks every 6–18 months. Lubrication, sensor testing and spring adjustments keep your system running smoothly and extend its working life. - Compare Quotes and Warranties
If you decide on professional installation, request detailed quotes from at least two providers, including parts, labour and any call-out fees. Look for comprehensive warranties on both motor and workmanship so you’re covered against unexpected faults.
Ready to take the next step? For prompt, local expertise—no call-out fees and guaranteed fast response across Adelaide—visit the Roller Shutter Repairs Adelaide homepage. Our technicians bring over 20 years of industry experience to every job, ensuring your new roller door motor is fitted safely, efficiently and backed by a satisfaction guarantee.