8 Common Roller Shutter Problems And Fixes In Adelaide
For many Adelaide homes and businesses, roller shutters are more than just a finishing touch—they’re an essential barrier against break-ins, storm damage and the harsh summer sun. But when shutters start to misbehave—sticking halfway, rattling, refusing to budge, or simply not responding to the remote—the frustration (and the risk to your security) can escalate fast. The culprit might be years of daily use, a build-up of dust and grit from Adelaide’s dry winds, or just the wear and tear on motors and moving parts that comes with time.
If you’re facing noisy, jammed or unreliable roller shutters, you’re not alone. This guide zeroes in on the eight most common roller shutter problems affecting Adelaide properties, with practical, step-by-step fixes you can try yourself—plus clear advice on when to call in the specialists at Roller Shutter Repairs Adelaide. Along the way, you’ll find extra tips on preventing future breakdowns, working safely, and making sure your shutters meet Australian standards. Ready to restore smooth, secure operation to your shutters? Let’s get started.
1. Roller Shutter Won’t Open or Close Properly
A shutter that refuses to budge or stops part-way can leave your home or business vulnerable—and it’s the most common call-out request we get in Adelaide. Both manual and electric systems can exhibit this fault, whether due to electrical hiccups, mechanical wear, or simple obstructions. Before you panic, a few quick checks might restore normal operation; if not, you’ll know it’s time to call in a qualified technician.
Causes of Failure
- Power supply issues: a tripped circuit breaker, blown fuse or switch left off can halt electric shutters.
- Control faults: dead remote batteries, a faulty wall switch or damaged wiring may interrupt signals.
- Obstructed guide rails: dirt, leaves, pebbles or small stones can jam the shutter curtain in its tracks.
- Mechanical wear in manual systems: broken springs, worn cables or snapped straps prevent smooth lifting.
DIY Troubleshooting Steps
- Electric models
- Confirm the mains switch is on and reset any tripped breakers.
- Replace remote or wall-switch batteries, ensuring correct polarity.
- Watch for any indicator lights on the controller—no light usually means no power.
- Manual models
- Visually inspect guide rails at top and bottom of the opening; clear visible debris with a stiff brush.
- Avoid forcing the shutter up or down—if it’s tight, use a torch to spot bent slats or lodged debris.
- Gently lift the shutter curtain by hand to test spring tension; listen for grinding or rubbing.
- Quick function test
- After clearing and resetting, try operating the shutter slowly.
- Note any hesitations or unusual noises—these will help pinpoint internal faults later.
When to Seek Professional Help
If the motor hums but the shutter won’t move, or if your manual springs or cables look frayed or snapped, it’s safer to bring in a qualified technician. These parts are under high tension and can cause injury if handled incorrectly. For no-call-out-fee assistance across Adelaide, reach out to the team at Roller Shutter Repairs Adelaide. Our experienced technicians can diagnose complex electrical faults, replace worn springs or cables, and restore secure, smooth operation—fast.
2. Noisy Operation
Even a gentle whine or an occasional rattle from your roller shutter can be more than an annoyance—it’s often a warning sign of misalignment or worn components. In Adelaide’s dry, dusty environment, grit in the tracks and constant metal-on-metal contact can turn a simple squeak into a grinding failure. Tackling noise early can save you from a costly breakdown further down the track.
Identifying Noise Sources
Before you reach for the grease gun, listen carefully as the shutter moves. Common culprits include:
- Rollers and bearings: a high-pitched squeal often means metal is contacting metal directly.
- Loose fittings: a rattling sound typically comes from screws, brackets or end plates that have worked themselves loose.
- Uneven slats: dents or bends in the slats can scrape against the guide rails, creating a harsh, repetitive scrape.
Zeroing in on the exact source of the noise will help you decide whether it’s a straightforward fix or a job for the pros.
DIY Lubrication and Adjustment
A bit of TLC can get your shutters whisper-quiet again. Try these steps:
- Clean first: wipe down the tracks and barrel ends with a dry cloth to remove built-up dust and grit—lubricant alone will just lock that debris in place.
- Lubricate: apply a silicone-based spray sparingly along the guide rails and both ends of the barrel shaft—if you’d like more detailed repair steps, check our how-to repair roller shutters guide.
- Tighten fasteners: use the correct screwdriver or socket to snug any loose screws on the shutter box, end plates and guide brackets.
- Test after each tweak: operate the shutter slowly to check whether the noise has diminished before proceeding to the next adjustment.
Performing these quick checks and tweaks often restores smooth, quiet operation and extends the life of your shutter.
When Noise Signals Serious Wear
If that grinding persists despite cleaning and lubrication, internal components may be worn beyond a simple fix. Persistent metal-on-metal grinding often indicates:
- Bearings or rollers that need replacing rather than just greasing.
- Gearbox damage causing misaligned or stripped gears.
At this point, it’s wise to enlist a professional inspection. Ignoring the warning signs can lead to sudden failure, and an emergency gearbox or motor replacement is far more costly than a planned service.
3. Jammed Roller Shutters
Few things are more frustrating—or potentially dangerous—than a roller shutter that seizes up mid-travel. Whether it stops halfway down or refuses to budge at all, a jammed shutter not only disrupts privacy and security but can also trap fingers or damage the curtain if you force it. Identifying the root cause and clearing the obstruction quickly will get your shutter gliding freely again and prevent further wear.
Common Causes of Jamming
- Debris in the guide tracks: Leaves, pebbles or dust sift in over time, creating an unwanted roadblock.
- Bent or dented slats: Impact from a vehicle or accidental knock can deform slats, causing them to catch on the guides.
- Rust build-up in older systems: Corrosion inside the tracks or on the barrel can grip the curtain and stop it in its tracks.
Clearing Tracks and Removing Obstructions
- Lift the shutter slightly: Manually raise the curtain just enough to see into the guide rails—don’t force it if it’s stuck tight.
- Brush out loose material: Use a stiff nylon or wire brush to sweep along both sides of the tracks, dislodging grit and foliage.
- Vacuum the rails: A shop-vac or hand vacuum will pick up the finer particles that brushing has shaken free.
- Inspect for bent slats: Shine a torch along the curtain; if you spot a dent, gently straighten it with padded pliers or call in the pros for a precise realignment.
- Lubricate the tracks: Once clear, apply a light coating of grease or a specialised track lubricant to both rails—this helps the curtain glide and deters future debris from sticking.
After each step, slowly cycle the shutter a few centimetres up and down to check if the jam has cleared. If the curtain still won’t move smoothly, or if you see significant rust or structural damage, it’s time to arrange a professional service.
Preventing Future Jams
- Install a rubber seal at the base of the guide rails to block out leaves and stones.
- Schedule track cleaning every three to six months, especially after windy days or during leaf-fall season.
- Inspect slat condition during each clean—catching minor dents early can save you a major repair later.
Regular attention to your shutter’s guide rails and curtain profile will keep it operating without hiccups and minimise the risk of a sudden jam disrupting your day. If in doubt or if damage is more than cosmetic, reach out to Roller Shutter Repairs Adelaide for a swift inspection and safe realignment.
4. Overheating Motors
Adelaide’s long, hot summers and busy commercial premises can push roller‐shutter motors to their limits. If you’re operating your shutters multiple times an hour or the ambient temperature soars above 35 °C, the motor may overheat—triggering thermal cut‐outs, reducing torque and ultimately shortening its service life. Spotting overheating early and adjusting your usage habits can prevent costly motor failures down the track.
Recognising Motor Overheating
Overheating often announces itself before total failure. Look out for:
- Laboured sounds: The motor struggles, producing a low whine or stuttering noise rather than a smooth whirr.
- Thermal cut‐out clicks: A faint “click” as the built-in thermal switch trips, halting operation until the motor cools.
- Excess heat: With extreme caution, briefly touch the motor housing—if it feels uncomfortably hot after just one or two cycles, it’s running above its safe operating temperature.
Ignoring these warning signs can lead to burnt-out windings or seized gearboxes, resulting in a complete motor replacement.
Cooling Strategies and Usage Tips
You don’t need to overhaul your entire shutter system to keep the motor cool. Try these simple adjustments:
- Rest between cycles
After heavy use—say, more than ten open/close cycles in quick succession—give the motor at least 10 minutes to cool down. - Avoid rapid cycling
Constant stop/start action heats the windings faster than normal operation. Where possible, open or close your shutter in uninterrupted runs. - Shade the motor box
For exterior installations, a bit of shade (an overhang or louvre) helps keep ambient temperatures lower inside the shutter box. - Upgrade to a heavy‐duty motor
If you run your shutter dozens of times a day—common in warehouses or shopfronts—consider a motor designed for frequent use. A higher-capacity unit dissipates heat more effectively and maintains torque under load.
When to Upgrade or Replace
If your shutter motor still overheats despite better habits, it’s time to consider a professional upgrade. Replacing an undersized motor with a model rated for high-cycle applications not only solves overheating but also extends service intervals. For expert advice, installation and a range of high-performance motor options, contact the team at Roller Shutter Repairs Adelaide.
5. Damaged or Bent Slats
Your shutter’s curtain is only as strong as its weakest slat. Even a small dent can catch on the guide rails, causing jams or chafing that worsen over time. Impact from a reversing car, a wayward lawnmower, or flying debris in a coastal breeze can leave slats creased, cracked or warped—and that’s when problems start.
A bent slat doesn’t just look unsightly; it compromises the curtain’s integrity. Under repeated operation, a slight warp becomes a pinch point, pulling on adjacent slats and eventually leading to more extensive damage. Spotting and addressing slat issues early is key to keeping your roller shutter gliding smoothly and maintaining its weatherproof seal.
Assessing Slat Damage
Begin with a close visual check along the entire curtain. Shine a torch across the slats at a low angle to reveal:
- Dents or creases in the metal profile
- Cracked or flaking paint, which exposes steel to rust
- Twists or kinks that prevent a slat from sitting flush
Gently press any minor dents—if the slat springs back flat, you may be able to reshape it yourself. However, deep creases or damaged coatings almost always require a fresh part to restore full strength and weather resistance.
Replacing Individual Slats
When a slat is beyond simple straightening, you can swap it out for a new one. The general steps are:
- Fully raise the shutter and secure the curtain in the open position.
- Remove the hinged bottom bar or end-cap to free the lowest slat.
- Carefully lift the curtain off the barrel until the damaged slat clears the guide tracks.
- Slide out the worn slat and insert the new one, ensuring it locks into the slot grooves.
- Reassemble the bottom bar or end-cap and lower the curtain slowly to test the fit.
Always match the profile and thickness of the replacement slat to the existing curtain—mixing types can lead to uneven wear or further jamming. Slats can be surprisingly heavy; if you have any doubts, call in a professional for a safe, precise replacement.
Matching Replacement Slats
When ordering parts, refer to the manufacturer’s serial plate or model code—this ensures you receive the correct size, material and finish. It’s also wise to keep an extra slat in storage, so you’re prepared for emergency repairs without long delays. That spare slat can save you time, money and the hassle of an unprotected opening on a windy Adelaide day.
6. Remote Control Malfunctions
Remote controls—whether handheld transmitters or wall-mounted keypads—are the fastest way to open and close your roller shutters. When they stop working, it not only disrupts daily routines but also leaves your property less secure. Before you call out a technician, it pays to run through a few simple checks: sometimes the fix is as easy as swapping a battery or re-syncing a handset.
Common Remote Issues
- Flat or corroded batteries: long-term battery leakage can damage the contact springs inside the remote.
- Signal interference: nearby Wi-Fi routers, garage door openers or even LED lighting can interrupt the radio frequency.
- Damaged buttons or water ingress: drops, spills or moisture can jam or short-circuit internal components.
These faults often show up as unresponsive buttons, inconsistent range or erratic operation—one press works, the next doesn’t.
Quick Fixes: Batteries and Reset
- Replace batteries with fresh AA or AAA cells, observing the correct polarity.
- Wipe battery contacts with a clean cloth or cotton bud dipped in isopropyl alcohol to remove any corrosion.
- Follow the manufacturer’s pairing procedure to re-sync the remote—usually this involves pressing a learn button on the motor unit and then a specific sequence on the remote.
- Test the remote at various distances, both within and beyond its normal range, to confirm a clear signal path.
After these steps, most common control faults will vanish. If the remote still behaves unpredictably, the receiver module in the shutter motor may need inspection or replacement.
Upgrading to Smart Controls
If your existing remote setup feels dated, consider upgrading to a Wi-Fi or smartphone-controlled kit. Benefits include:
- Scheduled operations: set your shutters to open or close at specific times.
- Remote monitoring: check shutter status from anywhere via an app.
- Voice control: integrate with home assistants like Google Home or Alexa.
Professional installation is recommended for any new wiring or programming—this ensures your system remains safe, fully compliant with Australian electrical standards and covered by warranty. For expert on-site setup, contact our team at Roller Shutter Repairs Mount Barker.
7. Clashing Remote Codes and Sensor Issues
Roller shutter remotes can occasionally open a neighbour’s shutters, or your safety sensors might not detect obstructions correctly—both issues undermine convenience and security. In suburbs like Unley or Glenelg, overlapping radio codes are surprisingly common, and dusty or misaligned auto-reverse sensors can leave you exposed to damage or injury. This section explains why these problems arise and how to set things straight.
Causes of Code Clashes
When manufacturers ship remotes with default codes, multiple installations nearby can share the same signal. Common culprits include:
- Factory-preset codes on new or replacement remotes.
- Neighbours installing identical models without custom pairing.
- Remotes not cleared of old codes before setting up a new system.
The result? Press your button once and any shutter within radio range might respond, compromising both privacy and security.
Resolving Code Conflicts
Fixing code clashes involves clearing and re-teaching your motor’s memory:
- Locate the learn/program button on the motor housing (refer to your user manual for its exact position).
- Press and hold until all stored codes are erased—usually indicated by a flashing LED.
- Within 30 seconds, press the desired button on each remote to pair them.
- Test every handset at various distances to ensure only your remotes operate the shutter.
For extra peace of mind, consider upgrading to rolling-code technology. Each time you use the remote, the signal changes, making it virtually impossible for neighbouring systems to interfere. Speak to the team at Roller Shutter Repairs Adelaide about fitting a rolling-code upgrade to your existing motor.
Troubleshooting Proximity Sensors
Many electric shutters rely on photo-eyes or infrared beams to auto-reverse on contact. If these sensors are blocked or misaligned, the shutter may fail to stop when it meets an obstacle. Follow these steps:
- Check the sensor lenses for dust, cobwebs or water spots.
- Clean each lens gently with a soft cloth moistened with isopropyl alcohol.
- Ensure the sensors face one another directly, usually mounted around 200–300 mm above floor level.
- Cycle the shutter to test the auto-reverse function—place a soft object (like a foam block) in its path to confirm it reverses on contact.
If cleaning and realignment don’t restore safe operation, the emitter or receiver may be faulty. Contact Roller Shutter Repairs Adelaide for professional sensor testing and replacement under our no‐call‐out‐fee policy.
8. Faulty Motor Units
Roller shutter motors are the driving force behind electric systems, yet they can suffer from both electrical failures and mechanical gearbox issues over time. Diving into a motor’s internals is risky—high voltages, spinning parts and spring-loaded components all pose hazards. Before you grab a toolkit, it pays to determine whether the problem lies with wiring, controls, the motor windings or the gearbox itself.
Diagnosing Motor Faults
A clear diagnosis will save time and avoid unnecessary work:
- Check power at the motor box. Use a multimeter to verify the proper voltage is reaching the motor terminals—no reading often signals a wiring fault, tripped breaker or a failed control board.
- Listen for humming without movement. A humming motor that refuses to turn usually points to a gearbox jam or stripped gear teeth, even though the windings remain energised.
- Note any thermal cut-out clicks. If the motor stops shortly after starting, the thermal protector is likely tripping—this indicates overheating and warns that the motor may be past its prime.
Repair vs Replacement
When it’s time to act, weigh up these options:
- Gearbox service. In some cases, a professional can safely open sealed gearboxes, clean or replace a worn gear and refill with the correct lubricant—an effective, low-cost fix.
- Motor rewind or swap. Rewinding old motors often ends up costing more than installing a new unit, especially once labour is included. Modern replacement motors offer improved efficiency, greater torque and solid warranties.
- Cost-benefit and downtime. Consider part availability, installation time and warranty on a new motor versus the expense and turnaround of a rewind. For high-cycle shutters (for example, shopfronts), a fresh motor is usually the best long-term solution.
Choosing a Professional Technician
Given the dangers and technical complexity, engaging experts is the safest route. Roller Shutter Repairs Adelaide offers:
- Over 20 years of combined experience with electric shutters
- No call-out fees across all Adelaide suburbs
- Fast response times for urgent motor failures
- Licensed electricians and qualified shutter technicians working together
- Comprehensive testing and certification of all repairs
For a precise diagnosis, honest advice on repair versus replacement, and a safe, compliant installation, contact Roller Shutter Repairs Adelaide. We’ll have your shutter running smoothly—and quietly—again in no time.
9. Preventive Maintenance Tips for Adelaide’s Climate
Adelaide’s mix of dry winds, seasonal storms and sea-spray in coastal suburbs puts extra strain on roller shutters. A regular maintenance routine tailored to local conditions will keep grit, salt and UV damage at bay—helping your shutters glide smoothly and last longer. Here’s a simple plan to protect your investment year-round.
Regular Cleaning Schedule
Start with a monthly once-over. Using a soft brush or dry cloth, sweep dust and leaf litter from the guide rails and the top and bottom of the curtain. Wipe slats with a mild detergent solution to remove grime and pollen—Adelaide’s eucalyptus season can leave a sticky residue if not cleaned promptly.
Every six months or after a particularly dusty spell, lift the shutter fully and remove the cover of the box to vacuum inside the barrel housing. This deep-clean clears accumulated debris before it works its way into bearings or spring assemblies. Don’t forget to check for early signs of corrosion or paint flaking, especially on shutters near the coast.
Lubrication Best Practices
Smooth operation relies on proper lubrication—but in our climate you don’t want excess grease attracting more dust. Every three months, apply a light mist of silicone spray along the guide rails and around the roller bearings at each end of the barrel shaft. This keeps metal-to-metal contact quiet and free-moving without gumming up the tracks.
Once a year, remove end-caps and add a small amount of high-grade grease to the barrel bearings and gearbox input shaft. This annual grease refill ensures internal components stay protected against wear, especially during Adelaide’s hot summers when heat can dry out factory lubrication.
Professional Servicing Plan
No matter how diligent you are, an annual professional service is the best way to catch hidden issues before they become costly breakdowns. Our technicians at Roller Shutter Repairs Adelaide will perform a full inspection—testing spring tension, checking motor amperage, verifying sensor alignment and certifying that all safety features meet Australian standards.
Booking a yearly service not only extends the life of your shutters but also preserves any manufacturer warranties and gives you peace of mind that your home or business remains secure, weather-proof and fully compliant.
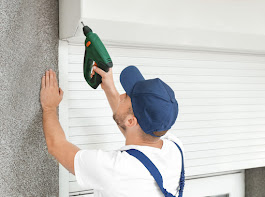
10. Safe Work Practices for Roller Shutter Repairs
Whether you’re a keen DIYer tackling a simple fix or a professional technician replacing a motor, roller shutter repairs involve lifting heavy parts, working at height and handling spring-loaded components under tension. Ignoring proper safety procedures can lead to muscle strains, dropped loads or even serious crush injuries. By adopting a systematic approach based on the Model Code of Practice for Hazardous Manual Tasks, you’ll protect yourself, anyone helping you, and the people around.
Identify Hazardous Manual Tasks
The first step is to list every manual or awkward task involved in your repair:
- Lifting and manoeuvring slats or bottom bars, each weighing up to 10–15 kg.
- Removing and installing the shutter barrel—a bulky assembly that can exceed 30 kg.
- Working overhead to access the shutter box, often while balancing on a ladder or scaffold.
- Tensioning or releasing springs and cables, which store significant force and can snap back suddenly.
Recognising these high-risk tasks upfront stops you from underestimating the effort or overlooking potential hazards.
Risk Management Steps
Once you’ve identified the risks, take proactive steps to reduce them:
- Assess the load
Determine the weight and size of each component before lifting. - Plan the lift
Decide on the safest lifting method—team lift, mechanical aid or sliding support. - Check your workspace
Ensure good lighting, stable ground, and enough clearance to move parts safely. - Involve helpers early
If a piece requires two people, line up assistance before you begin—don’t improvise under pressure.
Carrying out these simple checks prevents last-minute surprises and helps you stay in control throughout the job.
Control Measures According to Code of Practice
Safe Work Australia’s Model Code of Practice: Hazardous Manual Tasks recommends a hierarchy of controls:
- Engineering controls:
• Use hoists, trolleys or lifting straps to handle heavy barrels and slats.
• Fit removable endcaps or quick-release mounts on shutter boxes to reduce manual effort. - Administrative controls:
• Rotate tasks among team members to avoid repetitive strain.
• Schedule breaks and limit continuous overhead work to under 30 minutes at a time. - Personal protective equipment (PPE):
• Wear cut-resistant gloves to protect against sharp aluminium edges.
• Use safety boots with steel toes to guard against dropped parts.
• Equip yourself with a hard hat and eye protection when working under the shutter box.
By following these guidelines and referring to the full Model Code of Practice: Hazardous Manual Tasks, you’ll minimise injury risks and comply with Australian safety standards. For major repairs or any task requiring specialised lifting equipment, consider calling in our qualified technicians at Roller Shutter Repairs Adelaide—no call-out fees, just safe, reliable service.
11. Understanding Australian Standards & Fire-Rated Shutters
When it comes to roller shutters, meeting Australian Standards isn’t just a box-ticking exercise—it’s vital for safety, insurance compliance and peace of mind. Fire-rated shutters, in particular, play a critical role in slowing the spread of flame and smoke during an emergency evacuation. In this section, we’ll outline the key Standards governing fire-rated roller shutters, explain why compliance matters in South Australia, and point you towards further resources.
Overview of AS 1905.2-2005
AS 1905.2-2005 covers the design, construction and installation of fire-resistant roller shutter assemblies. Under this Standard, shutters must:
- Be constructed from fire-resistant materials (steel and specialised insulation cores).
- Withstand fire exposure for a specified period—commonly 60 or 120 minutes—without collapse.
- Maintain structural integrity and restrict the passage of hot gases and smoke.
In addition, each shutter assembly requires prototype testing under AS 1530.4, which evaluates its fire and heat resistance in a controlled furnace environment. Only shutters that clear these tests can carry a certified rating, guaranteeing they’ll perform as intended in real fire scenarios.
Why Compliance Matters in Adelaide
Adelaide’s building regulations reference national Standards to ensure occupant safety and property protection. Installing a fire-rated shutter that lacks AS 1905.2-2005 certification can lead to:
- Non-compliance with the South Australian Development Regulations, which may delay approvals or trigger costly modifications.
- Voided insurance cover if a non-rated product fails to perform during a fire.
- Increased risk to life and property—unrated shutters can buckle or allow smoke to spread.
By choosing a shutter system built and installed to the correct Standard, you meet your legal obligations, protect insurance validity and give tenants or staff the best possible chance to evacuate safely.
Further Reading
For full details on fire-resistance requirements and testing protocols, refer to the official Standard: AS 1905.2-2005 Fire-resistant rolling shutters. This document provides the comprehensive technical specifications you—or your installer—need to ensure total compliance.
Ensuring Smooth Operation Year-Round
Keeping your roller shutters in tip-top shape doesn’t have to be a chore. From simple DIY troubleshooting—like clearing debris, lubricating tracks and swapping out worn batteries—to seasonal deep-cleans and careful inspection of springs, cables and slats, the small tasks you tackle today will help you avoid sudden breakdowns tomorrow. A quick monthly brush-down of guide rails, combined with a light silicone spray every three months and an annual grease refill for bearings, adds up to years of smooth, silent performance.
Safety should never take a back seat. Whether you’re checking for rust in coastal suburbs or balancing on a ladder to access the shutter box, follow basic manual-handling and ladder-safety guidelines, wear your cut-resistant gloves and steel-toe boots, and never attempt high-tension spring repairs alone. For any work involving heavy lifting, electrical testing or motor replacement, relying on qualified professionals is the smartest—and safest—move.
Finally, don’t underestimate the value of a yearly professional service. Our technicians at Roller Shutter Repairs Adelaide will conduct a full diagnostic: testing motor amperage, verifying sensor alignment, topping up lubricants and certifying compliance with Australian Standards. This pre-emptive approach not only extends the life of your shutters but also preserves any manufacturer warranties, keeps your insurance valid and ensures your home or business stays secure, weather-proof and fully operational.
Ready for hassle-free, year-round protection? For fast response times, no call-out fees and expert maintenance or repair services across all Adelaide suburbs, partner with Roller Shutter Repairs Adelaide. Visit our homepage or get in touch today to book your annual service and keep your shutters rolling smoothly every day of the year.