Clipsal Roller Shutter Switch: Options, Wiring & Specs
Choosing the right Clipsal roller shutter switch makes a genuine difference to how you control your electric shutters day-to-day. Whether you’re upgrading from a manual system, replacing a faulty switch, or fitting out a new installation, understanding your options helps you make a confident purchasing decision.
Clipsal offers several switch mechanisms designed specifically for roller shutter control, primarily through their Iconic and 30 Series ranges. Each option has distinct features, wiring requirements, and specifications worth knowing before you commit. At Roller Shutter Repairs Adelaide, we work with these switches regularly during motor upgrades and manual-to-electric conversions, so we’ve put together this guide based on hands-on experience.
This article covers the main Clipsal switch options available in Australia, their technical specifications, wiring basics, and where to source them. By the end, you’ll have a clear picture of which switch suits your setup and what’s involved in getting it installed correctly.
Before you start: safety, tools and legal basics
Working with electrical switches requires proper preparation and awareness of Australian regulations. Before you install or replace any Clipsal roller shutter switch, you need to understand the safety obligations and legal requirements that apply to electrical work in South Australia and across the country.
Safety precautions
You must isolate power at the switchboard before touching any wiring or switch mechanisms. This means turning off the relevant circuit breaker and using a voltage tester to confirm power is completely disconnected. Even experienced DIY enthusiasts can make dangerous assumptions, so never skip this step.
“Electrical work requires proper isolation, verification, and respect for licensed installer regulations.”
Wear insulated gloves and use tools with insulated handles when working near electrical components. Keep a multimeter or voltage tester on hand throughout the job to verify connections and confirm that circuits remain de-energised while you work.
Legal requirements
Australian electrical regulations require that a licensed electrician performs all permanent electrical installations and modifications. While you can legally replace a switch mechanism yourself in some states under specific conditions, connecting new circuits or modifying existing wiring requires proper qualifications. South Australia enforces these rules strictly, and insurance claims can be denied if unlicensed work causes damage or injury.
Tools you’ll need
For a straightforward switch replacement, gather these items before you start:
- Flathead and Phillips screwdrivers (insulated handles)
- Voltage tester or multimeter
- Wire strippers
- Small spirit level
- Torch or headlamp
- Notepad for documenting existing wire colours and positions
- Camera or phone to photograph the original wiring setup
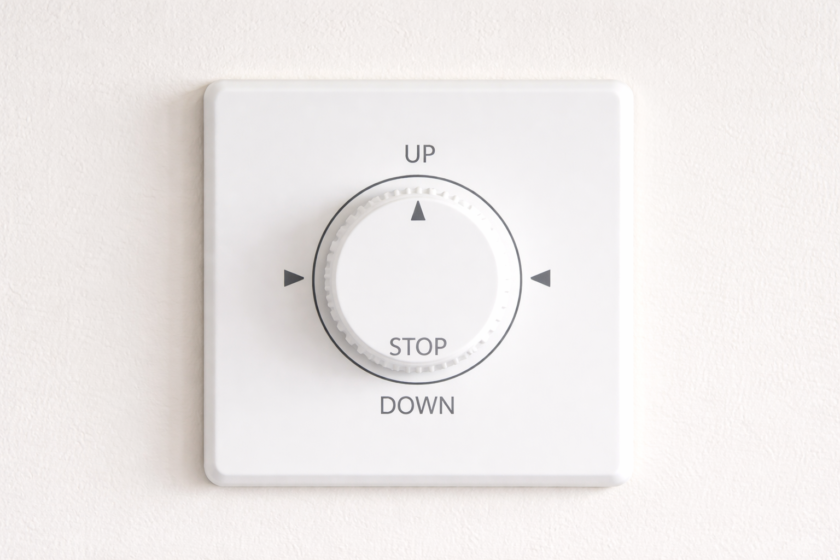
Step 1. Identify the right Clipsal switch style
Clipsal manufactures two main switch ranges suitable for roller shutter control, and choosing between them depends on your installation preferences and budget constraints. The Iconic Series represents their modern line with sleek aesthetics and enhanced features, while the 30 Series offers proven reliability at a lower price point. Both ranges include three-position mechanisms specifically designed for Up/Off/Down shutter operation.
Iconic Series mechanisms
The Iconic range delivers contemporary styling with flat switch plates and a slim 33mm mounting depth. You’ll find these switches paired with various cover frame options that suit modern Australian homes. The mechanism includes tactile feedback when you press each position, giving clear confirmation of your selection.
| Feature | Specification |
|---|---|
| Mechanism type | 10AX 3-position (momentary) |
| Mounting depth | 33mm |
| Cover frames | Separate purchase required |
| Colour options | Various finishes available |
30 Series mechanisms
The 30 Series provides straightforward functionality with a traditional rocker design that many electricians prefer for retrofit projects. These switches feature a deeper mounting depth at 51mm, which gives you more room behind the wall plate for wire connections. Your clipsal roller shutter switch from this range typically includes the cover plate as a complete unit, simplifying ordering and installation.
“The 30 Series remains the most widely installed option across Adelaide due to its compatibility with existing switch plates.”
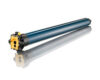
Step 2. Match the switch to your shutter motor
Your clipsal roller shutter switch must align with your motor’s electrical specifications to function safely and reliably. Before you purchase any switch mechanism, you need to know your motor’s voltage rating and current draw. This information appears on the motor’s identification plate, typically visible when you remove the shutter’s end cap or access the motor housing.
Check motor voltage and amperage
Most Australian roller shutter motors operate on 240V AC single-phase power, which matches the standard Clipsal switch ratings. You’ll find that both Iconic and 30 Series mechanisms handle 10 amps comfortably, covering virtually all residential shutter motors. Commercial installations with larger motors may require contactor-based control instead of direct switching.
Measure your motor’s running current using a clamp meter during operation. If the reading exceeds 8 amps, consult an electrician about installing a relay system rather than switching the motor directly.
“Direct switching works for most residential shutters, but high-current commercial motors need relay protection.”
Verify momentary vs maintained action
Roller shutter motors require momentary contact switches that return to the centre position automatically. This spring-loaded mechanism prevents the switch staying in the Up or Down position, which could damage your motor if left engaged. Both Clipsal ranges offer this momentary action specifically for shutter control.
Step 3. Wire the Up-Off-Down mechanism
Wiring your clipsal roller shutter switch correctly ensures your motor responds to each position command without hesitation or reversed operation. You’ll work with three main terminal points on the mechanism: common (C), up (1), and down (2). These terminals connect to your motor’s control circuit through existing wall cavity cables, typically consisting of three or four active conductors plus earth.
Identify your terminal connections
The back of your Clipsal mechanism shows clearly marked terminals. The common terminal (C) receives the active feed from your switchboard, while terminals 1 and 2 provide switched outputs to your motor’s directional controls. You need to identify which wire colour in your existing cable corresponds to each function before you disconnect anything.
| Terminal | Function | Typical wire colour |
|---|---|---|
| C | Common active | Red or brown |
| 1 | Up command | Black or blue |
| 2 | Down command | White or grey |
| E | Earth | Green/yellow stripe |
Take a photograph of your existing switch wiring before you remove any connections. Label each wire with masking tape if the colours don’t match standard conventions.
Connect the common and switched wires
Strip 6mm of insulation from each conductor and insert the bare copper fully into its designated terminal. Tighten each terminal screw firmly using a flathead screwdriver, then give each wire a gentle tug to confirm it’s secure. Connect your earth wire to the dedicated earth terminal on the switch mounting plate.
“Proper terminal tightness prevents overheating and intermittent operation that frustrates users later.”
Push excess wire neatly into the wall cavity, ensuring no bare copper shows outside the terminals. Mount your mechanism into the wall box and attach the cover plate, checking that wires don’t pinch between the mechanism and box edges.
Step 4. Test and troubleshoot common issues
Testing your newly installed clipsal roller shutter switch confirms everything works correctly before you close up the wall and restore full power to your property. You’ll need to verify that each switch position triggers the correct motor response, the mechanism returns to centre reliably, and your shutter stops at the intended limits. This systematic testing approach catches wiring errors or mechanical faults while they’re still easy to fix.
Run initial operation tests
Press the Up position briefly and confirm your shutter moves upward smoothly. Release the switch and verify it springs back to centre immediately. Repeat this test with the Down position, watching for consistent motor engagement without hesitation or grinding sounds.
Check that pressing both positions simultaneously doesn’t activate the motor. This safety feature prevents damage if someone accidentally presses two positions at once.
Fix reversed direction problems
If your shutter moves down when you press Up, you’ve swapped the terminal 1 and 2 connections. Turn off the power, remove the cover plate, and swap the wires on these terminals. Most installers encounter this issue once during their first Clipsal installation.
“Reversed wiring shows immediately during testing, making it the easiest fault to identify and correct.”
Wrap up and get help if needed
Installing a clipsal roller shutter switch correctly requires understanding your switch options, matching them to your motor specifications, following proper wiring procedures, and testing thoroughly before you restore full power to your property. This guide has walked you through each essential step, from safety preparation and product selection through to terminal connections and troubleshooting common installation faults that appear during initial testing runs with your shutter system.
If you encounter issues beyond basic switch replacement, such as motor compatibility problems, complex wiring configurations involving multiple shutters on one circuit, or persistent directional faults after following all standard troubleshooting steps, professional assistance saves time and prevents damage to your shutter system. Attempting electrical repairs beyond your current skill level risks voiding manufacturer warranties, creating safety hazards, and potentially damaging expensive motor components that require complete replacement rather than simple repairs.
Our experienced team at Roller Shutter Repairs Adelaide handles switch installations, motor upgrades, and complete manual-to-electric conversions across all Adelaide suburbs and surrounding regions. We work with Clipsal mechanisms daily and can diagnose wiring faults quickly, ensuring your shutter operates reliably from day one without complications.