Can You Paint Roller Shutters? Best Paint, Prep & Tips
Faded, discoloured, or outdated roller shutters can make your property look tired and neglected. The good news? Yes, you can paint roller shutters to restore their appearance and extend their lifespan. Whether you’re dealing with aluminium, steel, or PVC shutters, a fresh coat of paint offers a cost-effective alternative to full replacement.
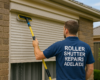
At Roller Shutter Repairs Adelaide, we’ve spent over 20 years helping property owners across Adelaide maintain and upgrade their roller shutters. While painting might seem straightforward, the results depend heavily on proper preparation and using the right products for your shutter material.
This guide covers everything you need to know, from choosing the best paint type to preparing the surface correctly. We’ll also help you decide whether to tackle the job yourself or call in a professional spray painting service for a flawless finish.
What to know before you paint roller shutters
Painting your roller shutters requires more than just grabbing a tin of paint and getting started. The success of your project depends on understanding what you’re working with and avoiding common mistakes that can waste time and money. Many property owners rush into painting without checking crucial factors, only to watch their fresh coat peel or flake within months.
Check your warranty status first
Before you pick up a paintbrush, check if your roller shutters are still under manufacturer warranty. Most warranties become void if you modify the original finish without approval. Contact your supplier or installer to confirm whether painting will affect your coverage. You don’t want to sacrifice valuable warranty protection for a DIY paint job that could have waited.
Painting shutters still under warranty may void your coverage and leave you responsible for future repair costs.
Assess the current condition honestly
You need to inspect your shutters thoroughly before deciding whether painting makes sense. Look for rust spots, dents, cracks, or significant paint peeling that might indicate deeper problems. Minor surface wear responds well to painting, but shutters with structural damage or severe corrosion often require professional repairs first. Check if the slats operate smoothly and if the existing paint is still bonded firmly to the surface. Painting over failing paint or damaged substrate only masks problems temporarily and leads to disappointing results. If you find extensive damage, contact a repair specialist to fix underlying issues before you proceed with any cosmetic work.
Step 1. Identify the shutter material and finish
You must know what your shutters are made from before you select paint or start any surface preparation. Different materials require different primers, paints, and application methods. Aluminium, steel, and PVC all respond differently to various coating systems, and using the wrong products leads to poor adhesion and premature paint failure.
Choosing paint without identifying your shutter material first is the single biggest reason DIY painting projects fail within the first year.
Common roller shutter materials
Most Adelaide roller shutters fall into three categories: powder-coated aluminium, galvanised steel, or PVC-coated steel. You can identify aluminium by its lightweight feel and the fact it doesn’t rust (though it may oxidise with a white powdery surface). Steel shutters feel heavier and may show rust spots if the coating has failed. PVC shutters have a plastic-like texture on the surface and often come in limited colour options.
Test the existing finish
Run your fingernail firmly across the shutter surface to test if the current coating is powder-coated or painted. Powder coating feels extremely hard and resists scratching, while painted surfaces show marks more easily. Check several slats because previous owners may have repainted only visible sections. Understanding whether you’re painting over factory powder coating or an existing paint job directly affects your primer selection and surface preparation requirements.
Step 2. Clean, mask, and prepare the surface
Before you can paint roller shutters successfully, you must clean and prepare the surface meticulously. Proper preparation determines whether your finish lasts two years or twenty. The smallest amount of dirt, grease, or oxidation prevents paint from bonding correctly, leading to peeling and bubbling within months of application.
Remove dirt and grease thoroughly
Start by washing each slat with sugar soap or a degreaser mixed with warm water. Use a stiff brush to scrub away accumulated grime, spider webs, and any chalky residue from the surface. Pay extra attention to areas near the motor housing where oil and grease often accumulate. Rinse thoroughly with clean water and allow the shutters to dry completely, typically 24 to 48 hours in Adelaide’s climate depending on humidity.
Even microscopic contamination prevents proper paint adhesion, so thorough cleaning is not optional.
Mask off surrounding areas
Apply painter’s tape to window frames, brickwork, and any fixed hardware you cannot remove. Cover adjacent walls and the ground beneath with drop sheets or plastic sheeting secured with tape. Protect the roller mechanism at the top and any guide rails on the sides. Remove slats if possible for easier access, though this requires mechanical knowledge of your shutter system.
Step 3. Choose primer and paint that will stick
The wrong primer or paint choice guarantees failure, regardless of how well you prepare the surface. You need products specifically formulated for metal or PVC substrates that can withstand Adelaide’s harsh UV exposure and temperature fluctuations. Generic house paint lacks the flexibility and adhesion required for roller shutters that expand, contract, and bend during operation.
Match primer to your shutter material
Aluminium shutters require an etch primer or self-etching primer that chemically bonds to the oxidised surface. Steel shutters need a rust-inhibiting primer designed for ferrous metals, even if you don’t see visible corrosion. PVC shutters perform best with a plastic primer that creates a mechanical bond with the smooth surface. Apply primer in thin coats and allow proper drying time between applications, typically two to four hours depending on temperature and humidity.
Using the correct primer type for your specific shutter material prevents 90% of premature paint failures.
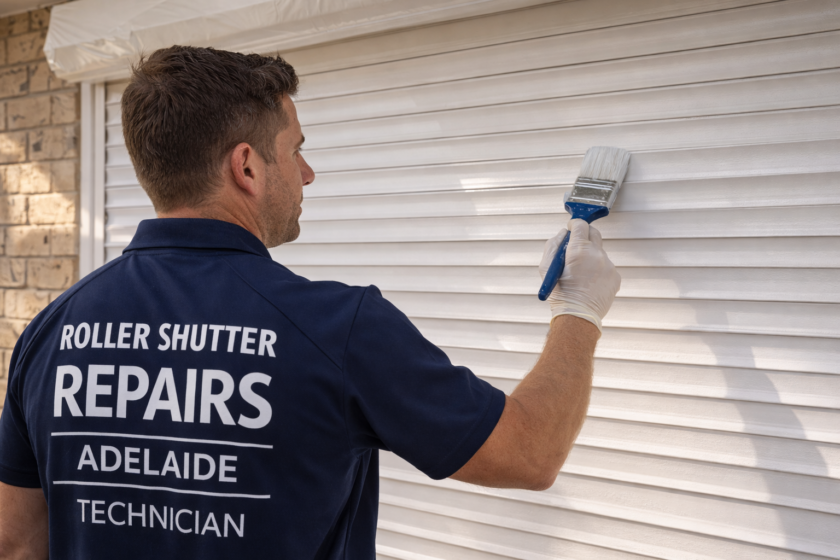
Select durable topcoat paint
Choose acrylic enamel or epoxy-based paint formulated for exterior metal applications. These products offer superior UV resistance and flexibility compared to standard exterior house paint. Avoid oil-based paints on aluminium as they can react poorly with the substrate. Select colours carefully because darker shades absorb more heat and may cause warping on thin metal slats.
Step 4. Apply paint the right way and avoid failures
Your application technique determines whether the finish lasts or fails within months. You can paint roller shutters successfully by applying thin, even coats rather than trying to achieve full coverage in one pass. Many DIY attempts fail because property owners apply paint too thickly, causing runs, sags, and poor adhesion to the primed surface.
Apply multiple thin coats
Spray application delivers the best results for roller shutters because it reaches recessed areas and creates an even film thickness across curved slat profiles. If you’re brushing or rolling, use a small foam roller for flat sections and a quality brush for edges and corners. Apply your first coat in light, overlapping passes and allow it to dry for the time specified on the product label, typically four to six hours. Sand lightly between coats with 320-grit paper to promote adhesion.
Thick single coats trap solvents that prevent proper curing and lead to soft, easily damaged finishes.
Check conditions before you start
Paint when temperatures sit between 15°C and 25°C with humidity below 70%. Avoid painting in direct sunlight or when rain threatens within 24 hours. Apply at least two full coats for adequate coverage and protection, with three coats recommended for shutters exposed to harsh weather.
Wrap it up and decide what to do next
You now know that you can paint roller shutters successfully if you follow the proper preparation steps and use the right materials for your specific shutter type. The key to lasting results lies in thorough surface preparation, selecting appropriate primers and paints, and applying thin, even coats that cure properly between applications. DIY painting works well for straightforward projects where shutters operate smoothly and show only minor cosmetic wear.
Painting delivers excellent results for shutters in good structural condition, but it won’t fix mechanical problems, broken slats, or repair significant damage underneath. If your shutters stick, make excessive noise, or show signs of motor failure, addressing these underlying issues first makes more sense than covering them with fresh paint that hides problems temporarily.
Need help assessing whether your shutters need repair before painting, or prefer to leave the job to experienced professionals? Contact Roller Shutter Repairs Adelaide for honest advice and quality service backed by over 20 years of experience across all Adelaide suburbs.