How to Clean Roller Shutters: Step-by-Step Guide & Pro Tips
Dust, sea spray and the occasional magpie dropping can leave roller shutters looking tired and grinding more than they should. The good news? You don’t need fancy kit or a full afternoon to restore that smooth, factory-fresh glide. A bucket of warm, soapy water and 45–60 minutes of care are enough to wipe away grime before it turns into an expensive repair.
This guide walks you, step by step, through cleaning both the exterior and the harder-to-reach inside curve of every slat, using nothing more exotic than a microfibre cloth, mild detergent and a garden hose. You’ll work through eight clear actions: gear gathering, set-up, dust removal, exterior wash, interior clean, rinse and dry, lubrication, and a maintenance schedule. We’ll point out mould fixes, what never to spray near the motor, and include a printable calendar that keeps you ahead of Adelaide’s dusty summers. By the end, your shutters will look newer, slide quieter and dodge future repair bills. Let’s get started.
Step 1: Gather the Right Cleaning Gear Before You Start
A smooth clean starts with the right kit laid out within arm’s reach. Grab everything now so you’re not dripping suds across the patio hunting for a cloth later.
- Mandatory gear
- Bucket filled with warm water
- Mild, pH-neutral detergent (dish soap or car-wash liquid)
- 2–3 soft microfibre cloths
- Soft-bristle brush or broom
- Garden hose fitted with a low-pressure spray nozzle
- Vacuum cleaner with brush attachment
- Old toothbrush for tight corners
- Silicone-based spray lubricant
- Optional but handy
- Magnetic roller shutter cleaner or thin microfibre strip
- Telescopic handle for upper windows
- Non-abrasive sponge
- Mould & mildew spray approved for powder-coated aluminium
- Safety glasses and nitrile gloves
Quick safety note: steer clear of pressure washers, scouring pads, bleach, citrus or acid cleaners. They strip powder-coat, force water into the head box and shorten motor life.
Eco alternatives: a 1 : 4 white-vinegar/water mix shifts light grime; a bicarbonate-of-soda paste lifts stubborn spots without scratching the finish.
Choosing a Mild Detergent
Powder-coated slats prefer products sitting between pH 6 and 8. Supermarket staples like Morning Fresh Original or most generic car-wash shampoos live in this range. Skip bleach, ammonia and citrus cleaners—they can pit aluminium and fade colour.
What to Do If You Have No Hose
In apartments or drought-restricted suburbs, use the two-bucket method: one bucket with soapy water, the other with clean rinse water. Wipe a section with a damp cloth from bucket 1, wring, then rinse the panel with a cloth from bucket 2. Replace rinse water often to avoid dragging grit across the slats.
Step 2: Prepare the Area and Your Shutters
Start by lowering the curtain all the way down; a flat surface is far easier to wash than one that’s half-open. If your shutters are motorised, isolate the power at the wall switch or breaker, then switch the unit to manual override—no accidental button-presses while your fingers are on the slats.
Next, clear a one-metre buffer zone. Shift pot plants, barbecues, outdoor settings and parked cars so you have room to manoeuvre the hose without ricocheting dirty water over the patio. Indoors, lay old towels along the sill and floorboards to catch drips as you clean the inside face.
Check the forecast: direct, blazing sun bakes detergent before you can rinse, leaving streaks. Aim for a calm, overcast morning or the cooler edge of late afternoon when panels are cool to touch. A quick visual once-over now for cracked paint or bent slats lets you note any repairs to tackle after cleaning.
Safety Precautions When Working at Height
If a ladder is needed, place it on firm, level ground and keep three points of contact at all times. Avoid leaning sideways; instead, climb down and reposition. For second-storey shutters, attach your cloth to an extendable pole or, if access is awkward, call a licensed technician rather than risking a roof-top wobble. Keep children and pets clear of the work zone.
Step 3: Remove Loose Dust, Cobwebs and Insects
Before any soap touches the slats, give the curtain a dry pre-clean. This simple step stops gritty particles turning into sandpaper once they’re wet. Start outside: with the shutter still fully closed, run a soft broom or long-handled brush from the top pelmet down to the bottom rail. Work vertically so debris falls away rather than wedging between slats. If you have a hose, switch to a gentle mist setting and lightly sluice the surface to float off pollen and red Adelaide dust—no scrubbing yet.
Move indoors and grab the vacuum’s brush attachment. Glide it straight down each row, pausing to circle the head box and side tracks where insects love to nest. Coastal homes should repeat this dust-off weekly to remove salt spray that can corrode powder coat in no time. Five lazy minutes here makes the later wash faster and protects the finish.
Dealing with Built-Up Spider Webs and Bird Droppings
Webs and droppings need softening first. Lightly mist the spot, wait 60 seconds, then “dab and lift” with a damp microfibre cloth. Stubborn blobs? Loosen the edges with an old toothbrush, always brushing downward. Skip metal scrapers—they gouge the coating and invite rust.
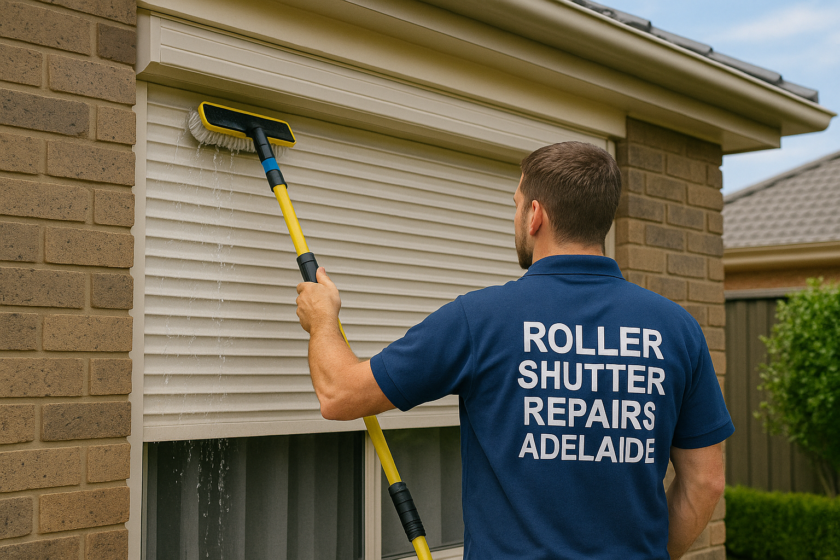
Step 4: Wash the Exterior Face of the Shutter
Now that the loose grit is gone, it’s time for suds. Fill a bucket with warm water and add 1–2 caps of mild detergent — roughly a 1 : 100 soap-to-water ratio. Dip a clean microfibre cloth, wring until it no longer drips, and work in downward strokes over a one-metre section at a time. Moving with the line of the slats (never side-to-side) keeps them aligned and avoids forcing grime into the joins. Rinse the cloth often so you’re not smearing yesterday’s dust across today’s clean surface.
For motorised shutters, clean with a light touch; don’t push against the curtain or pry apart slats. If you feel resistance, stop and check for obstructions before continuing. Continue section by section until the whole façade looks evenly wet and lightly soapy.
Tackling Stubborn Stains, Sap or Road Grime
Spots that laugh at standard suds need a gentler version of elbow grease. Spread a bicarbonate-of-soda paste over the blemish, wait two to three minutes, then agitate in small circles with an old toothbrush. Rinse straight away. Mould or mildew? Spray a diluted white-vinegar mix (1 : 4) or a commercial mould remover labelled safe for powder-coated aluminium, leave for five minutes, wipe, then rinse thoroughly. Always test unfamiliar products on an inconspicuous corner first.
Pro Tip: Keep Water Out of the Head Box
Aim the hose at a 45° downward angle and use the lowest pressure that still produces a gentle sheet of water. Never blast upward into the pelmet—water can pool around the motor, bearings and circuitry, turning a quick clean into an avoidable repair call.
Step 5: Clean the Interior Face and Hard-to-Reach Slats
The inside curve of each slat doesn’t cop rain, yet it still hoards dust, cooking vapour and the odd cobweb. A quick wipe while the exterior is still damp prevents grime hardening into a greasy film that squeaks every time you raise the curtain. Start by lifting the roller shutter about 300 mm—just enough to expose the underside without losing stability. Support the bottom rail with one hand so it can’t jolt upward, then work methodically from one edge to the other.
Wrap a microfibre cloth around your fingers and use slow, downward strokes that follow the slat profile; the “slide-and-pinch” motion picks up lint rather than pushing it deeper into the joins. A thin microfibre strip, magnetic shutter cleaner or even a folded baby wipe slid between slats tackles the narrow cavities. For kitchen or barbecue areas where a greasy haze is common, boost the wash water with a teaspoon of degreasing dish liquid and rinse the cloth frequently.
Avoid over-wetting: a lightly damp cloth is enough, and it stops drips running into the pelmet.
Cleaning Without Removing the Shutter
If you suspect mould or debris behind the curtain, use the “roll-as-you-clean” approach. Raise the shutter one slat at a time, wiping each exposed edge before rolling higher. Keep the motor switched off and lift manually to maintain control. The moment you feel resistance, stop—forcing the tube can twist slats or indicate a larger alignment issue best left to a professional.
Step 6: Rinse and Dry to Prevent Water Spots
Rinsing is the make-or-break moment—leave soap on and you’ll trade dirt for chalky streaks. Starting at the pelmet, run a garden hose on its gentlest fan setting so water sheets off rather than blasts in. No hose? Dip a clean sponge in a fresh bucket of tap water and wipe each metre-wide section, refreshing the bucket once it turns cloudy.
South Australia’s famously hard water means minerals will flash-dry into white spots if you walk away now. Immediately follow with a dry microfibre cloth or chamois, working the same top-to-bottom pattern. Swap cloths when they feel damp; a wet rag just moves minerals around.
Finish by opening the shutter fully for about ten minutes so air can circulate between the slats and inside the head box. Confirm every surface is touch-dry before restoring power or hitting the remote—moisture inside motors or switches is a fast track to blown fuses and warranty headaches.
Step 7: Lubricate Moving Parts and Inspect for Wear
A freshly washed shutter still needs a little mechanical TLC to stay whisper-quiet. Once every surface is bone-dry, grab your silicone spray and spend five quick minutes on the moving parts that cop the most friction. A light film is enough—the goal is to reduce drag, not drown the mechanism.
- Slightly raise the curtain so the side guide rails are exposed.
- Hold the nozzle 10–15 cm away and mist a thin line down each rail.
- Wipe with a clean cloth to spread the lubricant evenly and remove excess.
- Pop the pelmet cover (if it’s a clip-off style) and give a short burst to the axle bearings and any visible pivot points.
- Finish with the bottom bar locks or straps, ensuring overspray doesn’t reach the slats.
While you’re up there, run a quick inspection checklist:
- Cracked or dented slats
- Frayed straps or lifting tapes
- Grinding or rattling motor noises
- Rust spots inside the pelmet
- Mud wasp nests or insect build-up in the tracks
Anything structural—bent axle, sluggish motor, slat misalignment—signals it’s time to book a professional rather than force a DIY fix.
What Lubricant Should You Use?
Stick to silicone-based or PTFE dry sprays; they resist dust and won’t attack powder-coat. Skip petroleum or WD-40 style oils: they gum up, turn gritty, and can soften vinyl components over time. If you’ve only got a universal spray on the shelf, save it for the lawn mower and grab the right product before touching your shutters.
Step 8: Establish a Regular Cleaning & Maintenance Schedule
A one-off scrub is great, but shutters stay healthy when cleaning becomes a habit. Map out a schedule that matches your postcode and the local environment, then stick it on the fridge next to the kids’ soccer roster.
| Location type | Quick rinse | Full wash & lube |
|---|---|---|
| Coastal (salt spray) | Weekly | Every 2 months |
| Suburban/metro | Monthly | Quarterly |
| Rural/low dust | Quarterly | Every 6 months |
Print a simple log so you can tick jobs off and spot patterns before they turn into breakdowns:
| Date | Task | Issues found | Action taken |
|---|---|---|---|
| 05/08/25 | Wash & lube | Frayed strap | Book repair |
Seasonal reminders keep you ahead of Adelaide’s climate swings:
- Spring: Flush pollen and grass seeds from side tracks.
- Summer: Shade slats from direct noon sun; check motor thermal cut-out isn’t tripping.
- Autumn: Clear leaf build-up and spiders prepping for winter nests.
- Winter: Inspect weather seals and tighten any loosened fixings after storm fronts.
Finally, pencil in an annual professional service for motor tuning and spring tension checks. Five minutes of scheduling today avoids five hundred dollars of repairs tomorrow.
Key Takeaways & Next Actions
- A spotless, long-lasting shutter only needs household gear: warm water, pH-neutral soap, microfibre cloths and silicone spray.
- Work methodically: close the curtain, brush or vacuum loose grit, wash outside first, then the inside curve, always wiping in the slat direction.
- Rinse with low pressure, dry straight away to dodge Adelaide’s hard-water spots, and wait till everything is bone-dry before reconnecting power.
- Finish every clean with a light silicone lube on guide rails, axle bearings and locks; inspect slats and straps while you’re there.
- Lock in a calendar—weekly coastal rinses, quarterly suburban washes, a yearly pro service—for shutters that glide quietly and shrug off corrosion.
Feel a motor dragging, slats misaligned or just short on time? Reach out to the local experts at Roller Shutter Repairs Adelaide for fast, no-call-out-fee help that keeps your shutters looking and working like new. We clean roller shutters quickly and effectively.